前言
harbor是一个docker/podman镜像管理库,可用于存储私人镜像。现将本人在debian12系统搭建harbor镜像库的过程记录下来,留作后续参考。
可以参考github harbor项目给定的安装教程,很详细了:https://goharbor.io/docs/2.11.0/install-config/configure-https/
本篇博客着重参考了博客园另一位作者的文章 私有镜像仓库harbor之手把手搭建步骤,在此基础上做了一些补充。
正文
harbor 镜像管理库依赖于docker环境,并且会使用 docker-compose 的方式启动,所以需要先安装docker以及docker-compose,然后从github下载harbor离线安装包安装。由于是个人学习实验使用,安装环境是本地的debian12,安装全程使用root用户。
harbor安装包使用github目前最新的版本:https://github.com/goharbor/harbor/releases/download/v2.9.5-rc1/harbor-offline-installer-v2.9.5-rc1.tgz
根据官网上的说法,harbor对于环境有一定要求:
- 硬件要求
The following table lists the minimum and recommended hardware configurations for deploying Harbor.
| Resource | Minimum | Recommended |
|---|---|---|
| CPU | 2 CPU | 4 CPU |
| Mem | 4 GB | 8 GB |
| Disk | 40 GB | 160 GB |
- 软件要求
The following table lists the software versions that must be installed on the target host.
| Software | Version | Description |
|---|---|---|
| Docker Engine | Version 20.10.10-ce+ or higher | For installation instructions, see Docker Engine documentation |
| Docker Compose | docker-compose (v1.18.0+) or docker compose v2 (docker-compose-plugin) | For installation instructions, see Docker Compose documentation |
| OpenSSL | Latest is preferred | Used to generate certificate and keys for Harbor |
- 网络端口要求
Harbor requires that the following ports be open on the target host.
| Port | Protocol | Description |
|---|---|---|
| 443 | HTTPS | Harbor portal and core API accept HTTPS requests on this port. You can change this port in the configuration file. |
| 4443 | HTTPS | Connections to the Docker Content Trust service for Harbor. You can change this port in the configuration file. |
| 80 | HTTP | Harbor portal and core API accept HTTP requests on this port. You can change this port in the configuration file. |
1. 安装docker
apt update
apt install docker.io
docker --version
# Docker version 20.10.24+dfsg1, build 297e128
配置docker镜像
cd /etc/docker/
touch daemon.json
编辑 daemon.json (如果这个不可用,需要自行寻找可用镜像源)
{
    "registry-mirrors": ["https://docker.nastool.de"]
}
测试docker镜像可用性 -- 可略过
docker search hello-world
# NAME                                   DESCRIPTION                                     # STARS     OFFICIAL   AUTOMATED
# hello-world                            Hello World! (an example of minimal Dockeriz…   2269      [OK]

docker pull hello-world
docker images |grep hello-world
# hello-world                     latest    d2c94e258dcb   14 months ago   13.3kB
docker run --rm --name=tst hello-world

# Hello from Docker!
# This message shows that your installation appears to be working correctly.
#
# To generate this message, Docker took the following steps:
#  1. The Docker client contacted the Docker daemon.
#  2. The Docker daemon pulled the "hello-world" image from the Docker Hub.
#     (amd64)
#  3. The Docker daemon created a new container from that image which runs the
#     executable that produces the output you are currently reading.
#  4. The Docker daemon streamed that output to the Docker client, which sent it to your terminal.

# To try something more ambitious, you can run an Ubuntu container with:
#  $ docker run -it ubuntu bash

# Share images, automate workflows, and more with a free Docker ID:
#  https://hub.docker.com/

# For more examples and ideas, visit:
#  https://docs.docker.com/get-started/
2. 安装docker-complose
apt install docker-compose
# docker-compose version 1.29.2, build unknown
3. 下载harbor安装包
从github下载安装包,安装包比较大(621M),需要想办法下载。
# 比如下载到/root/harbor/目录
mkdir -p /root/harbor
cd /root/harbor

# 可以用aria2c下载
# apt install aria2c

# 从这个页面找到最新安装包或最适合的版本 https://github.com/goharbor/harbor/releases

# 下面的链接是我用浏览器点击下载后获取到的下载链接,应该会变,需要实时获取

aria2c "https://objects.githubusercontent.com/github-production-release-asset-2e65be/50613991/8905e864-0824-4b9c-87c1-44a9e0b4db4f?X-Amz-Algorithm=AWS4-HMAC-SHA256&X-Amz-Credential=releaseassetproduction%2F20240630%2Fus-east-1%2Fs3%2Faws4_request&X-Amz-Date=20240630T170549Z&X-Amz-Expires=300&X-Amz-Signature=484b6cdee5c9f515d800c41cbf3253d918b470b9d9401db224d2a1cfd36fc021&X-Amz-SignedHeaders=host&actor_id=0&key_id=0&repo_id=50613991&response-content-disposition=attachment%3B%20filename%3Dharbor-offline-installer-v2.9.5-rc1.tgz&response-content-type=application%2Foctet-stream"
4. 解压缩 & 创建文件夹
cd /root/harbor
tar -zxvf ./harbor-offline-installer-v2.9.5-rc1.tgz -C /opt
cd /opt/harbor/
mkdir -p /opt/harbor/certs
mkdir -p /opt/harbor/data
5. 准备证书
harbor 安装时内部使用了nginx, 从浏览器访问网页需要用到证书(https 单向认证)
更详细介绍可以参考:https://goharbor.io/docs/2.11.0/install-config/configure-https/
cd /opt/harbor/certs

# 我把官网的制作证书的过程写到了shell中
touch mkcerts.sh
mkcerts.sh
#!/bin/bash
# 你想要配置的域名 -- 需要按需修改
domain=brian-harbor
# 域名全称
host=${domain}.com
# 证书私钥 (docker-compose启动时)需要的证书私钥
key=${host}.key
# 证书申请文件 - 用于申请证书
csr=${host}.csr
# harbor (docker-compose启动时)需要的证书
crt=${host}.crt
# docker 需要配置的证书,基于crt生成
cert=${host}.cert
# 部署harbor的主机名称 -- 需要按需修改
ip=192.168.1.9


# ca 证书
openssl genrsa -out ca.key 4096
openssl req -x509 -new -nodes -sha512 -days 3650 \
 -subj "/C=CN/ST=Beijing/L=Beijing/O=example/OU=Personal/CN=MyPersonal Root CA" \
 -key ca.key \
 -out ca.crt

# cert 域名证书
openssl genrsa -out ${key} 4096
openssl req -sha512 -new \
    -subj "/C=CN/ST=Beijing/L=Beijing/O=example/OU=Personal/CN=${host}" \
    -key ${key} \
    -out ${csr}

cat > v3.ext <<-EOF
authorityKeyIdentifier=keyid,issuer
basicConstraints=CA:FALSE
keyUsage = digitalSignature, nonRepudiation, keyEncipherment, dataEncipherment
extendedKeyUsage = serverAuth
subjectAltName = @alt_names

[alt_names]
DNS.1=${host}
DNS.2=${domain}
DNS.3=${ip}
EOF

openssl x509 -req -sha512 -days 3650 \
    -extfile v3.ext \
    -CA ca.crt -CAkey ca.key -CAcreateserial \
    -in ${csr} \
    -out ${crt}

openssl x509 -inform PEM -in ${crt} -out ${cert}
# 制作证书
chmod +x mkcerts.sh
./mkcerts.sh
ls
# brian-harbor.com.cert  brian-harbor.com.crt  brian-harbor.com.csr  brian-harbor.com.key  ca.crt  ca.key  ca.srl  mkcerts.sh  v3.ext
6. 准备环境
如果用的本地服务器,没有域名,需要用修改/etc/hosts的方式添加域名解析地址
vim /etc/hosts
# 添加一行
192.168.1.9 brian-harbor.com
给docker.service添加步骤5生成的证书,否则可能造成docker login时报错证书未识别
cd /etc/docker
mkdir -p /etc/docker/certs.d
# 下面的域名文件夹要换成你自己的
mkdir -p /etc/docker/certs.d/brian-harbor.com/
# 这个未详细测试
mkdir -p /etc/docker/certs.d/192.168.1.9/

# 将步骤5生成的证书放入上方新建的子文件夹
cp /opt/harbor/certs/brian-harbor.com.cert /etc/docker/certs.d/brian-harbor.com/
cp /opt/harbor/certs/brian-harbor.com.key /etc/docker/certs.d/brian-harbor.com/
cp /opt/harbor/certs/ca.crt /etc/docker/certs.d/brian-harbor.com/

#  将/etc/docker/certs.d/brian-harbor.com/内容 复制给 /etc/docker/certs.d/192.168.1.9/ 一份
cp /etc/docker/certs.d/brian-harbor.com/* /etc/docker/certs.d/192.168.1.9/

# 最终效果
.
├── certs.d
│   ├── 192.168.1.9
│   │   ├── brian-harbor.com.cert
│   │   ├── brian-harbor.com.key
│   │   └── ca.crt
│   └── brian-harbor.com
│       ├── brian-harbor.com.cert
│       ├── brian-harbor.com.key
│       └── ca.crt
├── daemon.json
└── key.json
重启docker服务
systemctl restart docker
7. 配置harbor配置文件
cd /opt/harbor/
cp harbor.yml.tmpl harbor.yml
修改 harbor.yml (如果端口号80/443已经被其他服务占用,需要修改成其他的)
# ......
# 改成你自己的域名
hostname: brian-harbor.com

# ......

http:
  # port for http, default is 80. If https enabled, this port will redirect to https port
  port: 80

# https related config
https:
  # https port for harbor, default is 443
  port: 443
  # The path of cert and key files for nginx
  certificate: /opt/harbor/certs/brian-harbor.com.crt
  private_key: /opt/harbor/certs/brian-harbor.com.key

# ......

# admin用户对应的用户名
harbor_admin_password: Harbor12345

# The default data volume
data_volume: /opt/harbor/data
安装harbor
cd /opt/harbor
./prepare
./install.sh
# 如果运行过程报错找不到/hostfs/opt/certs/xxx ,需要核对下/opt/certs/xxx 是否存在,然后再去检查harbor.yml

# 安装完毕,发现docker启动了很多容器
docker-compose ps

 Name                     Command                  State                                          Ports
------------------------------------------------------------------------------------------------------------------------------------------------
harbor-core         /harbor/entrypoint.sh            Up (healthy)
harbor-db           /docker-entrypoint.sh 13 14      Up (healthy)
harbor-jobservice   /harbor/entrypoint.sh            Up (healthy)
harbor-log          /bin/sh -c /usr/local/bin/ ...   Up (healthy)   127.0.0.1:1514->10514/tcp
harbor-portal       nginx -g daemon off;             Up (healthy)
nginx               nginx -g daemon off;             Up (healthy)   0.0.0.0:80->8080/tcp,:::80->8080/tcp, 0.0.0.0:443->8443/tcp,:::443->8443/tcp
redis               redis-server /etc/redis.conf     Up (healthy)
registry            /home/harbor/entrypoint.sh       Up (healthy)
registryctl         /home/harbor/start.sh            Up (healthy)

# 停止并删除容器和卷 docker-compose down -v
# 启动容器 docker-compose up -d
# 重启 docker-compose restart
# 查看状态 docker-compose ps
打开浏览器,访问 https://192.168.1.9, 浏览器会提示证书不可信,选择跳过。
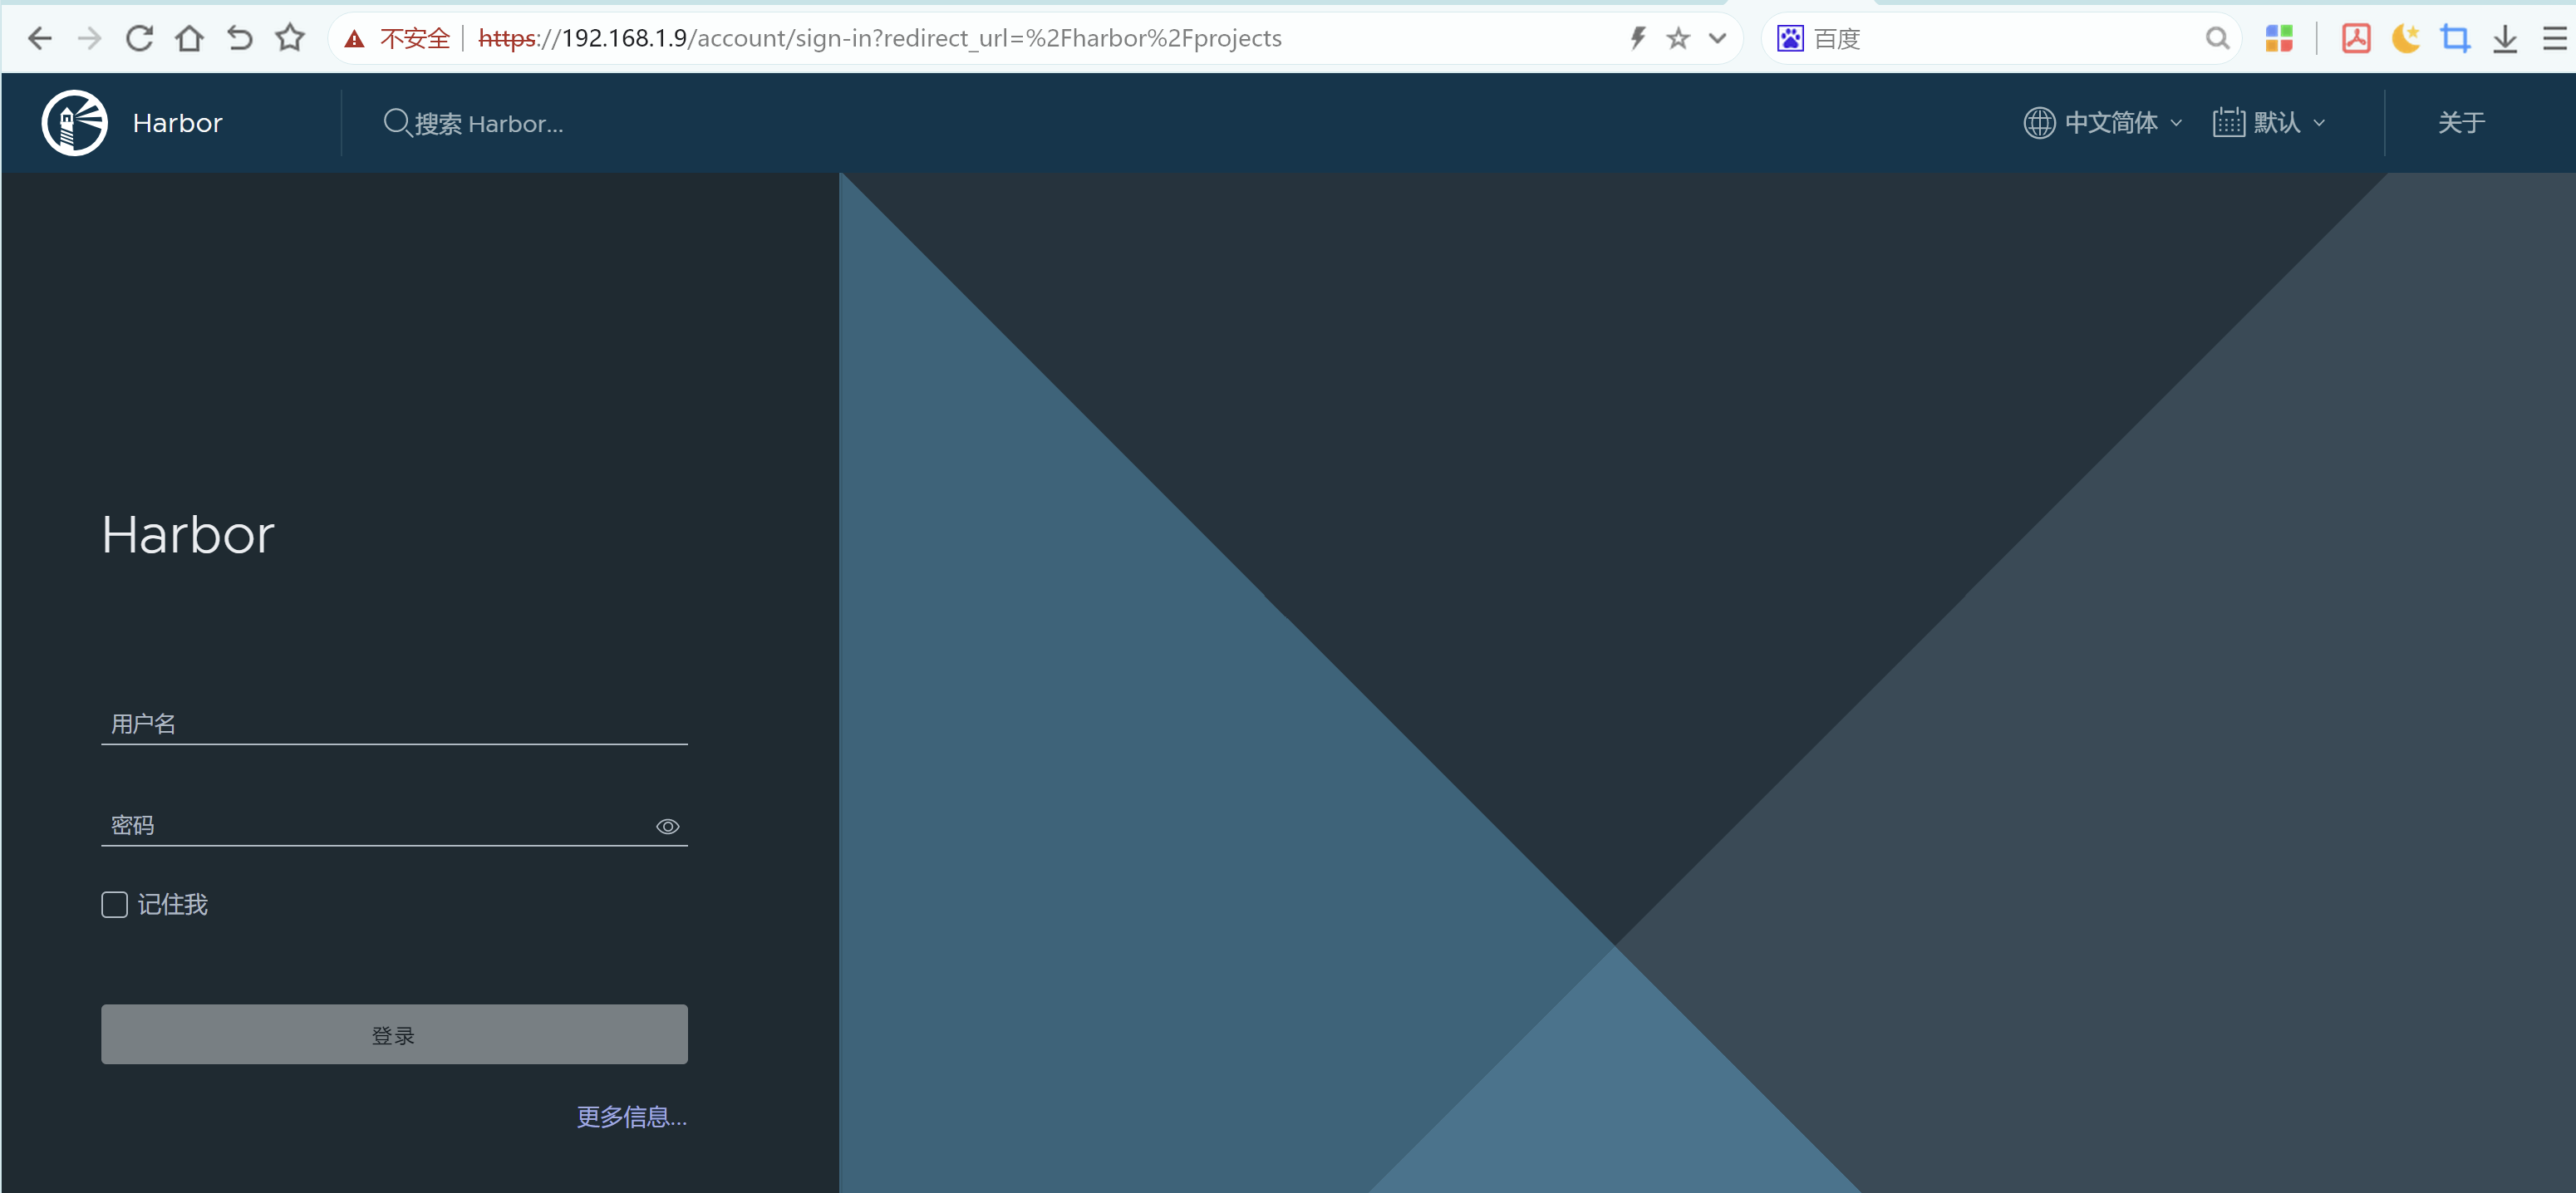
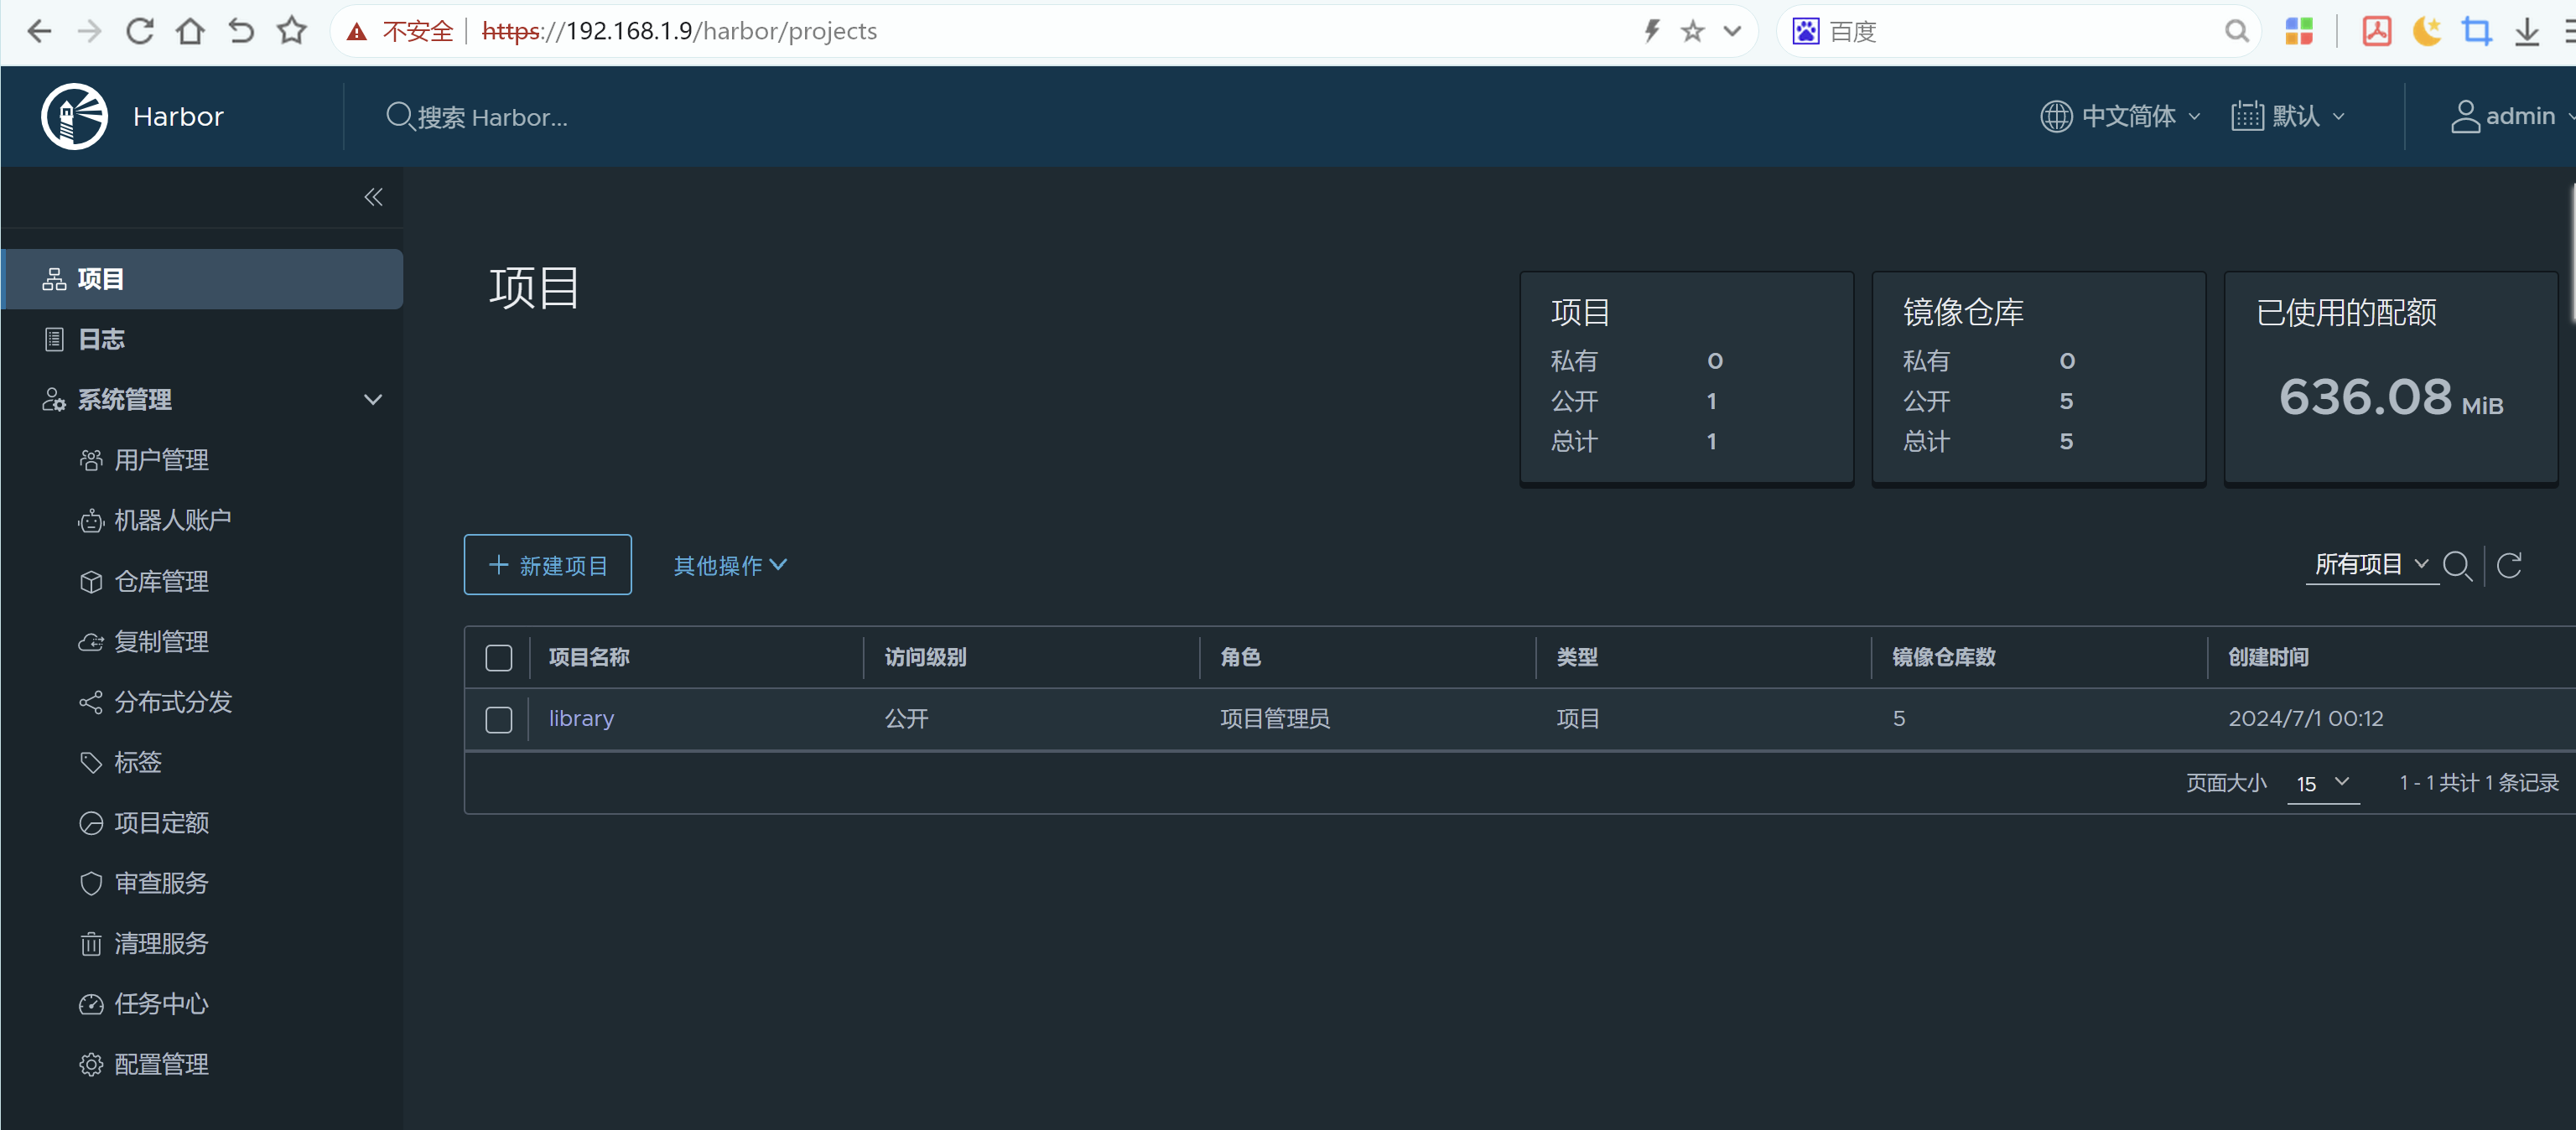
输入admin/Harbor12345进入
8. 设备登陆测试
- harbor本机登陆
docker login -u admin brian-harbor.com
# WARNING! Your password will be stored unencrypted in /root/.docker/config.json.
# Configure a credential helper to remove this warning. See
# https://docs.docker.com/engine/reference/commandline/login/#credentials-store

# Login Succeeded
- 另一台设备登陆
# 准备另一台设备,我用了一个ubuntu22虚拟机 + podman,podman 和 docker指令几乎一摸一样,以下的指令可以将podman换成docker使用

# 修改/etc/hosts
192.168.1.9 brian-harbor.com

# 登陆测试,我这里很奇怪,可能强制要求信任对方域名ca,需要指定ca证书路径,否则会报错
# 需要将 6. 准备环境 中做出来的ca.crt 拷贝到这个虚拟机中,我放在了 /root/harbor/ca.crt

podman login -u admin brian-harbor.com
Password:
Error: authenticating creds for "brian-harbor.com": pinging container registry brian-harbor.com: Get "https://brian-harbor.com/v2/": x509: certificate signed by unknown authority

# 需要指定ca文件夹路径
podman login --cert-dir /root/harbor/ -u admin brian-harbor.com
Login Succeeded!

# push 镜像
podman push brian-harbor.com/library/redis:latest --cert-dir /home/brian/harbor/

# 带上 --cert-dir 还是很别扭的,这个问题还要进一步研究更好的解决方式
# 估计需要配置本机的可信任ca
参考文章
[1]. 私有镜像仓库harbor之手把手搭建步骤
[2]. https://goharbor.io/docs/2.11.0/install-config/configure-https/