昨日回顾
#1 前端首页课程推荐功能:静态,后期你们需要编写出推荐课程接口
	-复制了卡片,50px

#2 登录注册的5个接口
	-多方式登录
    -验证手机号是否存在

    -短信登录
    -发送短信验证码
    -短信注册
# 3 多方式登录接口
	-用户,手机号,邮箱+密码---》{username:xx,password:1234}---》post
    -经过路由---》自动生成 ,user单独的路由,router = SimpleRouter()
    -视图类中:自动生成路由,继承 ViewSet+action装饰器
    	-实例化得到一个序列化类---》只用来做数据校验---》验证通过不调用save
        -ser.is_valid


# 4 验证手机号是否存在
	-get请求: /api/v1/userinfo/user/mobile/?mobile=18223344


# 5 什么是api,什么是sdk
	-第三方api:使用python模拟发送http请求,携带该带的数据      requests
    -第三方sdk:
    	-主流语言都会有
    	-使用不同语言对api进行了封装,以后你只需要安装包,使用包的某些方法,就能完成功能


   -硬件厂商提供的sdk ----》 dll文件---》c,go语言写完编译成的动态链接库文件

# 6 python调用dll,so文件

# 7 使用第三方云短信

cookies是给某个网址的。往某个网址发送请求会自动携带cookies。
csrf跨站请求伪造
# 验证手机号是否存在接口
	- 保证发送短信接口安全,不被第三方盗用
    	-1 加频率限制(频率限制,只能限制手机号一分钟发一次,不能限制接口一分钟访问一次)
        -2 随机字符串:
        	-跨站请求伪造:csrf
            同一个浏览器里:
            	登录 招商银行---》cookie存在浏览器中了
                进入了一个恶意网站,恶意网站有个按钮,一点击,向招商银行发请求,能发成功,服务器可以正常响应,浏览器拦截
                一旦登录招商银行成功,只要向招商银行发送请求,就会自动携带携带cookie

            -解决方案:
            	来到要发送post请求的页面,后端就生产个一个随机字符串,给前端
            	如果要发送post请求(一般用来增加,修改数据),需要携带一个随机字符串,如果没有带,就禁止
    -以后写视图类,有个统一模板
    try:
        逻辑
    except Exception as e:
        再抛出来
        retrun APIResponse()


   	-以后记住:
    	视图函数,视图类的方法,返回值一定是响应对象(django原生的4个,drf的一个,自己封装了一个)
        raise 的对象,必须是错误对象  KeyError,APIException,LqzException
只要做安全性检查,就尝试使用这种方案 ---> 后端给前端一个随机字符串
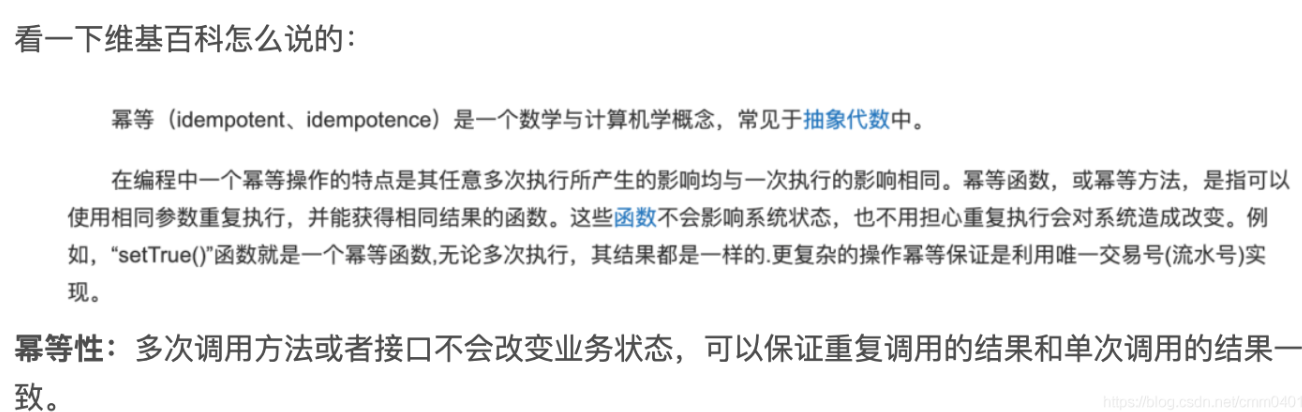
接口幂等性
接口幂等性为什么会出现,如何解决?
推荐阅读:(50条消息) 什么是接口的幂等性以及如何实现接口幂等性_什么叫接口幂等性?如何保证接口幂等性?_风暴计划的博客-CSDN博客
异常捕获
# 补充
1 接口幂等性:这是啥,为啥会出现,如何解决它?
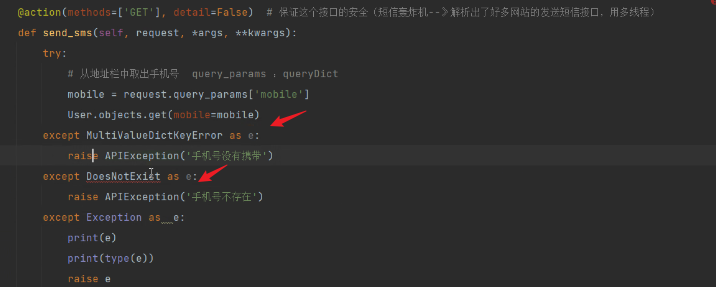
2 异常捕获,可以捕获粒度更细一些
3 自定义异常类
class LqzException(Exception):
def __init__(self,message):
pass
更具体的异常捕获,也可以自己写一个异常类,自定义异常。
from django.core.exceptions import DoesNotExist
今日内容
1 登录注册模态框分析
# 如果是跳转新的页面
-路由中配置一个路由
-写一个视图组件
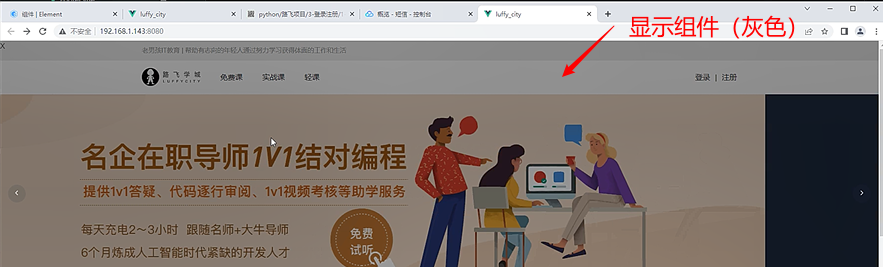
# 弹窗,盖在主页上---》模态框 ---》 用一个组件实现
组件样式:
.login {
  width: 100vw;  # 组件充满全屏
  height: 100vh;   # 组件充满全屏
  position: fixed;  # 基于html页面绝对定位
  top: 0;   # 绝对定位基于顶部 坐标0
  left: 0;  # 绝对定位基于左侧 坐标0
  z-index: 10;  # 高度
  background-color: rgba(0, 0, 0, 0.5);
}
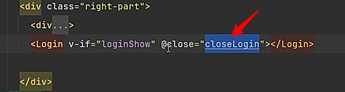
点击登录按钮,触发v-if显示登录组件:
需求:当点击登录组件的关闭按钮时,登录组件销毁。
要实现这个需求需要使用子传父(通过在父组件自定义事件)。修改一下控制子组件v-if的那个属性,将那个属性设置为false,子组件自然销毁。
父组件自定义事件:
子组件执行$emit,触发父组件的自定义事件:

Login.vue
<template>
  <div class="login">
    <span @click="handleClose">X</span>
  </div>
</template>

<script>
export default {
  name: "Login",
  methods:{
    handleClose(){
      this.$emit('close')
    }
  }
}
</script>

<style scoped>
.login {
  width: 100vw;
  height: 100vh;
  position: fixed;
  top: 0;
  left: 0;
  z-index: 10;
  background-color: rgba(0, 0, 0, 0.5);
}
</style>
Header.vue
<div class="right-part">
        <div>
          <span @click="goLogin">登录</span>
          <span class="line">|</span>
          <span>注册</span>
        </div>
        <Login v-if="loginShow" @close="closeLogin"></Login>
</div>


 export default {
  name: "Header",
  data() {
    return {
      url_path: sessionStorage.url_path || '/',
      loginShow: false
    }
  },
  methods: {
    goPage(url_path) {
      // 已经是当前路由就没有必要重新跳转
      if (this.url_path !== url_path) {
        // 传入的参数,如果不等于当前路径,就跳转
        this.$router.push(url_path)
      }
      sessionStorage.url_path = url_path;
    },
    goLogin() {
      this.loginShow = true
    },
    closeLogin() {
      this.loginShow = false
    }
  },
  created() {
    sessionStorage.url_path = this.$route.path
    this.url_path = this.$route.path
  },
  components: {
    Login
  }
}
2 登录注册前端页面复制
2.0 Header.vue
<template>
<div class="header">
<div class="slogan">
<p>老男孩IT教育 | 帮助有志向的年轻人通过努力学习获得体面的工作和生活</p>
</div>
<div class="nav">
<ul class="left-part">
<li class="logo">
<router-link to="/">
<img src="../assets/img/head-logo.svg" alt="">
</router-link>
</li>
<li class="ele">
<span @click="goPage('/free-course')" :class="{active: url_path === '/free-course'}">免费课</span>
</li>
<li class="ele">
<span @click="goPage('/actual-course')" :class="{active: url_path === '/actual-course'}">实战课</span>
</li>
<li class="ele">
<span @click="goPage('/light-course')" :class="{active: url_path === '/light-course'}">轻课</span>
</li>
</ul>
<div class="right-part">
<div>
<span @click="put_login">登录</span>
<span class="line">|</span>
<span @click="put_register">注册</span>
</div>
<Login v-if="is_login" @close="close_login" @go="put_register"></Login>
<Register v-if="is_register" @close="close_register" @go="put_login"></Register>
</div>
</div>
</div>
</template>
<script>
import Login from "@/components/Login";
import Register from "@/components/Register";
export default {
name: "Header",
data() {
return {
url_path: sessionStorage.url_path || '/',
is_login: false,
is_register: false,
}
},
methods: {
goPage(url_path) {
// 已经是当前路由就没有必要重新跳转
if (this.url_path !== url_path) {
// 传入的参数,如果不等于当前路径,就跳转
this.$router.push(url_path)
}
sessionStorage.url_path = url_path;
},
goLogin() {
this.loginShow = true
},
put_login() {
this.is_login = true;
this.is_register = false;
},
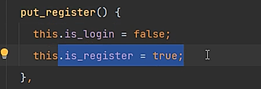
put_register() {
this.is_login = false;
this.is_register = true;
},
close_login() {
this.is_login = false;
},
close_register() {
this.is_register = false;
}
},
created() {
sessionStorage.url_path = this.$route.path
this.url_path = this.$route.path
},
components: {
Login,
Register
}
}
</script>
<style scoped>
.header {
background-color: white;
box-shadow: 0 0 5px 0 #aaa;
}
.header:after {
content: "";
display: block;
clear: both;
}
.slogan {
background-color: #eee;
height: 40px;
}
.slogan p {
width: 1200px;
margin: 0 auto;
color: #aaa;
font-size: 13px;
line-height: 40px;
}
.nav {
background-color: white;
user-select: none;
width: 1200px;
margin: 0 auto;
}
.nav ul {
padding: 15px 0;
float: left;
}
.nav ul:after {
clear: both;
content: '';
display: block;
}
.nav ul li {
float: left;
}
.logo {
margin-right: 20px;
}
.ele {
margin: 0 20px;
}
.ele span {
display: block;
font: 15px/36px '微软雅黑';
border-bottom: 2px solid transparent;
cursor: pointer;
}
.ele span:hover {
border-bottom-color: orange;
}
.ele span.active {
color: orange;
border-bottom-color: orange;
}
.right-part {
float: right;
}
.right-part .line {
margin: 0 10px;
}
.right-part span {
line-height: 68px;
cursor: pointer;
}
</style>
2.1 Login.vue
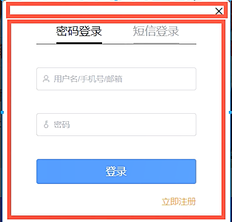
<div class="box">这个div对应的就是登录框。
<i class="el-icon-close">这个i标签就是关闭登录框的叉号。

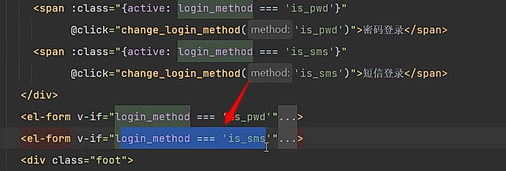
el-form是饿了么Ui提供的表单,这两个表单分别对应密码登录和短信登录。
点击密码登录,通过v-if就会显示密码表单:
去注册按钮,会调用父组件的自定义事件go,会执行如下函数:
销毁登录组件,显示注册组件。
<template>
  <div class="login">
    <div class="box">
      <i class="el-icon-close" @click="close_login"></i>
      <div class="content">
        <div class="nav">
          <span :class="{active: login_method === 'is_pwd'}"
                @click="change_login_method('is_pwd')">密码登录</span>
          <span :class="{active: login_method === 'is_sms'}"
                @click="change_login_method('is_sms')">短信登录</span>
        </div>
        <el-form v-if="login_method === 'is_pwd'">
          <el-input
              placeholder="用户名/手机号/邮箱"
              prefix-icon="el-icon-user"
              v-model="username"
              clearable>
          </el-input>
          <el-input
              placeholder="密码"
              prefix-icon="el-icon-key"
              v-model="password"
              clearable
              show-password>
          </el-input>
          <el-button type="primary">登录</el-button>
        </el-form>
        <el-form v-if="login_method === 'is_sms'">
          <el-input
              placeholder="手机号"
              prefix-icon="el-icon-phone-outline"
              v-model="mobile"
              clearable
              @blur="check_mobile">
          </el-input>
          <el-input
              placeholder="验证码"
              prefix-icon="el-icon-chat-line-round"
              v-model="sms"
              clearable>
            <template slot="append">
              <span class="sms" @click="send_sms">{{ sms_interval }}</span>
            </template>
          </el-input>
          <el-button type="primary">登录</el-button>
        </el-form>
        <div class="foot">
          <span @click="go_register">立即注册</span>
        </div>
      </div>
    </div>
  </div>
</template>

<script>
export default {
  name: "Login",
  data() {
    return {
      username: '',
      password: '',
      mobile: '',
      sms: '',
      login_method: 'is_pwd',
      sms_interval: '获取验证码',
      is_send: false,
    }
  },
  methods: {
    close_login() {
      this.$emit('close')
    },
    go_register() {
      this.$emit('go')
    },
    change_login_method(method) {
      this.login_method = method;
    },
    check_mobile() {
      if (!this.mobile) return;
      if (!this.mobile.match(/^1[3-9][0-9]{9}$/)) {
        this.$message({
          message: '手机号有误',
          type: 'warning',
          duration: 1000,
          onClose: () => {
            this.mobile = '';
          }
        });
        return false;
      }
      this.is_send = true;
    },
    send_sms() {

      if (!this.is_send) return;
      this.is_send = false;
      let sms_interval_time = 60;
      this.sms_interval = "发送中...";
      let timer = setInterval(() => {
        if (sms_interval_time <= 1) {
          clearInterval(timer);
          this.sms_interval = "获取验证码";
          this.is_send = true; // 重新回复点击发送功能的条件
        } else {
          sms_interval_time -= 1;
          this.sms_interval = `${sms_interval_time}秒后再发`;
        }
      }, 1000);
    }
  }
}
</script>

<style scoped>
.login {
  width: 100vw;
  height: 100vh;
  position: fixed;
  top: 0;
  left: 0;
  z-index: 10;
  background-color: rgba(0, 0, 0, 0.3);
}

.box {
  width: 400px;
  height: 420px;
  background-color: white;
  border-radius: 10px;
  position: relative;
  top: calc(50vh - 210px);
  left: calc(50vw - 200px);
}

.el-icon-close {
  position: absolute;
  font-weight: bold;
  font-size: 20px;
  top: 10px;
  right: 10px;
  cursor: pointer;
}

.el-icon-close:hover {
  color: darkred;
}

.content {
  position: absolute;
  top: 40px;
  width: 280px;
  left: 60px;
}

.nav {
  font-size: 20px;
  height: 38px;
  border-bottom: 2px solid darkgrey;
}

.nav > span {
  margin: 0 20px 0 35px;
  color: darkgrey;
  user-select: none;
  cursor: pointer;
  padding-bottom: 10px;
  border-bottom: 2px solid darkgrey;
}

.nav > span.active {
  color: black;
  border-bottom: 3px solid black;
  padding-bottom: 9px;
}

.el-input, .el-button {
  margin-top: 40px;
}

.el-button {
  width: 100%;
  font-size: 18px;
}

.foot > span {
  float: right;
  margin-top: 20px;
  color: orange;
  cursor: pointer;
}

.sms {
  color: orange;
  cursor: pointer;
  display: inline-block;
  width: 70px;
  text-align: center;
  user-select: none;
}
</style>
2.2 Register.vue
立即登录会调用父组件的自定义事件,将注册组件销毁,登录组件显示。
<template>
  <div class="register">
    <div class="box">
      <i class="el-icon-close" @click="close_register"></i>
      <div class="content">
        <div class="nav">
          <span class="active">新用户注册</span>
        </div>
        <el-form>
          <el-input
              placeholder="手机号"
              prefix-icon="el-icon-phone-outline"
              v-model="mobile"
              clearable
              @blur="check_mobile">
          </el-input>
          <el-input
              placeholder="密码"
              prefix-icon="el-icon-key"
              v-model="password"
              clearable
              show-password>
          </el-input>
          <el-input
              placeholder="验证码"
              prefix-icon="el-icon-chat-line-round"
              v-model="sms"
              clearable>
            <template slot="append">
              <span class="sms" @click="send_sms">{{ sms_interval }}</span>
            </template>
          </el-input>
          <el-button type="primary">注册</el-button>
        </el-form>
        <div class="foot">
          <span @click="go_login">立即登录</span>
        </div>
      </div>
    </div>
  </div>
</template>

<script>
export default {
  name: "Register",
  data() {
    return {
      mobile: '',
      password: '',
      sms: '',
      sms_interval: '获取验证码',
      is_send: false,
    }
  },
  methods: {
    close_register() {
      this.$emit('close', false)
    },
    go_login() {
      this.$emit('go')
    },
    check_mobile() {
      if (!this.mobile) return;
      if (!this.mobile.match(/^1[3-9][0-9]{9}$/)) {
        this.$message({
          message: '手机号有误',
          type: 'warning',
          duration: 1000,
          onClose: () => {
            this.mobile = '';
          }
        });
        return false;
      }
      this.is_send = true;
    },
    send_sms() {
      if (!this.is_send) return;
      this.is_send = false;
      let sms_interval_time = 60;
      this.sms_interval = "发送中...";
      let timer = setInterval(() => {
        if (sms_interval_time <= 1) {
          clearInterval(timer);
          this.sms_interval = "获取验证码";
          this.is_send = true; // 重新回复点击发送功能的条件
        } else {
          sms_interval_time -= 1;
          this.sms_interval = `${sms_interval_time}秒后再发`;
        }
      }, 1000);
    }
  }
}
</script>

<style scoped>
.register {
  width: 100vw;
  height: 100vh;
  position: fixed;
  top: 0;
  left: 0;
  z-index: 10;
  background-color: rgba(0, 0, 0, 0.3);
}

.box {
  width: 400px;
  height: 480px;
  background-color: white;
  border-radius: 10px;
  position: relative;
  top: calc(50vh - 240px);
  left: calc(50vw - 200px);
}

.el-icon-close {
  position: absolute;
  font-weight: bold;
  font-size: 20px;
  top: 10px;
  right: 10px;
  cursor: pointer;
}

.el-icon-close:hover {
  color: darkred;
}

.content {
  position: absolute;
  top: 40px;
  width: 280px;
  left: 60px;
}

.nav {
  font-size: 20px;
  height: 38px;
  border-bottom: 2px solid darkgrey;
}

.nav > span {
  margin-left: 90px;
  color: darkgrey;
  user-select: none;
  cursor: pointer;
  padding-bottom: 10px;
  border-bottom: 2px solid darkgrey;
}

.nav > span.active {
  color: black;
  border-bottom: 3px solid black;
  padding-bottom: 9px;
}

.el-input, .el-button {
  margin-top: 40px;
}

.el-button {
  width: 100%;
  font-size: 18px;
}

.foot > span {
  float: right;
  margin-top: 20px;
  color: orange;
  cursor: pointer;
}

.sms {
  color: orange;
  cursor: pointer;
  display: inline-block;
  width: 70px;
  text-align: center;
  user-select: none;
}
</style>
3 腾讯短信功能二次封装
封装成包的目的,是为了在任何项目中都可以使用这个包来发短信。
3.1 封装v2版本
3.2 封装v3版本
# 给手机发送短信---》第三方平台:腾讯云短信----》
# API和SDK,有sdk优先用sdk
# sdk:
3.0版本,云操作的sdk,不仅仅有发送短信,还有云功能的其他功能
2.0版本,简单,只有发送短信功能
# 安装sdk
-方式一:pip install tencentcloud-sdk-python
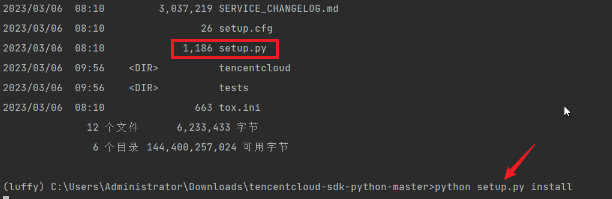
-方式二源码安装:
-下载源码
-执行 python steup.py install
# 发送短信测试
腾讯云sdk:
# -*- coding: utf-8 -*-
from tencentcloud.common import credential
from tencentcloud.common.exception.tencent_cloud_sdk_exception import TencentCloudSDKException
# 导入对应产品模块的client models。
from tencentcloud.sms.v20210111 import sms_client, models

# 导入可选配置类
from tencentcloud.common.profile.client_profile import ClientProfile
from tencentcloud.common.profile.http_profile import HttpProfile

try:
    cred = credential.Credential("id", "key")
    httpProfile = HttpProfile()
    httpProfile.reqMethod = "POST"  # post请求(默认为post请求)
    httpProfile.reqTimeout = 30  # 请求超时时间,单位为秒(默认60秒)
    httpProfile.endpoint = "sms.tencentcloudapi.com"  # 指定接入地域域名(默认就近接入)

    # 非必要步骤:
    # 实例化一个客户端配置对象,可以指定超时时间等配置
    clientProfile = ClientProfile()
    clientProfile.signMethod = "TC3-HMAC-SHA256"  # 指定签名算法
    clientProfile.language = "en-US"
    clientProfile.httpProfile = httpProfile
    client = sms_client.SmsClient(cred, "ap-guangzhou", clientProfile)
    req = models.SendSmsRequest()
    req.SmsSdkAppId = "1400763090" # 腾讯短信创建app把app的id号复制过来https://console.cloud.tencent.com/smsv2/app-manage
    # 短信签名内容: 使用 UTF-8 编码,必须填写已审核通过的签名
    # 签名信息可前往 [国内短信](https://console.cloud.tencent.com/smsv2/csms-sign) 或 [国际/港澳台短信](https://console.cloud.tencent.com/smsv2/isms-sign) 的签名管理查看
    req.SignName = "关于金鹏公众号"
    # 模板 ID: 必须填写已审核通过的模板 ID
    # 模板 ID 可前往 [国内短信](https://console.cloud.tencent.com/smsv2/csms-template) 或 [国际/港澳台短信](https://console.cloud.tencent.com/smsv2/isms-template) 的正文模板管理查看
    req.TemplateId = "1603526"
    # 模板参数: 模板参数的个数需要与 TemplateId 对应模板的变量个数保持一致,,若无模板参数,则设置为空
    req.TemplateParamSet = ["8888",'100']
    # 下发手机号码,采用 E.164 标准,+[国家或地区码][手机号]
    # 示例如:+8613711112222, 其中前面有一个+号 ,86为国家码,13711112222为手机号,最多不要超过200个手机号
    req.PhoneNumberSet = ["+8615386800417"]
    # 用户的 session 内容(无需要可忽略): 可以携带用户侧 ID 等上下文信息,server 会原样返回
    req.SessionContext = ""
    req.ExtendCode = ""
    req.SenderId = ""

    resp = client.SendSms(req)

    # 输出json格式的字符串回包
    print(resp.to_json_string(indent=2))

except TencentCloudSDKException as err:
    print(err)
通过源码包安装sdk:
步骤:

3.2.2 把发送短信封装成包
# 后期别的项目,也要使用发送短信----》只要把包copy到项目中即可
# 封装包:
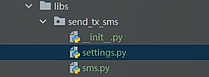
-目录结构
send_tx_sms # 包名
__init__.py
settings.py # 配置文件
sms.py # 核心文件
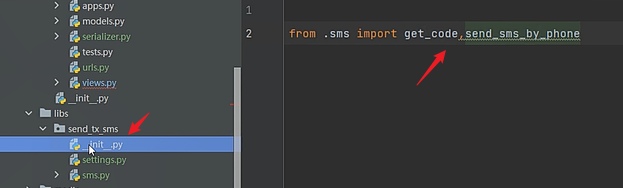
# __init__.py
from .sms import get_code,send_sms
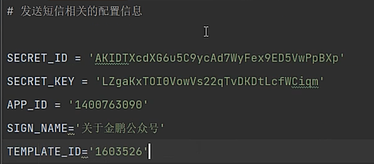
# settings.py
SECRET_ID = ''
SECRET_KEY = ''
APP_ID = ''
SIGN_NAME = ''
TEMPLATE_ID = ''
# sms.py
# 生成 n 位数字验证码的函数
import random
from tencentcloud.common import credential
from tencentcloud.common.exception.tencent_cloud_sdk_exception import TencentCloudSDKException
from tencentcloud.sms.v20210111 import sms_client, models
from tencentcloud.common.profile.client_profile import ClientProfile
from tencentcloud.common.profile.http_profile import HttpProfile
from . import settings
import json
def get_code(number=4):
code = ''
for i in range(number):
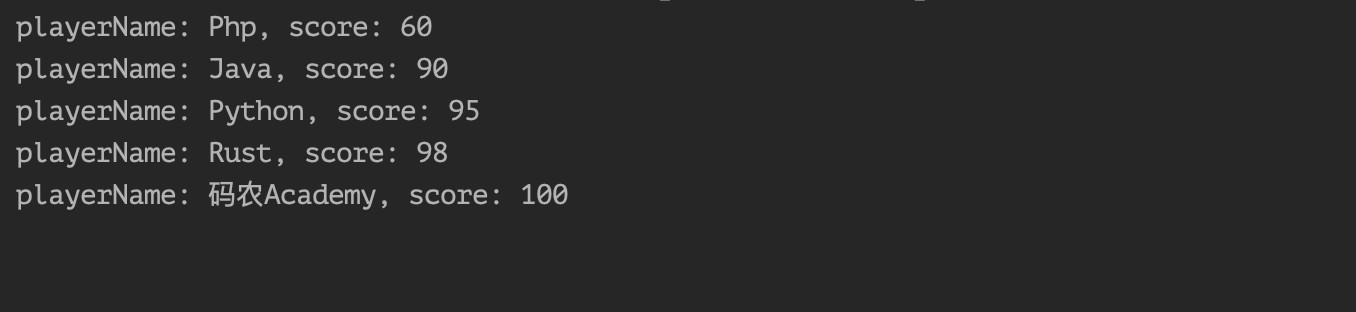
code += str(random.randint(0, 9)) # python 是强类型语言,不同类型运算不允许
return code
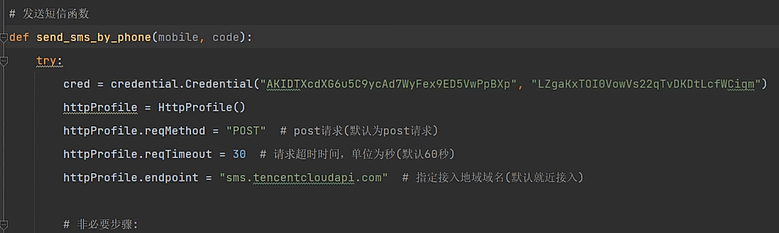
# 发送短信函数
def send_sms(code, mobile):
try:
cred = credential.Credential(settings.SECRET_ID, settings.SECRET_KEY)
httpProfile = HttpProfile()
httpProfile.reqMethod = "POST" # post请求(默认为post请求)
httpProfile.reqTimeout = 30 # 请求超时时间,单位为秒(默认60秒)
httpProfile.endpoint = "sms.tencentcloudapi.com" # 指定接入地域域名(默认就近接入)
clientProfile = ClientProfile()
clientProfile.signMethod = "TC3-HMAC-SHA256" # 指定签名算法
clientProfile.language = "en-US"
clientProfile.httpProfile = httpProfile
client = sms_client.SmsClient(cred, "ap-guangzhou", clientProfile)
req = models.SendSmsRequest()
req.SmsSdkAppId = settings.APP_ID
req.SignName = settings.SIGN_NAME
req.TemplateId = settings.TEMPLATE_ID
# 模板参数: 模板参数的个数需要与 TemplateId 对应模板的变量个数保持一致,,若无模板参数,则设置为空
req.TemplateParamSet = [code, '1']
# 下发手机号码,采用 E.164 标准,+[国家或地区码][手机号]
# 示例如:+8613711112222, 其中前面有一个+号 ,86为国家码,13711112222为手机号,最多不要超过200个手机号
req.PhoneNumberSet = ["+86" + mobile, ]
# 用户的 session 内容(无需要可忽略): 可以携带用户侧 ID 等上下文信息,server 会原样返回
req.SessionContext = ""
# 短信码号扩展号(无需要可忽略): 默认未开通,如需开通请联系 [腾讯云短信小助手]
req.ExtendCode = ""
# 国际/港澳台短信 senderid(无需要可忽略): 国内短信填空,默认未开通,如需开通请联系 [腾讯云短信小助手]
req.SenderId = ""
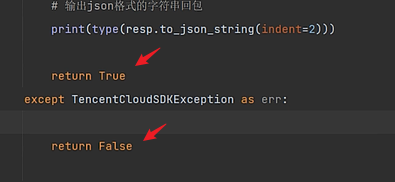
resp = client.SendSms(req)
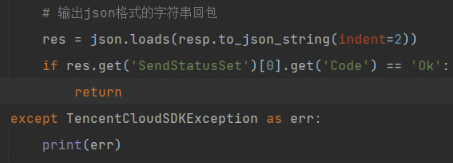
# 输出json格式的字符串回包
res = json.loads(resp.to_json_string(indent=2))
if res.get('SendStatusSet')[0].get('Code') == 'Ok':
return True
else:
return False
except TencentCloudSDKException as err:
print(err)
return False
可以将封装好的包,上传到pypi(公司的仓库)中,任何人都可以下载。
实现如下效果:
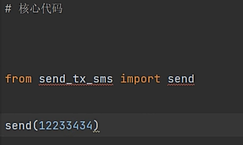
给send函数传入一个手机号,就可以发送短信了!
生成随机验证码:

注意:验证码需要保存在后端,且验证码不能保存在我们封装的这个包里。
发送短信函数:
先把sdk复制过来。
配置文件:
导入配置文件:

验证码默认1分钟过期。
短信发送成功此函数返回true:
resp.to_json_string(indent=2)的结果是个字符串。
这个字符串是一个关于短信是否发送成功的信息。里面有键值对code:ok来告知我们短信是否发送成功。所以我们需要取出code判断其值是否为ok,来决定我们函数返回的是true还是false。
解决方法,如:
在__init__注册:
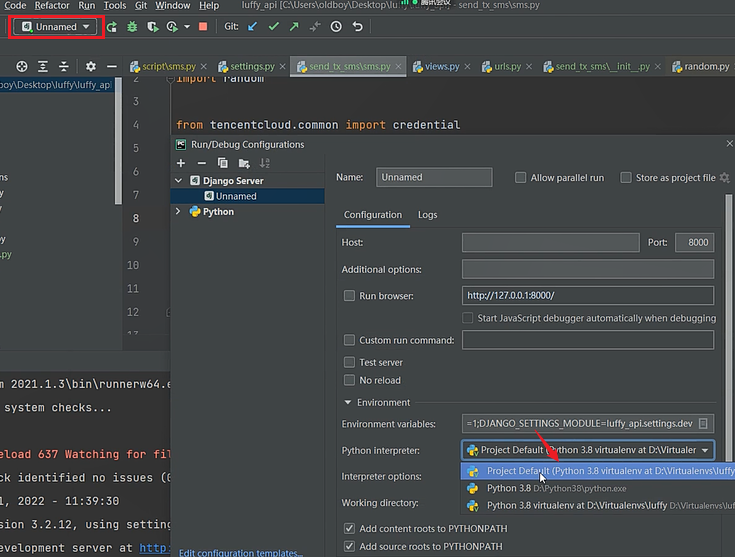
解释器映射问题解决:
4 短信验证码接口
# 前端通过 get请求
http://127.0.0.1:8000/api/v1/userinfo/user/send_sms/?mobile=12324344

# 前端通过 post请求
http://127.0.0.1:8000/api/v1/userinfo/user/send_sms/
{"mobile":"123412313"}
ViewSet写法:
class UserView(ViewSet):
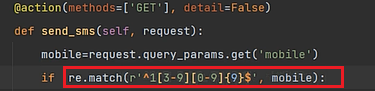
@action(methods=['GET'], detail=False)
def send_sms(self, request):
mobile = request.query_params.get('mobile')
if re.match(r'^1[3-9][0-9]{9}$', mobile):
code = get_code()
print(code) # 保存验证码---》能存,不能丢,后期能取---》缓存--》django自带缓存框架
# 放在内存中了,只要重启就没了----》后期学完redis,放到redis中,重启项目,还在
cache.set('sms_code_%s' % mobile, code)
# cache.get('sms_code_%s'%mobile)
res = send_sms_by_phone(mobile, code)
if res:
return APIResponse(msg='发送短信成功')
else:
# raise APIException('发送短信失败')
return APIResponse(msg='发送短信失败', code=101)
else:
return APIResponse(msg='手机号不合法', code=102)
GenericViewSet写法:
class UserView(GenericViewSet):
    serializer_class = UserLoginSerializer
    queryset = User.objects.all().filter(is_active=True)


    @action(methods=['POST'], detail=False)
    def send_sms(self, request):
        try:
            mobile = request.data['mobile']
            # 生成验证码
            code = get_code()
            res = send_sms_ss(code, mobile)  # 同步发送,后期可以改成异步  后期学了celery可以加入异步 目前咱们可以使用 多线程
            if res:
                return APIResponse(msg='发送成功')
            else:
                return APIResponse(code=101, msg='发送失败')

        except Exception as e:
            raise APIException(str(e))
安全起见,可以将手机号进行正则匹配:
由于用户需要携带验证码进行验证,所以我们需要保存这次请求产生的验证码。如何保存?
之前的项目验证码是保存在session中,但是现在我们使用jwt认证,使用token,已经不需要在服务端保存信息了。
这时候就需要使用缓存了。django自带缓存--->帮你写好了。
导入:from django.core.cache import cache
缓存放在内存中,只要重启项目,数据就消失:

发送短信是一个同步操作。后期可以改成异步。现阶段可以使用多线程实现此需求。

注意:异步里面的异常无法在主线程里面捕获。异步的子线程崩掉,不会影响到主线程的运行。
5 短信登录接口
# 手机号+验证码

# 示例
{mobile:12333,code:7878} -->  post请求

# 路由
/api/v1/userinfo/user/mobile_login/

# 视图类的方法中的逻辑
	1 取出手机号和验证码
    2 校验验证码是否正确(发送验证码接口,存储验证码)
    	-session:根本不用
        -全局变量:不好,可能会取不到,集群环境中
        -缓存:django 自带缓存
        	-from django.core.cache import cache
        	-cache.set()
            -cache.get()
    3 根据手机号查询用户,如果能查到
    4 签发token
    5 返回给前端
全局变量存放验证码问题
全局变量存放验证码不可行的原因:
wsgi就一个进程在跑。
uwsgi 跑了四个django进程。uwsgi写了并发代码。
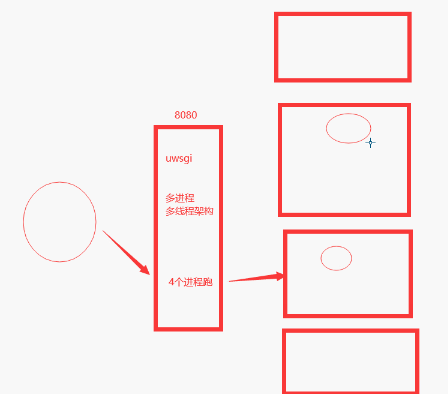
如果跑不同的django进程,就拿不到全局变量了。配置文件四个django都是用的同一套。
来了请求之后,其中一个进程里再开一个线程跑。
uwsgi的并发量也就100多。再加上查数据库的消耗,并发量就更小了。
集群化部署问题
解决:使用异步 使用集群化的部署(加机器)优化代码(读写分离)
现阶段使用缓存保存验证码。
集群化部署,取不到缓存的问题:
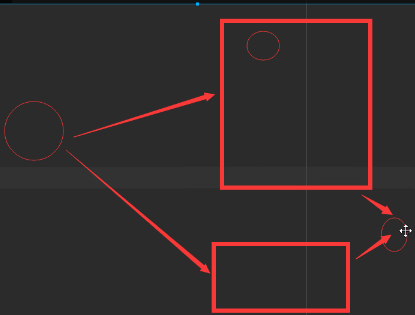
这是因为数据在不同机器的内存中,所以需要将缓存统一放置在一个地方(redis)。
短信登录序列化类
视图函数写一个短信登录接口,然后写一个序列化类专门做验证码的校验和token签发:
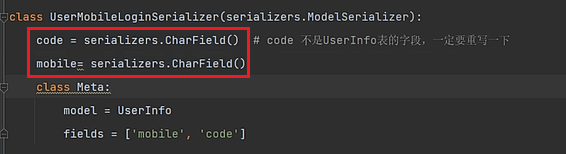
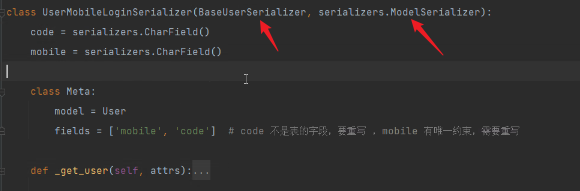
code和mobile两个字段都在序列化类里重写一下,否则会字段从模型中映射,导致会携带字段自己的校验规则,最终不会执行全局钩子。
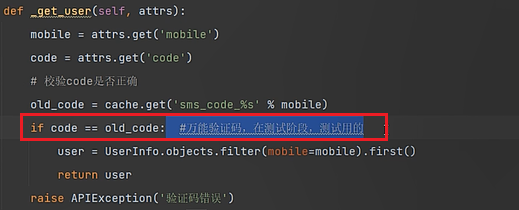
重写_get_user:

比较用户上传的验证码和缓存中的验证码。根据手机号查询出用户。
由于这里我们又要重新写一遍_get_token方法和全局钩子,可以选择将这个方法封装到父类,然后继承。
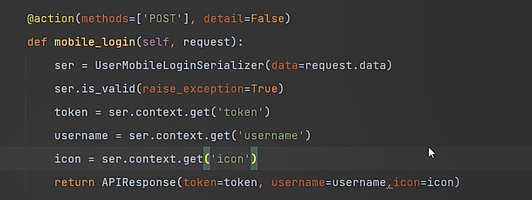
手机登录接口视图类函数:
可以添加万能验证码,方便测试:
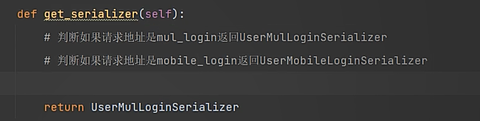
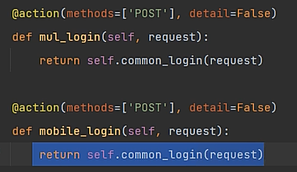
短信登录和多方式登录的视图类只有一个地方不同,也就是使用的序列化类,所以我们可以选择封装,在视图类中写一个函数:

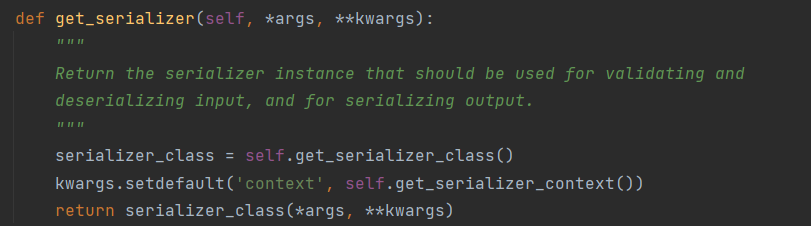
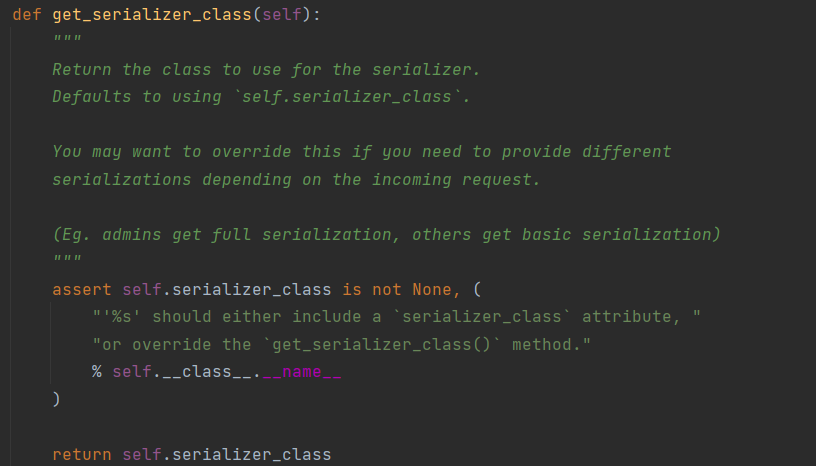
重写get_serialzer
查看get_serialzer源码:
方法一:从self.request(新request)中获取请求的地址
方法二:通过请求的action进行判断
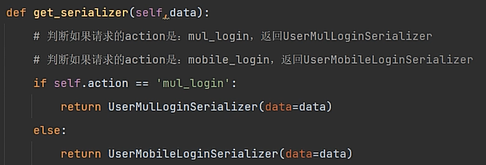
注意:重写get_serializer方法时,需要传入data参数。
多登录接口和手机登录接口:
总结:只要是重复的代码,就要考虑进行封装。
重写get_serializer_class
还有第二种选择,即重写get_serializer_class。
查看get_serializer_class源码:
代码:

封装序列化类父类
抽取全局钩子、_get_token,写一个序列化类父类:
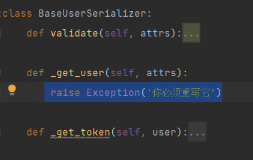
在序列化类中继承:
代码
视图类:
class UserView(GenericViewSet):
    # class UserView(ViewSetMixin, GenericAPIView):
    serializer_class = UserLoginSerializer
    queryset = User.objects.all().filter(is_active=True)
    # 重写
    def get_serializer_class(self):
        if self.action == 'login_sms':
            return UserMobileLoginSerializer
        else:
            return super().get_serializer_class()


    def _login(self,request,*args, **kwargs):
        ser = self.get_serializer(data=request.data)
        ser.is_valid(raise_exception=True)
        token = ser.context.get('token')
        username = ser.context.get('username')
        return APIResponse(token=token, username=username)

    @action(methods=['POST'], detail=False)
    def login_sms(self, request, *args, **kwargs):
        return self._login(request)
序列化类:
from .models import User
from rest_framework import serializers
import re
from rest_framework.exceptions import APIException, ValidationError
from rest_framework_jwt.settings import api_settings

jwt_payload_handler = api_settings.JWT_PAYLOAD_HANDLER
jwt_encode_handler = api_settings.JWT_ENCODE_HANDLER
from django.core.cache import cache


class BaseUserSerializer:
    def validate(self, attrs):
        user = self._get_user(attrs)
        token = self._get_token(user)
        self.context['token'] = token
        self.context['username'] = user.username
        return attrs

    def _get_user(self, attrs):
        raise Exception('你必须重写它')

    def _get_token(self, user):
        payload = jwt_payload_handler(user)
        token = jwt_encode_handler(payload)
        return token


class UserMobileLoginSerializer(BaseUserSerializer, serializers.ModelSerializer):
    code = serializers.CharField()
    mobile = serializers.CharField()

    class Meta:
        model = User
        fields = ['mobile', 'code']  # code 不是表的字段,要重写 ,mobile 有唯一约束,需要重写
    def _get_user(self, attrs):
        code = attrs.get('code')
        mobile = attrs.get('mobile')
        # 从缓存中取出
        old_code = cache.get('sms_code_%s' % mobile)
        if old_code and old_code == code:
            # 根据手机号,查到用户
            user = User.objects.filter(mobile=mobile).first()
            if user:
                return user
            else:
                raise APIException('用户不存在')
        else:
            raise APIException('验证码验证失败')
6 短信注册接口
# 手机号+验证码+密码

# 示例
{mobile:111111,password:1234,code:8888}-->  post请求

# 路由
/api/v1/userinfo/user/mobile_login/

# 用手机号作为用户名, 也可以选择随机生成用户名
视图类
class RegisterUserView(GenericViewSet, CreateModelMixin):
    queryset = User.objects.all()
    serializer_class = RegisterSerializer

    def create(self, request, *args, **kwargs):
        # 使用父类的,会触发序列化,一定要让code只写
        super().create(request, *args, **kwargs)

        # 另一种写法,不用序列化
        # serializer = self.get_serializer(data=request.data)
        # serializer.is_valid(raise_exception=True)
        # self.perform_create(serializer)
        return APIResponse(msg='注册成功')
序列化类
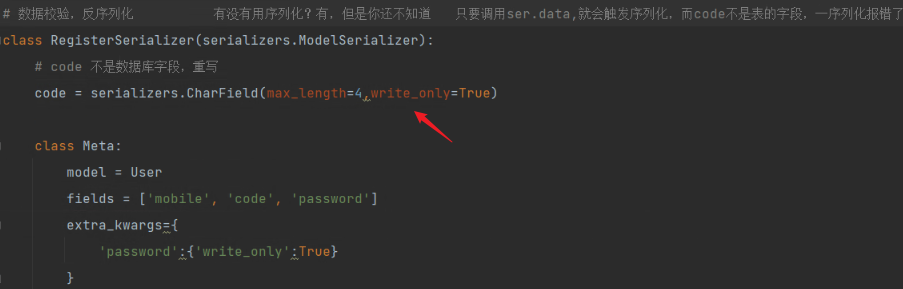
class RegisterSerializer(serializers.ModelSerializer):
    # code 不是数据库字段,重写
    code = serializers.CharField(max_length=4, write_only=True)

    class Meta:
        model = User
        fields = ['mobile', 'code', 'password']
        extra_kwargs = {
            'password': {'write_only': True}
        }

    def validate(self, attrs):  # 全局钩子
        '''
        1 取出前端传入的code,校验code是否正确
        2 把username设置成手机号(你可以随机生成),用户名如果不传,存库进不去
        3 code 不是数据库的字段,从attrs中剔除
        '''
        mobile = attrs.get('mobile')
        code = attrs.get('code')
        old_code = cache.get('sms_code_%s' % mobile)
        if old_code and old_code == code:
            attrs['username'] = mobile
            attrs.pop('code')
        else:
            raise APIException('验证码验证失败')

        return attrs

    def create(self, validated_data):  # 一定要重写create,因为密码是明文,如果不重写,存入到数据库的也是明文
        # validated_data={username:18888,mobile:18888,password:123}
        # 创建用户
        user = User.objects.create_user(**validated_data)

        # 不要忘了return,后期,ser.data 会使用当前返回的对象做序列化
        return user
全局钩子:
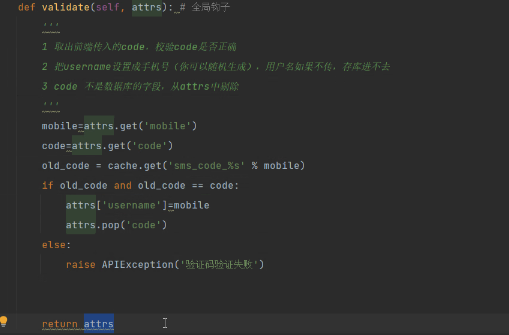
用户名为手机号、随机生成用户名。
重写序列化类的create方法:
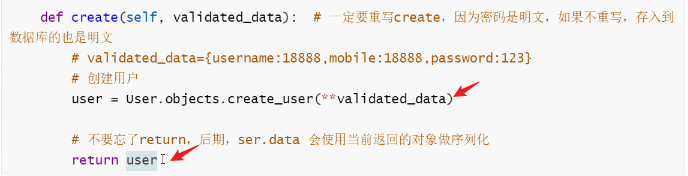
不重写则密码是明文。
路由
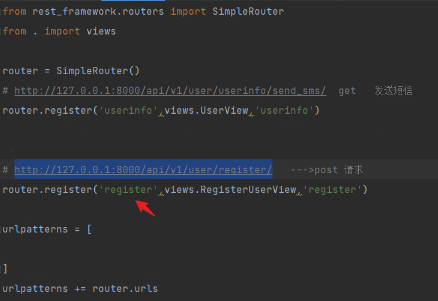
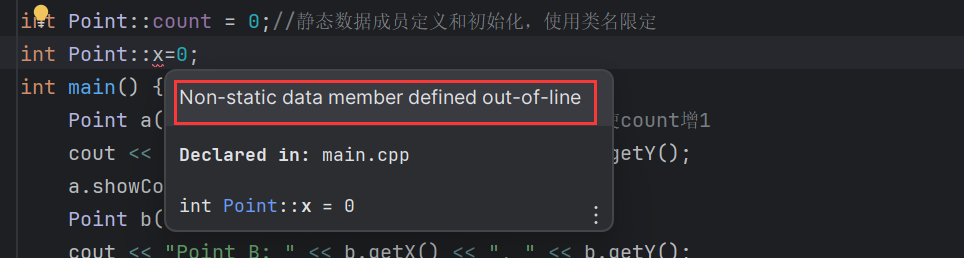
这样写完之后,数据虽然能存进去但是会报错:

提示我们:用户对象没有一个code属性
查看报错:

报错的原因是会自动序列化这些字段:

查看CreateModelMixin源码,为了符合restful规范,会返回新增的对象,所以执行了serializer.data。
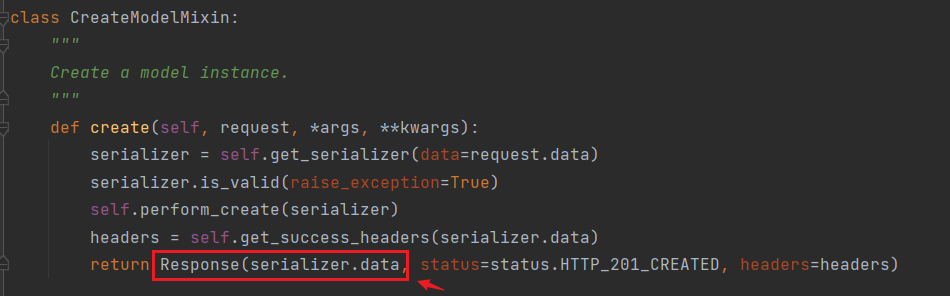
当执行serializer.data时,序列化类会自动执行序列化,而验证码code并不是我们模型类中的字段,所以会报错。
解决:
练习
1 发送短信接口
2 短信登录接口
3 短信注册接口
4 python的深浅copy
5 __new__和__init__的区别

-----------
6 前端和后端对上
7 python 是值传递还是引用传递
8 python 可变与不可变
<template>
    <div class="login"><span @click="close_login">X</span>
</div>

</template>
<script>
    export default {
        name: "Login",
        methods: {
            close_login() {
                // 控制父组件中的is_login变量编程false this.$emit('close_login')
            } } }
</script>

    <style scoped>
        .login { width: 100vw;
            height: 100vh;
            position: fixed;
            top: 0; left: 0;
            z-index: 10;
            background-color: rgba(0, 0, 0, 0.3);
        }
    </style>