转自:https://www.cnblogs.com/smlile-you-me/p/16668899.html
DO280
目录
- 前奏
- 1、Create OpenShift users
- 2、Configure persistent storage for the local registry
- 3、Create OpenShift Enterprise projects
- 4、Create an application from a Git repository
- 5、Create an application using Docker images and definition files
- 6、Create an application with a secure edgeterminated route
- 7、Configure OpenShift quotas for a project
- 8、Create an application from a third party template
- 9、Scale an application
- 10、Install OpenShift metrics
前奏
| yum -y install bash-completion | |
| source /etc/profile.d/bash_completion.sh | |
| # 搭建集群(不考) | |
| [root@foundation0 ~]# echo y | rht-vmctl reset all | |
| [root@foundation0 ~]# ssh student@workstation | |
| [student@workstation ~]$ lab install-prepare setup | |
| [student@workstation ~]$ cd /home/student/do280-ansible | |
| [student@workstation do280-ansible]$ ./install.sh | |
| # 部署成功执行以下脚本 | |
| [student@workstation do280-ansible]$ lab install-metrics setup | |
| [root@foundation0 ~]# scp -r files/ root@master:~ | |
| # 考试注意事项 | |
| 相关节点密码均考试说明中给出; | |
| 考试环境中OpenShift已部署完成,建议进行检查 | |
| 1、每个节点openshift已经安装完成。 | |
| 2、考试时候大部分操作在master上完成,master节点存储空间有限,push image在node上完成 | |
| 3、物理机作为集群外节点直接访问ocp中route,练习环境中workstation可以直接访问ocp中route(查文档也是同样方法) | |
| 4、考试时没有workstation虚拟机 | |
| 5、所有练习基本全在master节点中完成 | |
| 6、不用管理防火墙 | |
| 7、练习环境中部署后的网站必须到workstation节点中的浏览器上验证(考试时直接在宿机上验证) |
1、Create OpenShift users
| Create additional OpenShift users with the following characteristics: | |
| 创建具有以下特征的其他 OpenShift 用户: | |
| 1、The regular user joe with password redhat; | |
| 2、The regular user lene with password redhat; | |
| 3、You must use the existing authentication file at /etc/origin/master/htpasswd while preserving its original content; | |
| 必须使用/etc/origin/master/htpasswd已有的认证文件,同时保留其原始内容; | |
| 4、Both users must be able to authenticate to the OpenShift instance via CLI and on the web console at https://master.lab.example.com:443; | |
| 两个用户都必须能够通过CLI和Web控制台https://master.lab.example.com:443对OpenShift实例进行身份验证; | |
| 5、Regular users must NOT be able to create projects themselves | |
| 普通用户不能自己创建项目 | |
| [root@foundation0 ~]# ssh root@master | |
| [root@master ~]# rpm -qa httpd-tools | |
| [root@master ~]# yum -y install httpd-tools | |
| [root@master ~]# oc get nodes | |
| [root@master ~]# oc get pods | |
| [root@master ~]# oc whoami | |
| system:admin | |
| =============================================================== | |
| 提示: | |
| master节点的系统root用户默认是集群管理员 | |
| 给普通用户授权集群管理权限 | |
| [root@master ~]# oc adm policy add-cluster-role-to-user [ system:admin | cluster-admin ] admin | |
| =============================================================== | |
| [root@master ~]# grep -A3 prov /etc/origin/master/master-config.yaml | |
| [root@master ~]# cat /etc/origin/master/htpasswd | |
| [root@master ~]# htpasswd -b /etc/origin/master/htpasswd joe redhat | |
| [root@master ~]# htpasswd -b /etc/origin/master/htpasswd lene redhat | |
| # 为组去除集群的角色(所有用户不允许创建项目) | |
| 注:在帮助文档的6.2.2 Disabling Self-provisioning节中有示例 | |
| [root@master ~]# oc adm policy remove-cluster-role-from-group \ | |
| self-provisioner \ | |
| system:authenticated \ | |
| system:authenticated:oauth | |
| [root@master ~]# oc login -u joe -p redhat | |
| [root@master ~]# oc login -u lene -p redhat | |
| 注:都是提示能成功登录但不能创建项目则为正确 |
2、Configure persistent storage for the local registry
| Configure nfs persistent storage on services.lab.example.com,that does thefollowing: | |
| 1、Create and share /OCP_mysql; | |
| 2、Create and share /OCP_wordpress; | |
| 3、Create and share /OCP_registry; | |
| 4、Create and share /OCP_metrics; | |
| 5、Associate the share named /OCP_registry to the builtin registry running within your OpenShift Enterprise instance so that it will be used for permanent storage | |
| 将共享/OCP_registry关联到 OpenShift Enterprise 实例的镜像仓库 | |
| 6、Use train-registry-volume for the volume name and train-registry-claim for the claim name | |
| 使用train-registry-volume 作为 volume name, train-registry-claim 作为 claim name | |
| 7、You can find sample YAML files on http://classroom.example.com/materials/exam/storage/ | |
| 可在http://classroom.example.com/materials/exam/storage/上找到示例YAML文件 | |
| (Note: This task needs to be solved before any applications are created) | |
| 8、所有共享均可以被172.25.250.0/255.255.255.0网段用户共享 (考试时查看hosts文件来定义具体的网段) | |
| # 解题 | |
| 先创建nfs,再创建pv,pv就和nfs关联上了, 再创建pvc,pvc就会自动和pv进行绑定。然后对pod进行pvc关联,这样pod的内容就写入到nfs的路径了 | |
| nfs--pv | |
| | | |
| pvc <-- pod | |
| [root@foundation0 ~]# ssh root@services | |
| [root@services ~]# mkdir /OCP_{mysql,wordpress,registry,metrics} | |
| [root@services ~]# chown nfsnobody.nfsnobody /OCP_* | |
| [root@services ~]# chmod 700 /OCP_* | |
| [root@services ~]# man exports 查看设置示例 | |
| [root@services ~]# vim /etc/exports | |
| /OCP_metrics 172.25.250.0/24(rw,async,all_squash) | |
| /OCP_mysql 172.25.250.0/24(rw,async,all_squash) | |
| /OCP_registry 172.25.250.0/24(rw,async,all_squash) | |
| /OCP_wordpress 172.25.250.0/24(rw,async,all_squash) | |
| [root@services ~]# exportfs -r | |
| [root@services ~]# showmount -e | grep OCP | |
| # 将共享关联到实例镜像仓库(需要切换到master节点) | |
| [root@master ~]# oc login -u system:admin | |
| [root@master ~]# oc project default | |
| [root@master ~]# cd files/2/ | |
| 注:考试时会提供相应的文件,只需将文件wget下来即可 | |
| [root@master 2]# vim sample-pv.yml | |
| apiVersion: v1 | |
| kind: PersistentVolume | |
| metadata: | |
| name: train-registry-volume # volume的名字 | |
| spec: | |
| capacity: | |
| storage: 5Gi | |
| accessModes: | |
| - ReadWriteMany # 访问的模式 | |
| nfs: | |
| path: /OCP_registry # 共享的目录 | |
| server: services.lab.example.com # 共享的服务器是哪里 | |
| persistentVolumeReclaimPolicy: Recycle | |
| [root@master 2]# vim sample-pvc.yml | |
| apiVersion: v1 | |
| kind: PersistentVolumeClaim | |
| metadata: | |
| name: train-registry-claim # pvc的名字 | |
| spec: | |
| accessModes: | |
| - ReadWriteMany # 访问模式 | |
| resources: | |
| requests: | |
| storage: 5Gi # 请求资源的大小 | |
| # 创建pv只能是管理员用户 | |
| [root@master 2]# oc whoami | |
| system:admin | |
| [root@master 2]# oc create -f sample-pv.yml -n default | |
| [root@master 2]# oc create -f sample-pvc.yml -n default | |
| [root@master 2]# oc get pods | |
| [root@master 2]# oc get pv | |
| [root@master 2]# oc get pvc | |
| 注:关联成功并不代表能写到共享存储中,因为nfs如果配错了会导致写不进去和容器起不来等情况 | |
| # 将pod和pvc关联 | |
| [root@master 2]# oc get dc | |
| NAME REVISION DESIRED CURRENT TRIGGERED BY | |
| docker-registry 1 2 2 config | |
| [root@master 2]# oc describe dc/docker-registry | grep -A8 Vol | |
| Volumes: | |
| registry-storage: # 对这个Volumes进行设置,下一条命令中的--name所用的就是这个名字 | |
| Type: PersistentVolumeClaim (a reference to a PersistentVolumeClaim in the same namespace) | |
| ClaimName: registry-claim | |
| ReadOnly: false | |
| [root@master 2]# oc set volume dc/docker-registry --add --overwrite --name=registry-storage -t pvc --claim-name=train-registry-claim | |
| [root@master 2]# oc describe dc/docker-registry | grep -A8 Vol | |
| [root@master 2]# oc get pods |
3、Create OpenShift Enterprise projects
创建 OpenShift 企业项目
| On your OpenShift Enterprise instance create the following projects: | |
| 1、raleigh | |
| 2、lobster | |
| 3、farm | |
| 4、ditto | |
| 5、samples | |
| Additionally, configure the projects as follows: | |
| 1、For all of the projects, set the description to 'This is a DO280 project'; | |
| 2、Make joe the admin of project raleigh and ditto; | |
| 3、The user lene must be able to view the project raleigh but not administer or delete it; | |
| 4、Make lene the admin of projects farm,lobster and samples。 | |
| # 解题 | |
| [root@master 2]# oc whoami | |
| system:admin | |
| [root@master 2]# for i in raleigh lobster farm ditto samples;do oc new-project $i --description="This is a DO280 project";done | |
| [root@master 2]# for i in raleigh lobster farm ditto samples;do oc get project $i|grep -v ^NAME;done | |
| [root@master 2]# oc adm policy add-role-to-user admin joe -n raleigh | |
| [root@master 2]# oc adm policy add-role-to-user admin joe -n ditto | |
| [root@master 2]# oc adm policy add-role-to-user view lene -n raleigh | |
| [root@master 2]# oc adm policy add-role-to-user admin lene -n farm | |
| [root@master 2]# oc adm policy add-role-to-user admin lene -n lobster | |
| [root@master 2]# oc adm policy add-role-to-user admin lene -n samples | |
| 删除格式:oc adm policy remove-role-from-user <角色> <用户名> -n <项目> | |
| 删除示例:oc adm policy remove-role-from-user admin lene -n farm | |
| [root@master 2]# oc get rolebinding -n {farm | lobster...} |
4、Create an application from a Git repository
从 Git 存储库创建应用程序
| Use the S2I functionality of your OpenShift instance to build an application in the raleigh project | |
| 使用 OpenShift 实例的 S2I 功能在 raleigh 项目中构建应用程序 | |
| Use the Git repository at http://services.lab.example.com/php-helloworld for theapplication source | |
| 使用位于 http://services.lab.example.com/php-helloworld 的 Git 存储库作为应用程序源 | |
| 1、Use the Docker image labeled openshift/php:5.6; | |
| 使用标记为 openshift/php:5.6 的 Docker 镜像; | |
| 2、Once deployed, the application must be reachable(and browsable)at the following address: http://helloworld.raleigh.apps.lab.example.com; | |
| 部署后,应用程序必须可以通过以下地址访问http://... | |
| 3、Update the original repository so that the index.php file contains the text "This is a DO280 exam" instead of the word 'Hello, World! php version is'; | |
| 更新原始repository中的index.php文件内容,使其内容成为"This is a DO280 test",以替换原来的文字 | |
| 4、Trigger a rebuild so that when browsing http://helloworld.raleigh.apps.lab.example.com it will display the new text | |
| 触发重建,以便在浏览 http://helloworld.raleigh.apps.lab.example.com 时显示新文本 | |
| # 查看本地仓库是否有该镜像 | |
| [root@services ~]# docker-registry-cli services.lab.example.com [list all] | <[search IMAGE_NAME]> ssl | |
| [root@master ~]# oc get is -n openshift | grep php | |
| # 开始创建应用 | |
| 因为joe用户是raleigh项目的管理员,所以要切换用户,需要在master节点上操作 | |
| [root@master 2]# oc login -u joe | |
| [root@master 2]# oc project raleigh | |
| [root@master 2]# oc new-app openshift/php:5.6~http://services.lab.example.com/php-helloworld --name=hello # php:5.6是is地址 | |
| [root@master 2]# oc get build | |
| [root@master 2]# oc logs -f bc/hello | |
| 注:如果这里push出错,说明第二题registry永久卷配置错误,重置环境重做 | |
| # push后对raleigh项目的is验证 | |
| [root@master 2]# oc get is -n raleigh | grep hello | |
| hello docker-registry.default.svc:5000/raleigh/hello latest 20 minutes ago | |
| # 对push后的存储结果进行验证 | |
| [root@services ~]# ll /OCP_registry/docker/registry/v2/repositories/raleigh | |
| # 创建路由 | |
| [root@master 2]# oc get svc | |
| NAME TYPE CLUSTER-IP EXTERNAL-IP PORT(S) AGE | |
| hello ClusterIP 172.30.196.16 <none> 8080/TCP,8443/TCP 26m | |
| [root@master 2]# oc expose svc hello --hostname=helloworld.raleigh.apps.lab.example.com | |
| 注:helloworld.raleigh.apps.lab.example.com是题目中给定的 | |
| [root@master 2]# oc get route | |
| NAME HOST/PORT PATH SERVICES PORT TERMINATION WILDCARD | |
| hello helloworld.raleigh.apps.lab.example.com hello 8080-tcp None | |
| [root@master 2]# curl helloworld.raleigh.apps.lab.example.com | |
| Hello, World! php version is 5.6.25 | |
| # 更新源代码 | |
| [root@master 2]# cd | |
| [root@master ~]# git clone http://services.lab.example.com/php-helloworld | |
| [root@master ~]# cd php-helloworld/ | |
| [root@master php-helloworld]# vim index.php | |
| <?php | |
| print "This is a DO280 test\n"; | |
| ?> | |
| [root@master php-helloworld]# git add . | |
| [root@master php-helloworld]# git commit -m "xxx" | |
| [root@master php-helloworld]# git push | |
| # 手动触发rebuild | |
| [root@master php-helloworld]# oc start-build hello | |
| [root@master php-helloworld]# oc logs -f bc/hello | |
| [root@master php-helloworld]# curl helloworld.raleigh.apps.lab.example.com | |
| This is a DO280 test | |
| [root@master php-helloworld]# cd |
5、Create an application using Docker images and definition files
使用 Docker 映像和定义文件创建应用程序
| Using the example files from the wordpress directory under http://classroom.example.com/materials/exam/wordpress | |
| 使用 http://classroom.example.com/materials/exam/wordpress 下 wordpress 目录中的示例文件 | |
| 1、create a WordPress application in the farm project; | |
| 在farm项目中创建一个WordPress应用; | |
| 2、For permanent storage use the the NFS shares /OCP_wordpress and /OCP_mysql from services.lab.example.com | |
| 对于永久存储,使用来自 services.lab.example.com 的 NFS 共享 /OCP_wordpress 和 /OCP_mysql | |
| Use the files from http://classroom.example.com/materials/exam/wordpress for the volumes. | |
| 使用来自 http://classroom.example.com/materials/exam/wordpress 的文件作为卷 | |
| 3、For the WordPress pod,use the Docker image from http://classroom.example.com/materials/exam/wordpress/wordpress.tar; | |
| 对于WordPress pod,使用来自http://classroom.example.com/materials/exam/wordpress/wordpress.tar的Docker镜像; | |
| (Note: It is normal if the WordPress pod initially restarts a couple of times due to permission issues) | |
| (注意:如果 WordPress pod 最初重启几次是正常的,因为权限问题) | |
| 4、For the MySQL pod use the Docker image openshift3/mysql-55-rhel7; | |
| 对于MySQL pod,使用Docker镜像openshift3/mysql-55-rhel7; | |
| 5、Once deployed, the application must be reachable at the following address: http://shining.farm.apps.lab.example.com; | |
| 部署后,应用程序必须可访问以下地址:http://shining.farm.apps.lab.example.com; | |
| 6、Finally, complete the WordPress installation by setting lene as the admin user with password redhat and lene@master.lab.example.com for the email address; | |
| 最后完成WordPress的安装,设置lene为admin用户,密码为redhat,邮箱为lene@master.lab.example.com; | |
| 7、Set the blog name to do280 blog; | |
| 设置博客名称为do280 blog; | |
| 8、Create your first post with title "My first post"。The text in the post does not matter | |
| 创建您的第一篇标题为"My first post"的文章,文章中的文字无关紧要 | |
| farm项目的管理员是lene用户,所以要用lene用户并切换到farm中 | |
| [root@master ~]# oc login -u lene -p redhat | |
| [root@master ~]# oc project farm | |
| [root@master ~]# cd files/5 | |
| 先创建2个pv--> 2个pvc--->加载WP镜像-->创建MySQL的pod-->MySQL service-->创建WP的pod-->WP的service-->指向WP的service-->| | |
| 创建时需要是一个pv一个pvc,一个pv一个pvc的创建,如果统一把pv先创建完再统一创建pvc可能会匹配不上(混乱) | |
| [root@master 5]# mv pv-1.yaml pv-wp.yaml | |
| [root@master 5]# mv pv-2.yaml pv-mysql.yaml | |
| =================================================== | |
| [root@master 5]# vim pv-mysql.yaml | |
| apiVersion: v1 | |
| kind: PersistentVolume | |
| metadata: | |
| name: pv-mysql # 名字可自定义 | |
| spec: | |
| capacity: | |
| storage: 3Gi # 大小3G就够 | |
| accessModes: | |
| - ReadWriteMany # 访问模式写成ReadWriteMany | |
| persistentVolumeReclaimPolicy: Recycle | |
| nfs: | |
| server: services.lab.example.com | |
| path: /OCP_mysql | |
| [root@master 5]# vim pvc-mysql.yaml | |
| kind: PersistentVolumeClaim | |
| apiVersion: v1 | |
| metadata: | |
| name: claim-mysql | |
| spec: | |
| accessModes: | |
| - ReadWriteMany # 访问模式写成ReadWriteMany | |
| resources: | |
| requests: | |
| storage: 3Gi | |
| =================================================== | |
| [root@master 5]# vim pv-wp.yaml | |
| apiVersion: v1 | |
| kind: PersistentVolume | |
| metadata: | |
| name: pv-wordpress # 名字可自定义 | |
| spec: | |
| capacity: | |
| storage: 1Gi | |
| accessModes: | |
| - ReadWriteMany # 访问模式写成ReadWriteMany | |
| persistentVolumeReclaimPolicy: Recycle | |
| nfs: | |
| server: services.lab.example.com | |
| path: /OCP_wordpress | |
| [root@master 5]# vim pvc-wp.yaml | |
| kind: PersistentVolumeClaim | |
| apiVersion: v1 | |
| metadata: | |
| name: claim-wp | |
| spec: | |
| accessModes: | |
| - ReadWriteMany # 访问模式写成ReadWriteMany | |
| resources: | |
| requests: | |
| storage: 1Gi | |
| # 创建2个pvc | |
| [root@master 5]# oc create -f pvc-mysql.yaml | |
| [root@master 5]# oc create -f pvc-wp.yaml | |
| # 创建2个pv(切到集群管理员用户) | |
| [root@master 5]# oc login -u system:admin | |
| [root@master 5]# oc project farm | |
| [root@master 5]# oc create -f pv-mysql.yaml | |
| [root@master 5]# oc create -f pv-wp.yaml | |
| [root@master 5]# oc get pvc | |
| # 把镜像导入进来并推送到内部镜像仓库中 | |
| [root@master 5]# docker load -i wordpress.tar | |
| [root@master 5]# docker tag docker.io/wordpress:latest registry.lab.example.com/wordpress:latest | |
| [root@master 5]# docker push registry.lab.example.com/wordpress:latest # 第一次可查看hosts文件中的registry的地址 | |
| [root@master 5]# docker rmi -f 4ad4 | |
| # 搭建MySQL数据库的pod | |
| [root@master 5]# vim pod-mysql.yaml | |
| apiVersion: v1 | |
| kind: Pod | |
| metadata: | |
| name: mysql | |
| labels: | |
| name: mysql # 这个labels下面会用到 | |
| spec: | |
| containers: | |
| - resources: | |
| limits : | |
| cpu: 0.5 | |
| image: openshift3/mysql-55-rhel7 # 修改成提供的镜像 | |
| .... | |
| .... | |
| volumes: | |
| - name: mysql-persistent-storage | |
| persistentVolumeClaim: | |
| claimName: claim-mysql # 已对,如不对就按oc get pvc的名字修改(MySQL的pvc的名字) | |
| [root@master 5]# oc create -f pod-mysql.yaml | |
| [root@master 5]# oc get pods | |
| # 创建和MySQL对应的service | |
| [root@master 5]# vim service-mysql.yaml | |
| .... | |
| .... | |
| selector: | |
| name: mysql # 需要和上面的labels匹配(pod名) | |
| [root@master 5]# oc create -f service-mysql.yaml | |
| [root@master 5]# oc get svc | |
| # 创建WordPress的pod | |
| [root@master 5]# vim pod-wordpress.yaml | |
| apiVersion: v1 | |
| kind: Pod | |
| metadata: | |
| name: wordpress | |
| labels: | |
| name: wordpress | |
| spec: | |
| containers: | |
| - image: wordpress # 默认是到内部镜像仓库中找镜像,该镜像是用docker load导入进来后push到内部仓库的所以这里不用修改 | |
| .... | |
| .... | |
| - name: WORDPRESS_DB_HOST | |
| # this is the name of the mysql service fronting the mysql pod in the same namespace | |
| # expands to mysql.<namespace>.svc.cluster.local - where <namespace> is the current namespace | |
| value: mysql.farm.svc.cluster.local # 上面有说明 | |
| # 创建scc | |
| [root@master 5]# oc login -u system:admin # 很重要的一步 | |
| [root@master 5]# oc adm policy add-scc-to-user anyuid -z default -n farm # 很重要的一步 | |
| 释义: | |
| 给farm项目中的default默认的用户,这个默认的用户不管是什么名字就是执行程序的serviceaccount | |
| 换言之,有时要自己起一个serviceaccount名字,例如执行程序的时候不是root用户,我就给它起个名字, | |
| 例如叫xiaoming,我可以用oc adm policy add-scc-to-user anyuid -z xiaoming -n farm | |
| 但是现在我不想知道这个程序中他到底起了什么名字,也不想去查了,你不管用什么名字,我就用default来代替来统称 | |
| [root@master 5]# oc login -u lene | |
| [root@master 5]# oc create -f pod-wordpress.yaml | |
| [root@master 5]# oc get pods | |
| NAME READY STATUS RESTARTS AGE | |
| mysql 1/1 Running 0 19m | |
| wordpress 1/1 Running 2 3m | |
| # 给wp创建一个服务 | |
| [root@master 5]# vim service-wp.yaml # 不用修改,默认即可 | |
| [root@master 5]# oc create -f service-wp.yaml | |
| [root@master 5]# oc get svc | |
| NAME TYPE CLUSTER-IP EXTERNAL-IP PORT(S) AGE | |
| mysql ClusterIP 172.30.139.14 <none> 3306/TCP 12m | |
| wpfrontend LoadBalancer 172.30.140.86 172.29.227.62,172.29.227.62 80:32247/TCP 2s | |
| # 给wp的service创建路由 | |
| [root@master 5]# oc expose svc wpfrontend --hostname=shining.farm.apps.lab.example.com | |
| 注:wpfrontend是svc的名字,--hostname是题目中给定的 | |
| [root@master 5]# oc get route | |
| NAME HOST/PORT PATH SERVICES PORT TERMINATION WILDCARD | |
| wpfrontend shining.farm.apps.lab.example.com wpfrontend 80 None | |
| 去workstations图形化中操作.... |
6、Create an application with a secure edgeterminated route
创建具有 secure edge-terminate路由的应用程序
| Create an application greeter in the project samples, which uses the Docker image | |
| registry.lab.example.com/openshift/hello-openshift so that it is reachable at the following address only: https://greeter.samples.apps.lab.example.com | |
| (Note you can use the script http://classroom.example.com/materials/exam/cert/gencert.sh to generate the necessary certificate files) | |
| 在samples项目中创建一个应用greeter,它使用registry.lab.example.com/openshift/hello-openshift镜像,应用可以通过: https://greeter.samples.apps.lab.example.com访问 | |
| (请注意, 请使用/files/6/gencert.sh 创建必要的证书文件) | |
| lene用户是samples项目的管理员 | |
| [root@master 5]# cd ../6/ | |
| [root@master 6]# oc login -u lene | |
| [root@master 6]# oc project samples | |
| [root@master 6]# oc new-app --docker-image=registry.lab.example.com/openshift/hello-openshift --name=greeter | |
| [root@master 6]# oc get pods | |
| [root@master 6]# oc get svc | |
| [root@master 6]# bash gencert.sh greeter | |
| [root@master 6]# oc create route edge --help | |
| [root@master 6]# oc create route edge \ | |
| --cert=greeter.crt \ | |
| --key=greeter.key \ | |
| --service=greeter \ | |
| --hostname=greeter.samples.apps.lab.example.com | |
| [root@master 6]# oc get route | |
| NAME HOST/PORT PATH SERVICES PORT TERMINATION WILDCARD | |
| greeter greeter.samples.apps.lab.example.com greeter 8080-tcp edge None | |
| [root@master 6]# cd | |
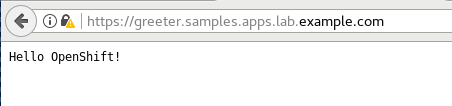
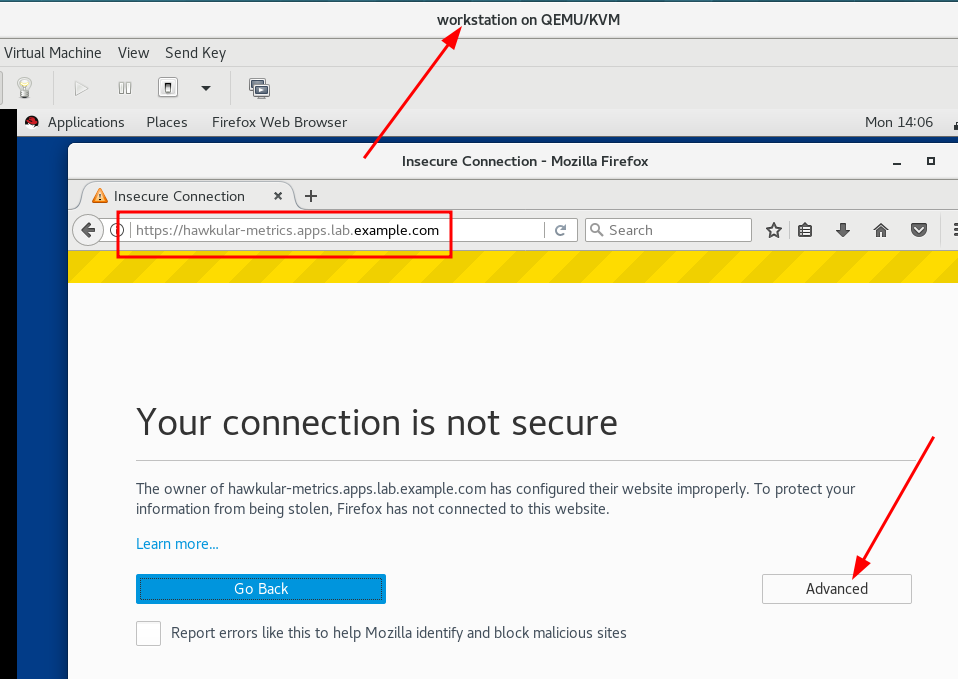
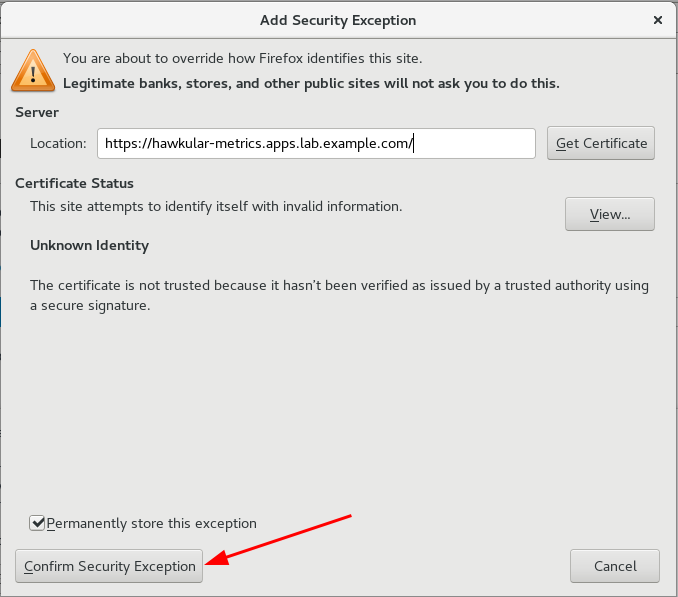
| 注:在workstation访问HOST/PORT列的地址,https://greeter.samples.apps.lab.example.com | |
| 然后点击Advanced---Add Exception---Confirm Security Exception---看到最终的结果是Hello OpenShift! |
7、Configure OpenShift quotas for a project
为openshift的一个项目配置quotas
| Configure quotas and limits for project lobster so that: | |
| 为lobster项目配置quotas 和 limits: | |
| The ResourceQuota resource is named do280-quota | |
| ResourceQuota资源名为do280-quota | |
| 1、The amount of memory consumed across all containers may not exceed 1Gi; | |
| 所有容器内存消耗不能超过1Gi | |
| 2、The total amount of CPU usage consumed across all containers may not exceed 2 Kubernetes compute units; | |
| 所有容器消耗的CPU使用总量不得超过2个Kubernetes计算单元; | |
| 3、The maximum number of replication controllers does not exceed 3 The maximum number of pods does not exceed 3; | |
| ReplicationControllers和Pod数量都不能超过3个; | |
| 4、The maximum number of services does not exceed 6 | |
| Services不能超过6个 | |
| The LimitRange resource is named do280-limits | |
| LimitRange资源名: do280-limits | |
| 1、The amount of memory consumed by a single pod is between 5Mi and 300Mi; | |
| 单个pod内存用量在5Mi-300Mi | |
| 2、The amount of memory consumed by a single container is between 5Mi and 300Mi with a default request value of 100Mi; | |
| 单个容器消耗的内存量在5Mi-300Mi之间,默认请求值为100Mi; | |
| 3、The amount of cpu consumed by a single pod is between 10m and 500m; | |
| 单个pod消耗的cpu量在10m-500m之间; | |
| 4、The amount of cpu consumed by a single container is between 10m and 500m with a default request value of 100m | |
| 单个容器消耗的cpu量在10m-500m之间,默认请求值为100m | |
| 注:配置quota必须要有集群管理员,项目管理员无权限做 | |
| [root@master 6]# cd | |
| [root@master ~]# oc login -u system:admin | |
| [root@master ~]# oc project lobster | |
| [root@master ~]# vim do280-quota.yaml | |
| apiVersion: v1 | |
| kind: ResourceQuota | |
| metadata: | |
| name: do280-quota # ResourceQuota资源名 | |
| spec: | |
| hard: | |
| services: "6" # Services不能超过6个 | |
| pods: "3" # Pods不能超过3个 | |
| limits.cpu: "2" # CPU用量最多2Kubernetes units | |
| limits.memory: 1Gi # 所有容器内存消耗不能超过1Gi | |
| replicationcontrollers: "3" # RC最大不能超过3个 | |
| [root@master ~]# oc create -f do280-quota.yaml | |
| [root@master ~]# oc describe quota -n lobster | |
| # 为lobster项目创建limits | |
| [root@master ~]# vim do280-limits.yaml | |
| kind: "LimitRange" | |
| metadata: | |
| name: "do280-limits" | |
| spec: | |
| limits: | |
| - type: "Pod" | |
| max: | |
| cpu: "500m" | |
| memory: "300Mi" | |
| min: | |
| cpu: "10m" | |
| memory: "5Mi" | |
| - type: "Container" | |
| max: | |
| cpu: "500m" | |
| memory: "300Mi" | |
| min: | |
| cpu: "10m" | |
| memory: "5Mi" | |
| defaultRequest: | |
| cpu: "100m" | |
| memory: "100Mi" | |
| [root@master ~]# oc create -f do280-limits.yaml | |
| [root@master ~]# oc describe limitrange |
8、Create an application from a third party template
从第三方模板创建应用程序
| On master.lab.example.com using the template file in http://classroom.example.com/materials/exam/gogs as a basis, install an application in the ditto project according to the following requirements: | |
| 在master.lab.example.com上使用http://classroom.example.com/materials/exam/gogs中的模板文件(gogs-template.yaml),在ditto项目中安装一个应用,基于如下要求: | |
| ⚫ All of the registry entries must point to your local registry at registry.lab.example.com。The version in the ImageStream line for the postgresql image must be changed from postgresql:9.2 to postgresql:9.5; | |
| 所有registry都必须指向您在registry.lab.example.com的本地registry,ImageStream中的postgresql image版本必须从 postgresql:9.2更改为postgresql:9.5 | |
| ⚫ for the Gogs pod,use the Docker image from http://classroom.example.com/materials/exam/gogs/gogs.tar and make sure it is tagged as registry.lab.example.com/openshiftdemos/gogs:0.9.97 and pushed to your local registry vm; | |
| gogs pod的镜像来自于http://classroom.example.com/materials/exam/gogs.tar的Docker镜像,并确保它的tag改为registry.lab.example.com/openshiftdemos/gogs:0.9.97,并推送到registry中 | |
| ⚫ Make the template gogs available across all projects and for all users; | |
| 使模板gogs可用于所有项目和所有用户(就是导入到openshift项目中才可以) | |
| ⚫ Deploy the application using the template, setting the parameter HOSTNAME to gogs.ditto.apps.lab.example.com; | |
| 使用模板部署应用,设置参数HOSTNAME为gogs.ditto.apps.lab.example.com; | |
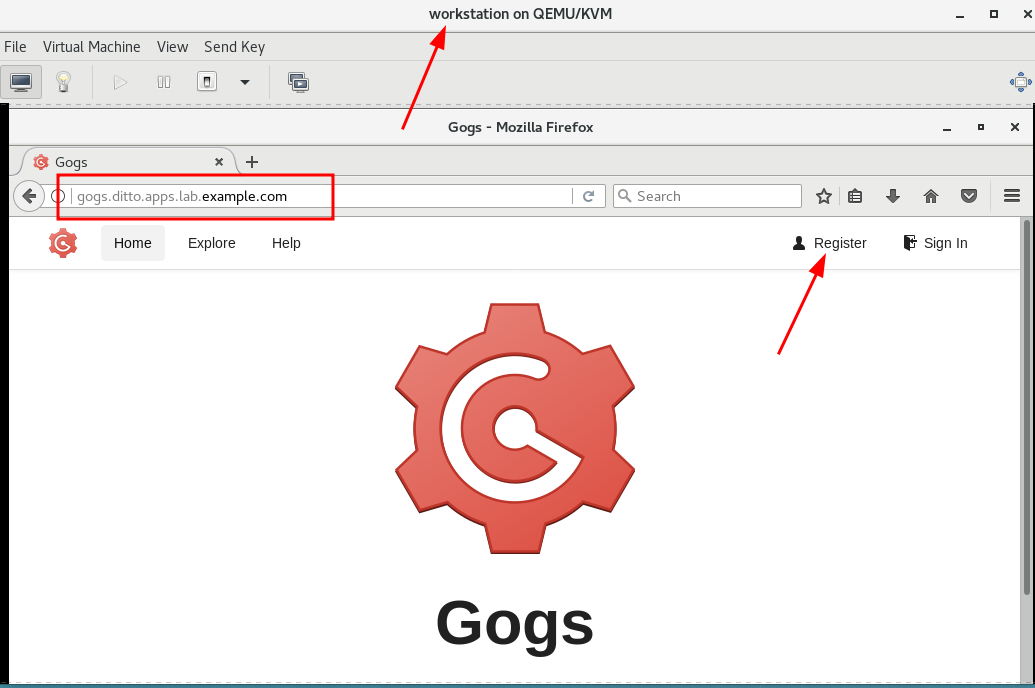
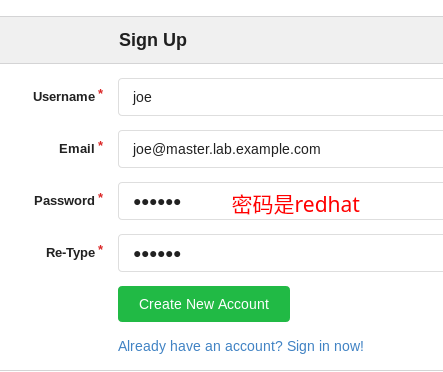
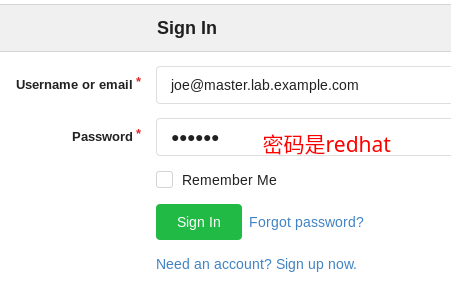
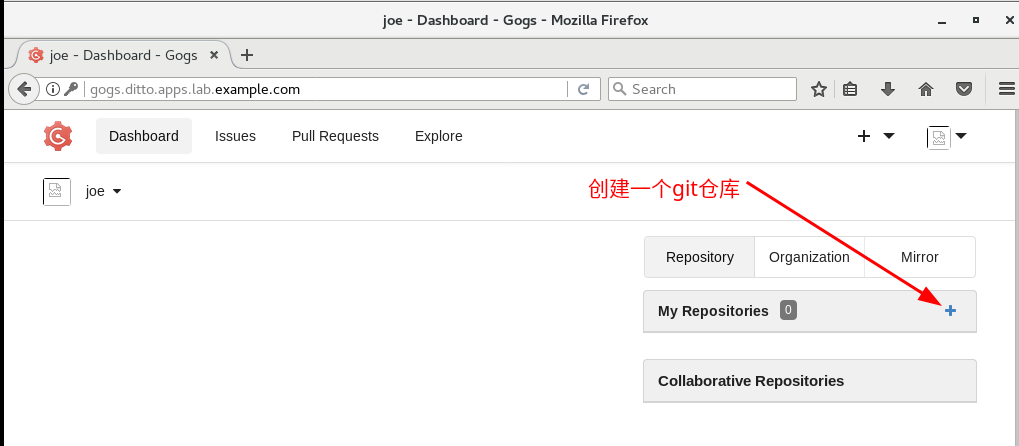
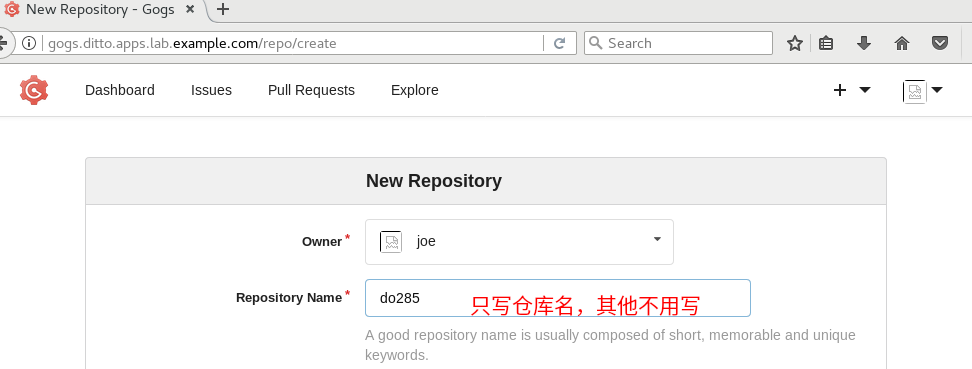
| ⚫ Create a user joe with password redhat and email address joe@master.lab.example.com on the application frontend (use the Register link on the top right of the page at http://gogs.ditto.apps.lab.example.com) and, as this user, create a Git repository named do280; | |
| 在应用程序前端创建用户joe使用密码redhat和电子邮件地址joe@master.lab.example.com,(使用页面右上角的注册链接http://gogs.ditto.apps.lab.example.com)并以此用户身份创建一个名为do280的Git存储库; | |
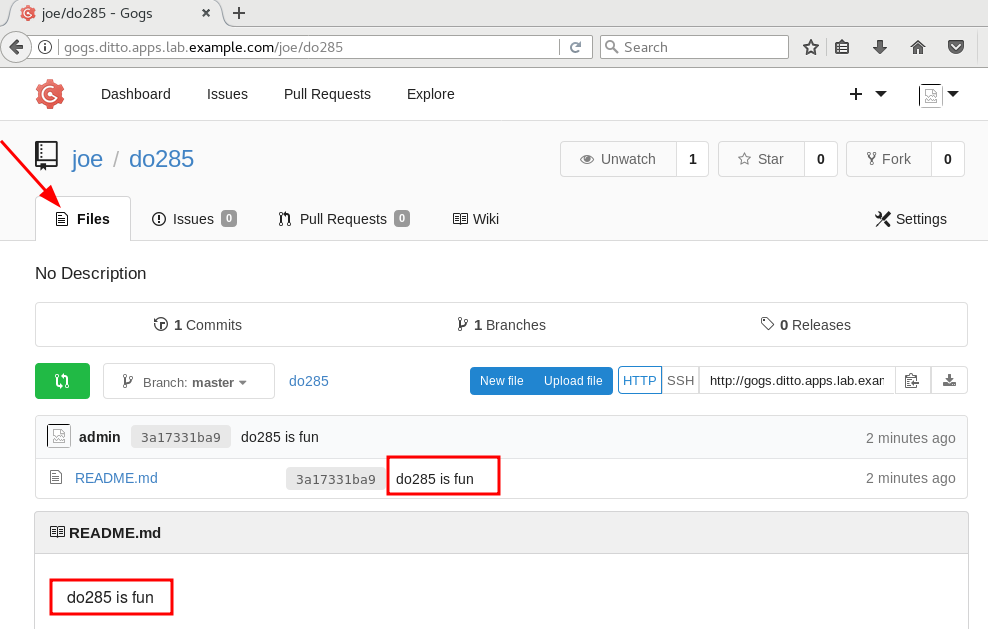
| ⚫ If there isn't one already, create a file named README.md in the repository do280 and put the line "do280 is fun" in it and commit it; | |
| 如果还没有,请在存储库do280中创建一个名为README.md的文件,并将"do280 is fun"行放入其中并提交; | |
| ⚫The repository must be visible and accessible | |
| 存储库必须可见且可访问 | |
| # 授权 SCC | |
| [root@master ~]# oc login -u system:admin | |
| [root@master ~]# oc adm policy add-scc-to-user anyuid -z default -n ditto | |
| [root@master ~]# docker load -i ~/files/8/gogs.tar | |
| [root@master ~]# docker images | |
| [root@master ~]# docker tag docker.io/openshiftdemos/gogs:latest registry.lab.example.com/openshiftdemos/gogs:0.9.97 | |
| [root@master ~]# docker push registry.lab.example.com/openshiftdemos/gogs:0.9.97 | |
| [root@master ~]# docker rmi -f 3ca | |
| # 查看是否上传到了内部镜像仓库 | |
| [root@services ~]# ll /var/lib/registry/docker/registry/v2/repositories/openshiftdemos | |
| # 在本地仓库验证 | |
| [student@workstation ~]$ docker-registry-cli registry.lab.example.com search gogs ssl | |
| [student@workstation ~]$ docker-registry-cli registry.lab.example.com search postgresql ssl | |
| # 查看is中是否有,如有、在下面模板文件中可直接使用镜像名,如无、则需要写完整地址 | |
| [root@master ~]# oc get is -n openshift| grep gogs | |
| [root@master ~]# oc get is -n openshift| grep pos | |
| postgresql docker-registry.default.svc:5000/openshift/postgresql 9.5,9.2,9.4 + 1 more... 2 weeks ago | |
| # 按题意修改模板(使用system:admin用户) | |
| [root@master ~]# oc project ditto | |
| [root@master ~]# vim files/8/gogs-template.yaml | |
| .... | |
| .... | |
| - kind: DeploymentConfig | |
| apiVersion: v1 | |
| metadata: | |
| annotations: | |
| description: Defines how to deploy the database | |
| name: ${APPLICATION_NAME}-postgresql | |
| .... | |
| image: 'rhscl/postgresql-95-rhel7' # workstation上用docker-registry-cli搜索出来的 | |
| .... | |
| triggers: | |
| - imageChangeParams: | |
| automatic: true | |
| containerNames: | |
| - postgresql | |
| from: | |
| kind: ImageStreamTag | |
| name: postgresql:9.5 # 考试中这里是9.2,需要改成9.5,练习中不用动 | |
| .... | |
| .... | |
| - kind: DeploymentConfig | |
| apiVersion: v1 | |
| metadata: | |
| labels: | |
| app: ${APPLICATION_NAME} | |
| .... | |
| spec: | |
| serviceAccountName: ${APPLICATION_NAME} | |
| containers: | |
| - image: "registry.lab.example.com/openshiftdemos/gogs:0.9.97" # 改镜像地址,因为is中无,所以写完整地址 | |
| .... | |
| .... | |
| - kind: ImageStream | |
| apiVersion: v1 | |
| metadata: | |
| labels: | |
| app: ${APPLICATION_NAME} | |
| name: ${APPLICATION_NAME} | |
| spec: | |
| tags: | |
| - name: "${GOGS_VERSION}" | |
| from: | |
| kind: DockerImage | |
| # 将自带的docker.io改为registry.lab.example.com | |
| name: registry.lab.example.com/openshiftdemos/gogs:${GOGS_VERSION} | |
| .... | |
| .... | |
| parameters: | |
| name: HOSTNAME | |
| required: true | |
| value: gogs.ditto.apps.lab.example.com # 就是待会创建好后的路由 | |
| # 因为只有集群管理员才能往openshift项目中上传模板所以需要使用system:admin用户登录到集群(openshift项目中的所有模板所有用户都能使用) | |
| [root@master ~]# oc login -u system:admin | |
| [root@master ~]# oc create -f files/8/gogs-template.yaml -n openshift | |
| [root@master ~]# oc get template -n openshift | grep gogs | |
| [root@master ~]# oc login -u joe -p redhat | |
| [root@master ~]# oc project ditto | |
| [root@master ~]# oc process openshift//gogs | oc create -f - # 普通用户不能处理openshift中的模板,要加上//才能 | |
| [root@master ~]# oc get pods | |
| [root@master ~]# oc get route | |
| NAME HOST/PORT PATH SERVICES PORT TERMINATION WILDCARD | |
| gogs gogs.ditto.apps.lab.example.com gogs <all> None | |
| 在 workstation 上进行网页访问,或者 添加 hosts 映射在 foundation0 上进行访问。http://gogs.ditto.apps.lab.example.com/ |
| [root@master ~]# mkdir test && cd test | |
| [root@master test]# echo "do280 is fun" >> README.md | |
| [root@master test]# git init | |
| [root@master test]# git add README.md | |
| [root@master test]# git commit -m "do280 is fun" | |
| [root@master test]# git remote add origin http://gogs.ditto.apps.lab.example.com/joe/do280.git | |
| [root@master test]# git push -u origin master | |
| Username for 'http://gogs.ditto.apps.lab.example.com': 用户名是joe | |
| Password for 'http://joe@gogs.ditto.apps.lab.example.com': 密码是redhat |
9、Scale an application
| Scale the application greeter in the project samples to a total of 5 replicas | |
| [root@master test]# oc login -u lene # 如要输入密码则是redhat | |
| [root@master test]# oc project samples | |
| [root@master test]# oc get dc | |
| NAME REVISION DESIRED CURRENT TRIGGERED BY | |
| greeter 1 1 1 config,image(greeter:latest) | |
| [root@master test]# oc scale --replicas=5 dc/greeter | |
| [root@master test]# oc get pods |
10、Install OpenShift metrics
| On workstation.lab.example.com install the OpenShift Metrics component with the following requirements: | |
| 在workstation.lab.example.com上安装具有以下要求的OpenShift Metrics组件: | |
| ⚫ Use the storage /OCP_metrics for cassandra storage。You can use the files on http://classroom.example.com/materials/exam/metrics for the pv sample; | |
| cassandra存储使用存储/OCP_metrics,pv示例可使用http://classroom.example.com/materials/exam/metrics上的文件;(可参考files/10中pv样例文件) | |
| ⚫ Use the file /home/student/DO280/labs/installmetrics/host for the inventory。Use the playbook /usr/share/ansible/openshiftansible/playbooks/openshiftmetrics/config.yml for the installation; | |
| 使用/home/student/DO280/labs/install-metrics/目录中的inventory文件。 | |
| playbook在/usr/share/ansible/openshiftansible/playbooks/openshiftmetrics/config.yml; | |
| ⚫ Use the following environment variables: | |
| 使用以下环境变量: | |
| openshift_metrics_image_version=v3.9 | |
| openshift_metrics_heapster_requests_memory=300M | |
| openshift_metrics_hawkular_requests_memory=750M | |
| openshift_metrics_cassandra_requests_memory=750M | |
| openshift_metrics_cassandra_storage_type=pv | |
| openshift_metrics_cassandra_pvc_size=5Gi | |
| openshift_metrics_cassandra_pvc_prefix=metrics | |
| openshift_metrics_install_metrics=True | |
| [root@master ~]# oc login -u system:admin | |
| [root@master ~]# vim files/10/sample-pv.yml | |
| apiVersion: v1 | |
| kind: PersistentVolume | |
| metadata: | |
| name: metrics # 名字要改 | |
| spec: | |
| capacity: | |
| storage: 5Gi | |
| accessModes: | |
| - ReadWriteOnce # 只能是Once | |
| nfs: | |
| path: /OCP_metrics # 共享要改 | |
| server: services.lab.example.com # 共享要改 | |
| persistentVolumeReclaimPolicy: Recycle | |
| [root@master test]# oc create -f files/10/sample-pv.yml | |
| [root@master test]# oc get pv | grep metrics | |
| # 切换机器 | |
| [root@foundation0 ~]# ssh student@workstation | |
| [student@workstation ~]# cd DO280/labs/install-metrics/ | |
| [student@workstation install-metrics]# vim inventory # 追加到该文件中以下内容 | |
| openshift_metrics_image_version=v3.9 | |
| openshift_metrics_heapster_requests_memory=300M | |
| openshift_metrics_hawkular_requests_memory=750M | |
| openshift_metrics_cassandra_requests_memory=750M | |
| openshift_metrics_cassandra_storage_type=pv | |
| openshift_metrics_cassandra_pvc_size=5Gi | |
| openshift_metrics_cassandra_pvc_prefix=metrics | |
| openshift_metrics_install_metrics=True | |
| openshift_metrics_image_prefix=registry.lab.example.com/openshift3/ose- # 该文件中有示例,简单修改/复制即可 | |
| [student@workstation install-metrics]# ansible-playbook -i inventory /usr/share/ansible/openshift-ansible/playbooks/openshift-metrics/config.yml | |
| # 切换到master节点 | |
| [root@master ~]# oc project openshift-infra | |
| [root@master ~]# oc get pods | |
| [root@master ~]# oc get route | |
| NAME HOST/PORT PATH SERVICES PORT TERMINATION WILDCARD | |
| hawkular-metrics hawkular-metrics.apps.lab.example.com hawkular-metrics <all> reencrypt None | |
| 在workstations上用浏览器访问 https://hawkular-metrics.apps.lab.example.com,看到老鹰头即算成功 |


![[前端原生技术]jsonp](https://img-blog.csdnimg.cn/direct/6e7769f7412c4671a8ea4f04f046a410.png)