.Net的OpenId Connect和OAuth 2.0协议实现的框架最新版是Duende.IdentityServer,用于公司要收费(最便宜1500USD一年可以授权管理5个客户端,每增加一个客户端就要加300USD),用于个人免费(年收入低于100W美元的公司也可以申请免费使用)。这里我们为了省去一些麻烦就使用之前的免费版本(IdentityServer4)来做演示,两者的代码差异不大,你用IdentityServer4也可以升级为Duende.IdentityServer,升级参考链接IdentityServer4 v4.1 to Duende IdentityServer v6。
首先创建一个Web项目,我这里创建一个空的Web项目,项目名称为IdentityServer用于管理验证和授权。
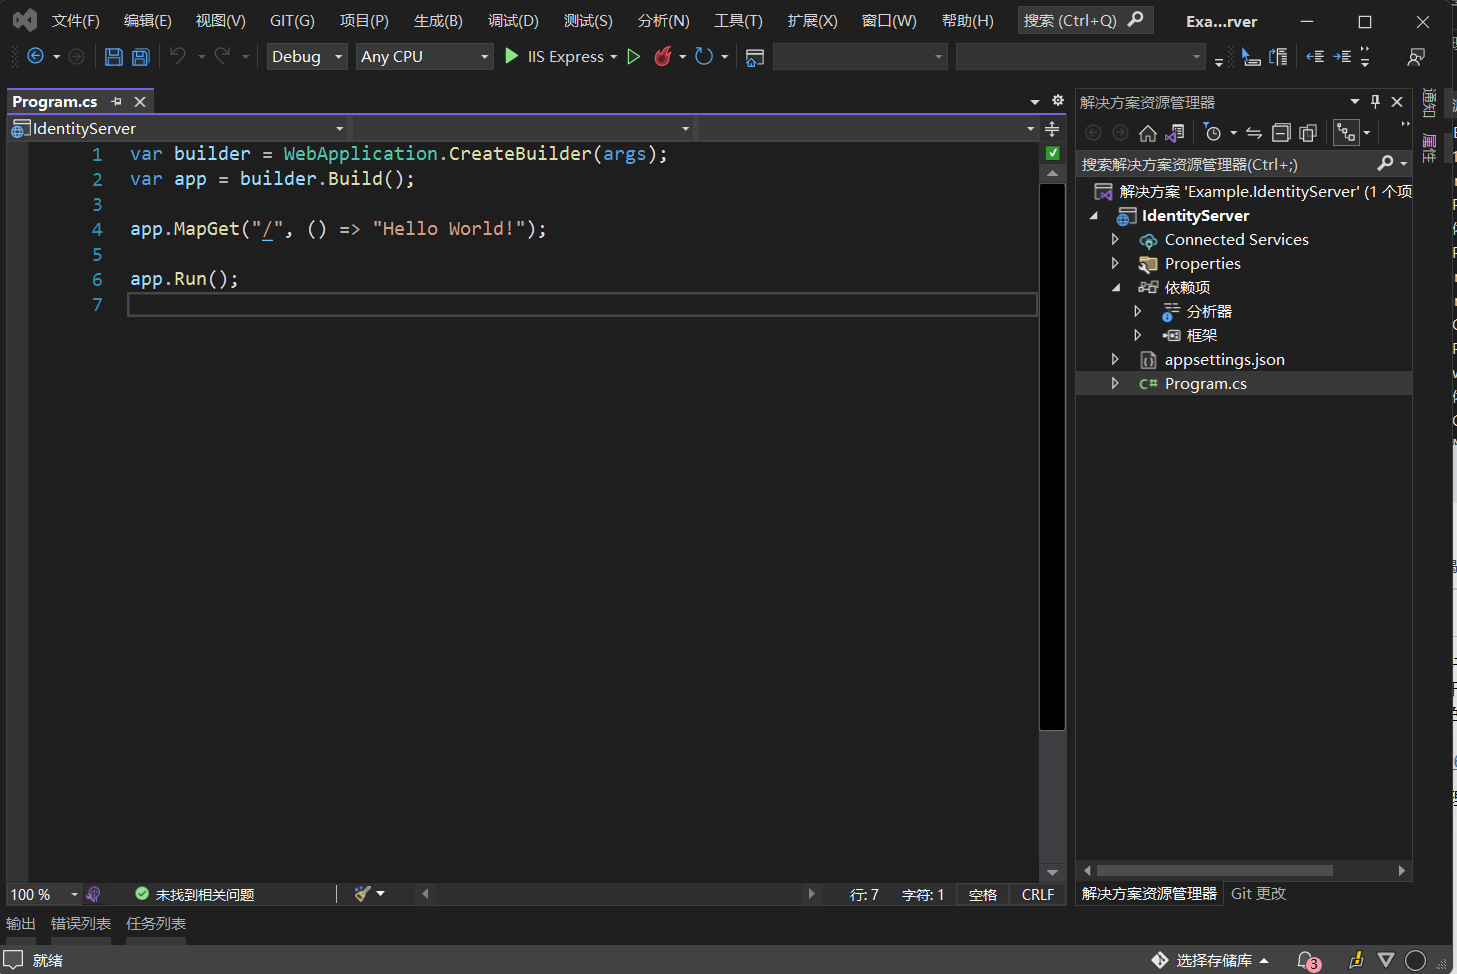
接下来添加IdentityServer4的Nuget包,然后去GitHub把官方演示程序整个下载下来Github链接,我们把wwwroot、Quickstart、Views三个文件夹复制到我们的项目里,然后在改写一下Program文件的代码。
只下载需要的那三个文件夹的代码如下:
// 在IdentityServer项目所在文件夹打开PowerShell执行如下命令
iex ((New-Object System.Net.WebClient).DownloadString('https://raw.githubusercontent.com/IdentityServer/IdentityServer4.Quickstart.UI/main/getmain.ps1'))
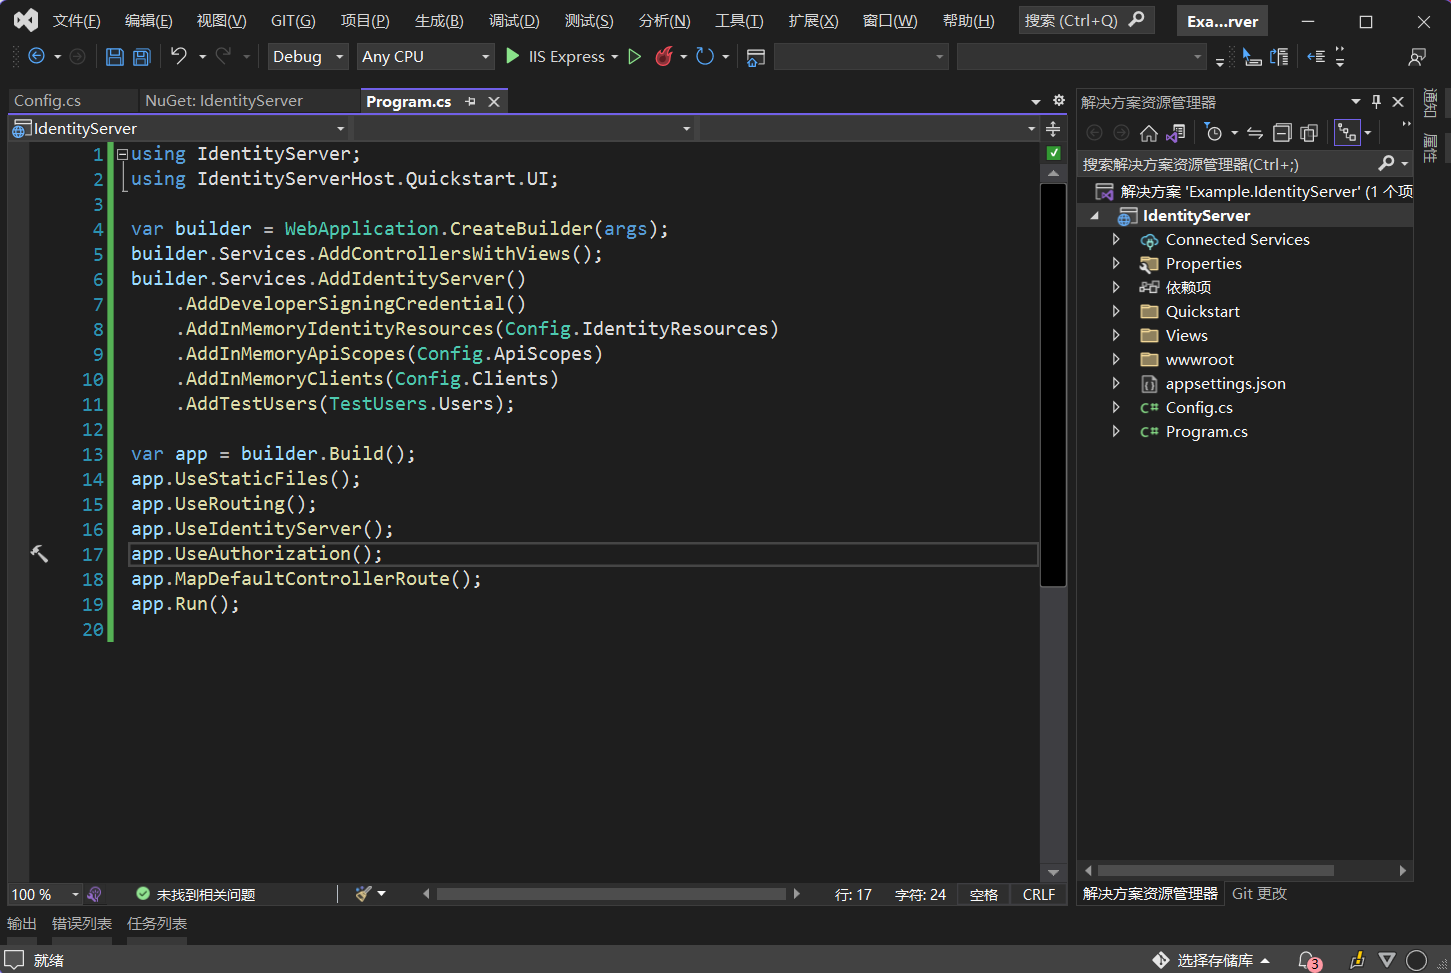
这里多了一个Config文件,内容如下:
using IdentityServer4.Models;

namespace IdentityServer
{
    public class Config
    {
        public static IEnumerable<ApiScope> ApiScopes => new List<ApiScope>
        {
        };

        public static IEnumerable<Client> Clients => new List<Client>
        {
        };

        public static IEnumerable<IdentityResource> IdentityResources => new List<IdentityResource>
        {
        };
    }
}
接下来我们再添加一个webApp项目并添加Microsoft.AspNetCore.Authentication.OpenIdConnect的Nuget包,改写Program文件代码如下:
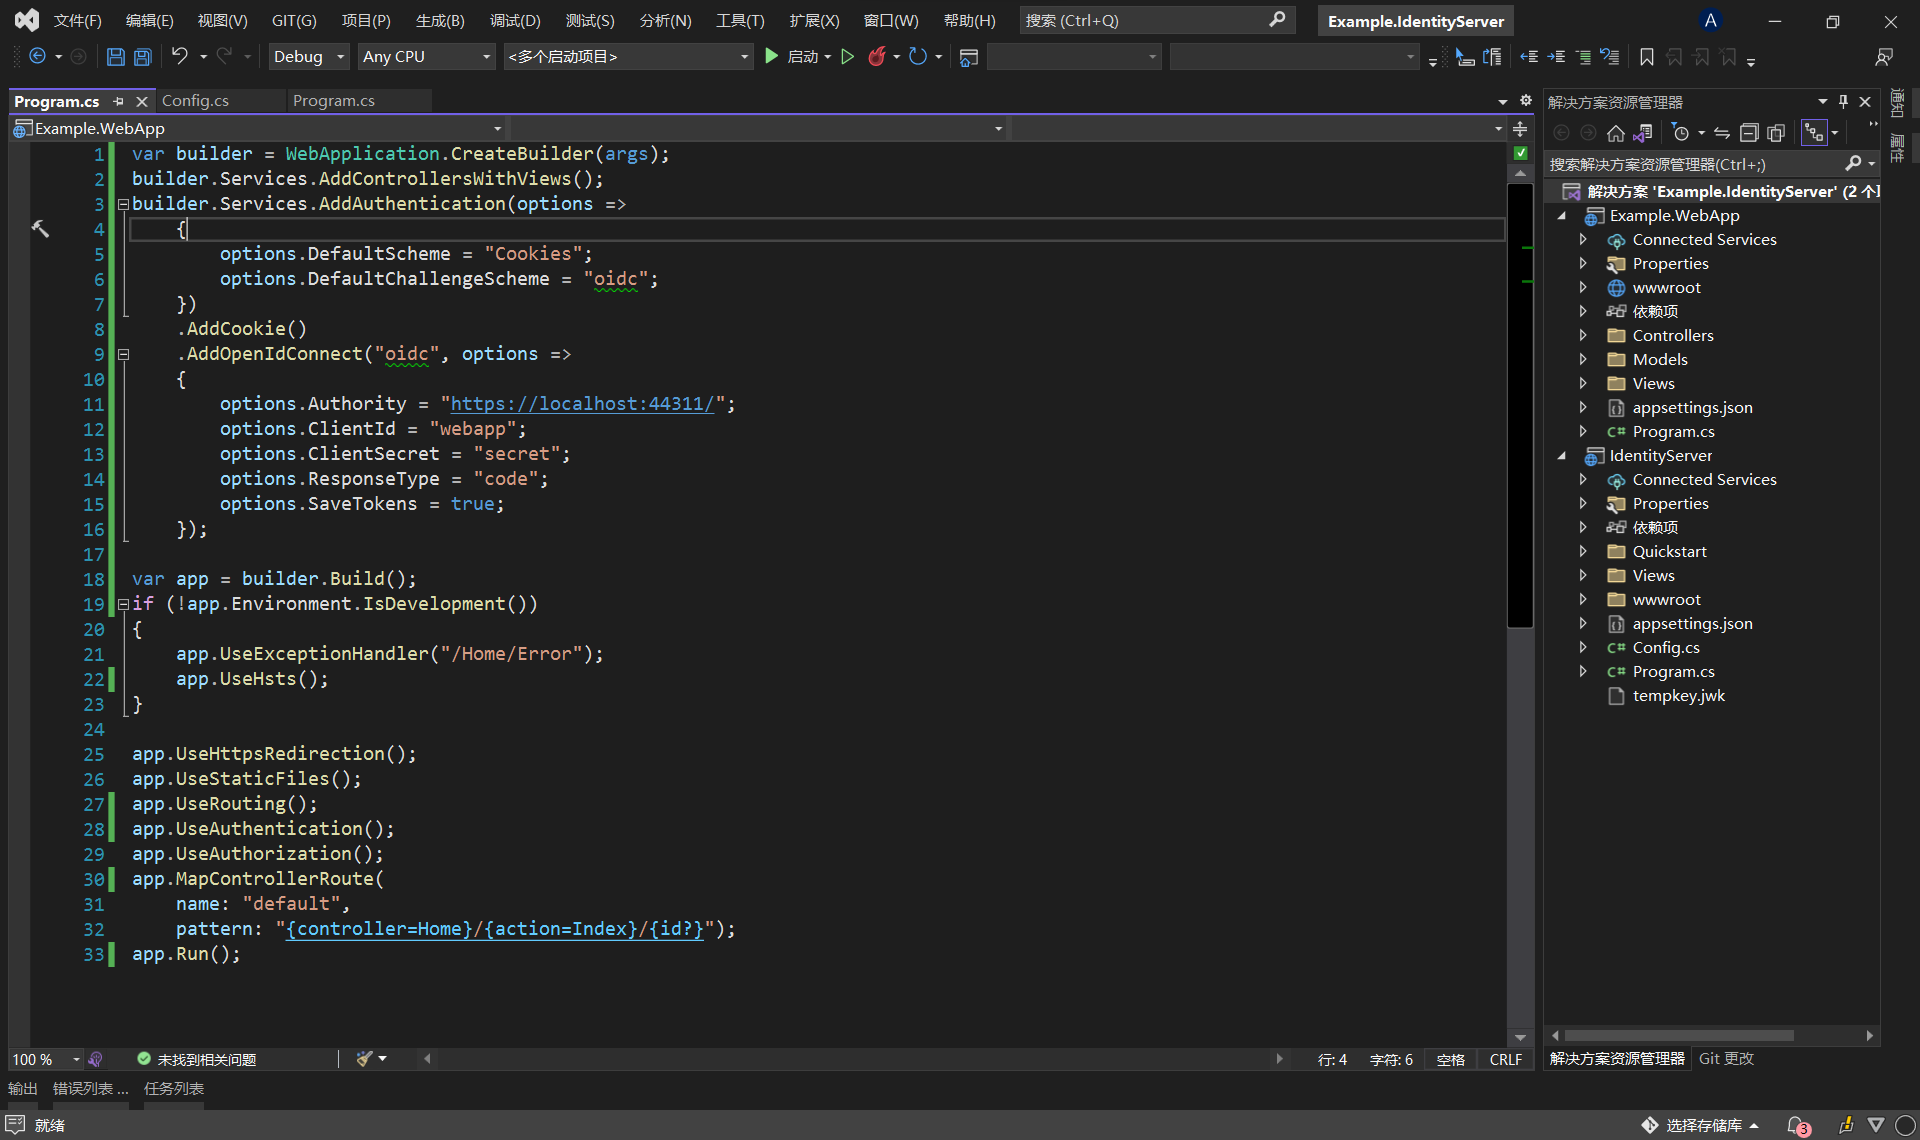
配置项里的Authority就是需要跳转到OpenId Connect的授权服务地址,ClientId可以理解为用户名,Client Secret可以理解为密码。
我们在WebApp项目的HomeController打个[Authorize],然后浏览器打开WebApp的地址会跳转到IdentityServer项目的错误页面。
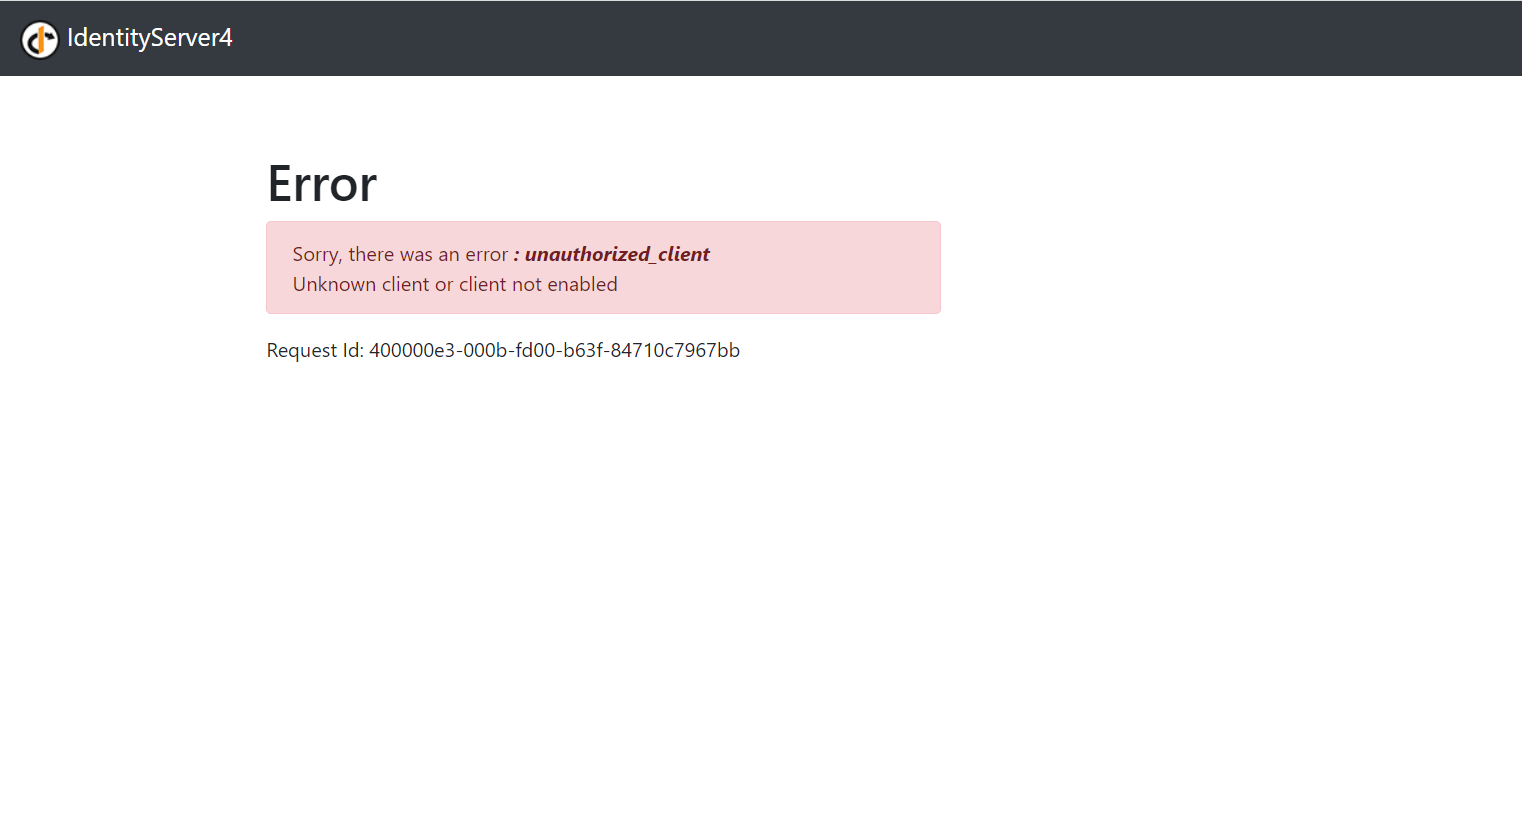
这个错误表示还没给IdentityServer项目配置Client,我们来配置一下,修改Config文件,代码如下:
using IdentityServer4;
using IdentityServer4.Models;

namespace IdentityServer
{
    public class Config
    {
        public static IEnumerable<ApiScope> ApiScopes => new List<ApiScope>
        {
        };

        public static IEnumerable<Client> Clients => new List<Client>
        {
            new Client
            {
                ClientId = "webapp",
                ClientSecrets = { new Secret("secret".Sha256()) },
                AllowedGrantTypes = GrantTypes.Code,
                RedirectUris = { "https://localhost:44381/signin-oidc" },
                PostLogoutRedirectUris = { "https://localhost:44381/signout-callback-oidc" },
                AllowedScopes =
                {
                     IdentityServerConstants.StandardScopes.OpenId,
                     IdentityServerConstants.StandardScopes.Profile,
                }

            }
        };

        public static IEnumerable<IdentityResource> IdentityResources => new List<IdentityResource>
        {
            new IdentityResources.OpenId(),
            new IdentityResources.Profile()
        };
    }
}
这时在浏览WebApp项目就会跳转到登录页面,用户名密码都是bob,登录后就会跳转到首页。bob这个用户是写死在TestUsers这个文件的可以自行修改。
接下来我们修改一下WebApp项目的Home/Index文件,修改后如下
@using Microsoft.AspNetCore.Authentication

@{
    ViewData["Title"] = "Home Page";
}

<div style="word-wrap:break-word;">
    <h2>Cliams</h2>
    <dl>
        @foreach (var claim in User.Claims)
        {
            <dt>@claim.Type</dt>
            <dd>@claim.Value</dd>
        }
    </dl>
    <h2>Properties</h2>
    <dl>
        @foreach (var prop in (await Context.AuthenticateAsync()).Properties.Items)
        {
            <dt>@prop.Key</dt>
            <dd>@prop.Value</dd>
        }
    </dl>
</div>
在新建一个Account控制器,增加一个Action,退出登录用,代码如下
using Microsoft.AspNetCore.Mvc;

namespace Example.WebApp.Controllers
{
    public class AccountController : Controller
    {
        public IActionResult Logout()
        {
            return SignOut("Cookies", "oidc");
        }
    }
}
在修改一下_Layout页面新增一个退出功能:

现在我们登录会看到WebApp首页多了一些数据,但是Claim有些名称显示的太长了看着不友好,我们修改代码调整一下:
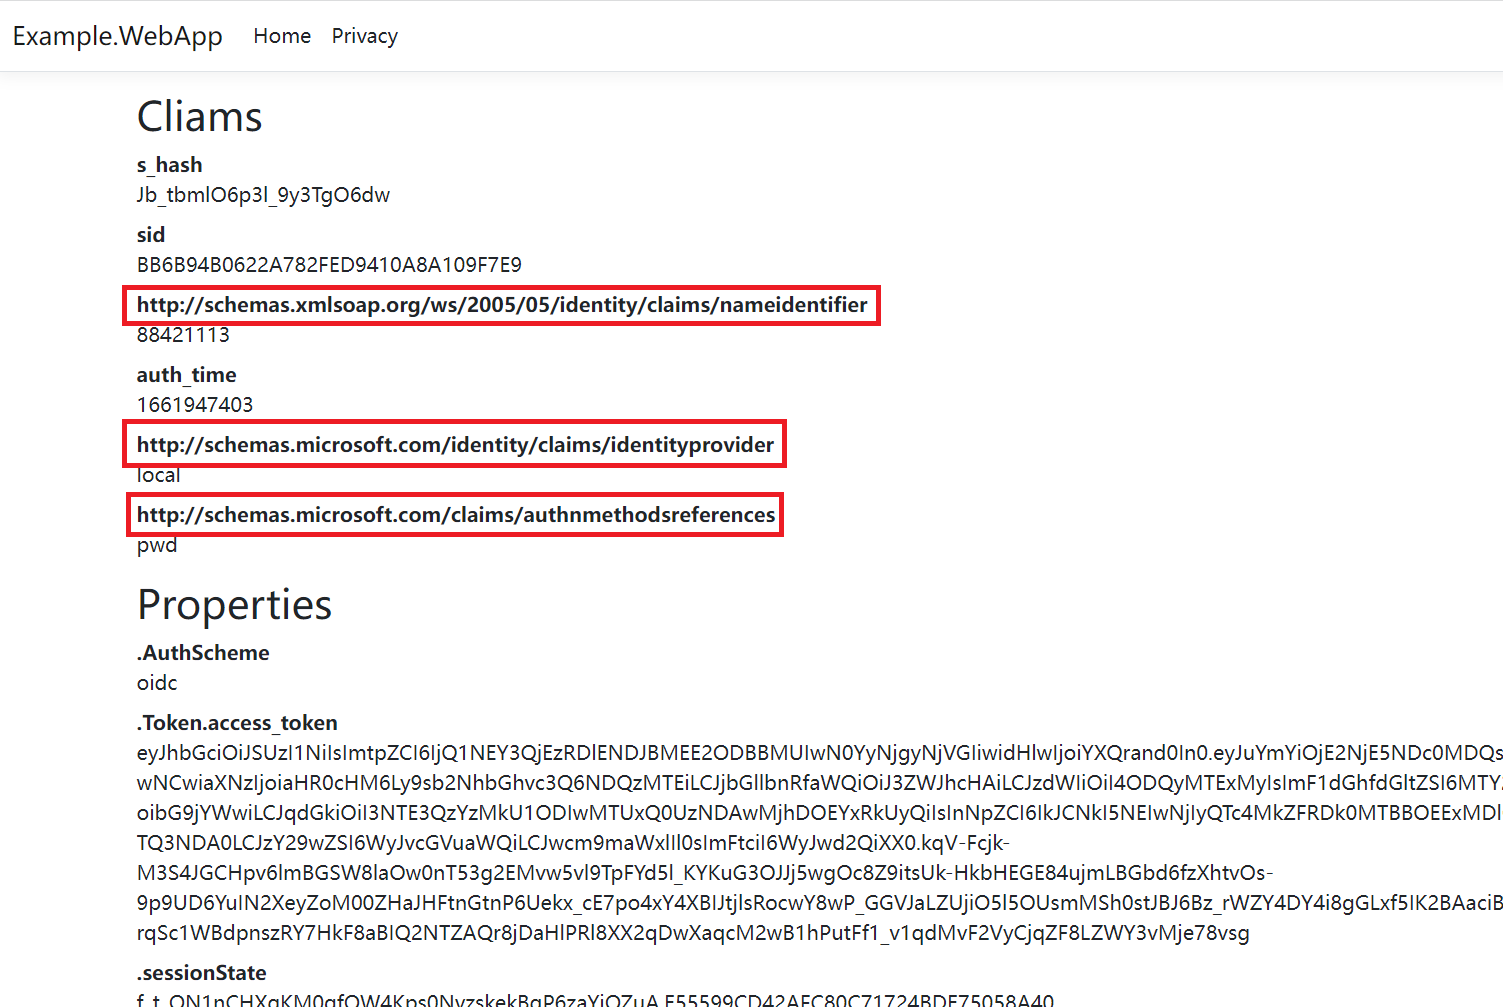
在WebApp项目的Program文件添加JwtSecurityTokenHandler.DefaultInboundClaimTypeMap.Clear()这句代码Claim就会显示短名称了。需要引用System.IdentityModel.Tokens.Jwt命名空间。
using System.IdentityModel.Tokens.Jwt;

var builder = WebApplication.CreateBuilder(args);
builder.Services.AddControllersWithViews();

JwtSecurityTokenHandler.DefaultInboundClaimTypeMap.Clear();

.......
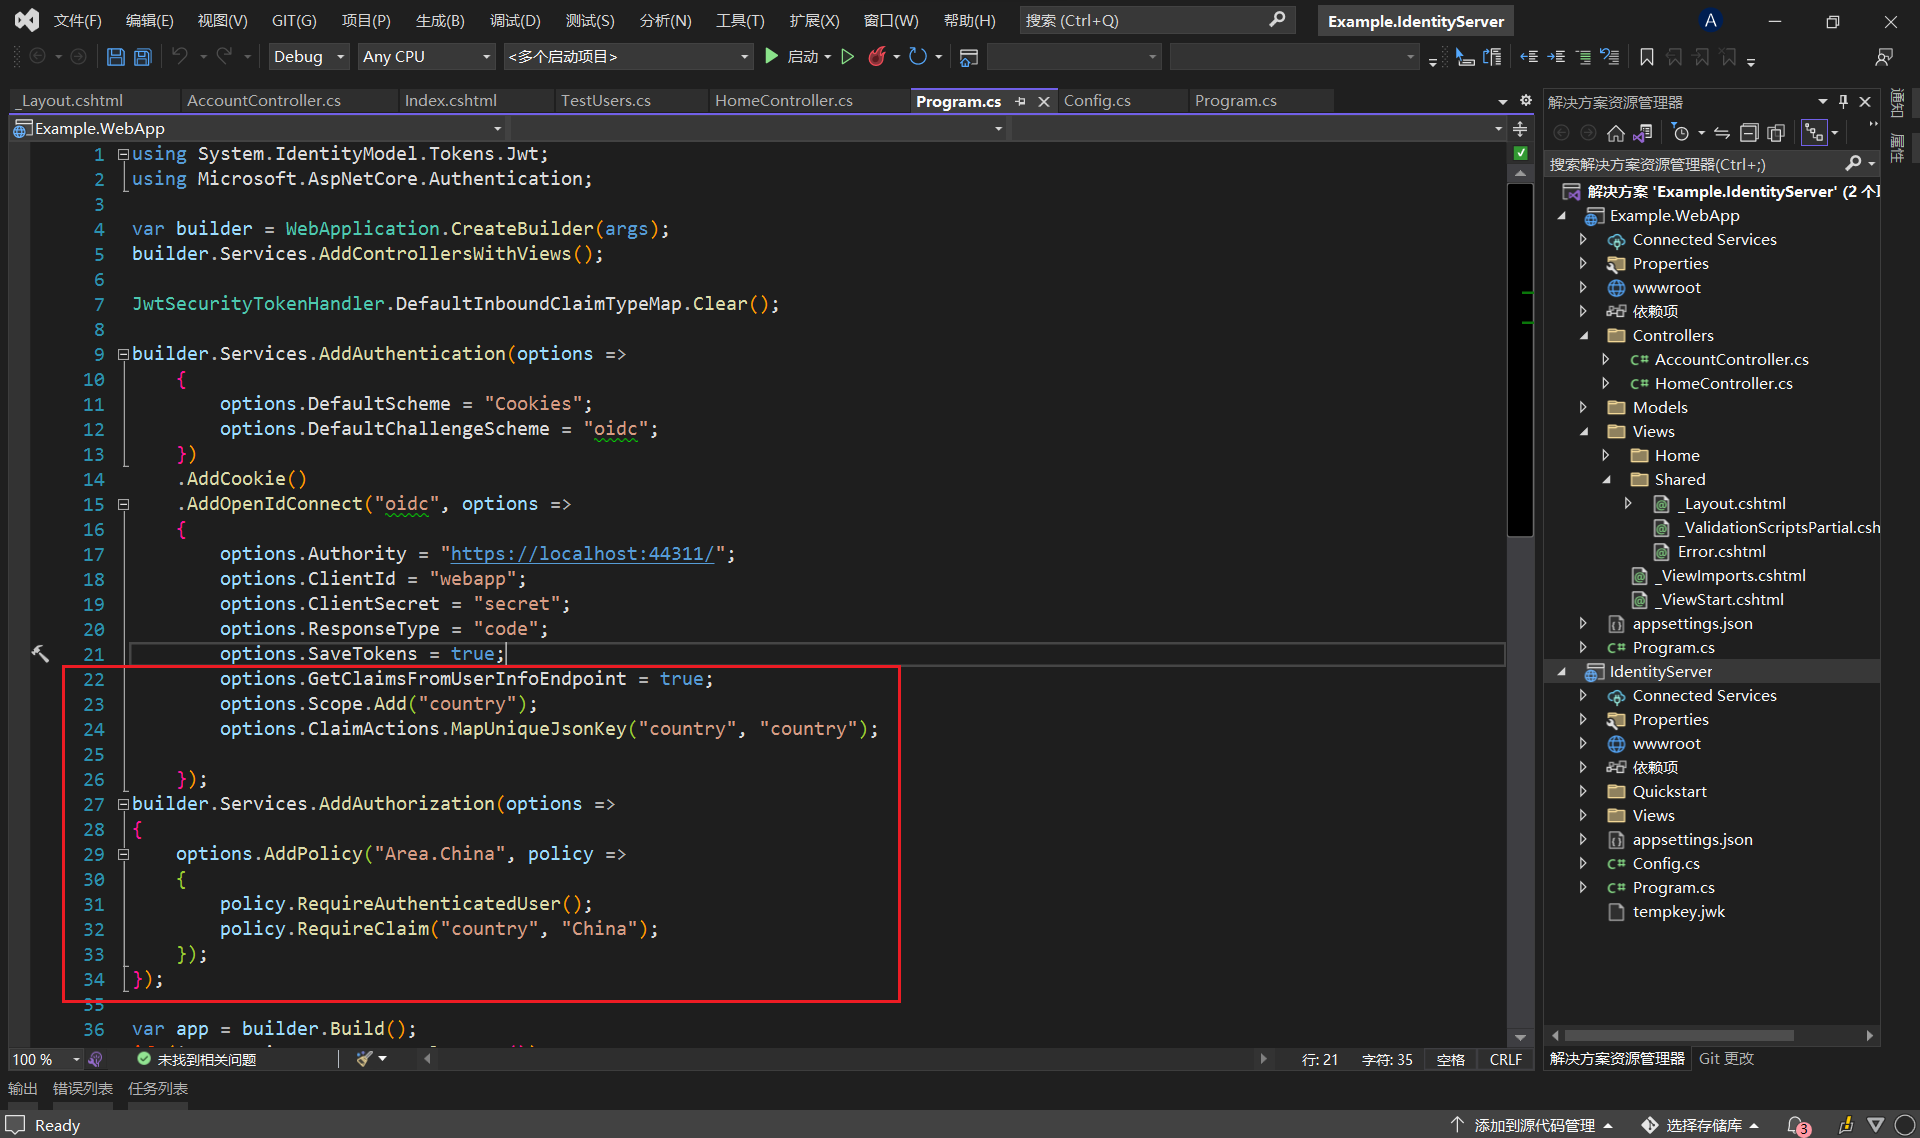
最简单的示例代码已经写完了,现在的验证场景有些单一,假设现在有个报表页面,只能给中国用户展示,我们继续来改下代码,WebApp的Program文件改动如下
IdentityServer的Config文件改动如下
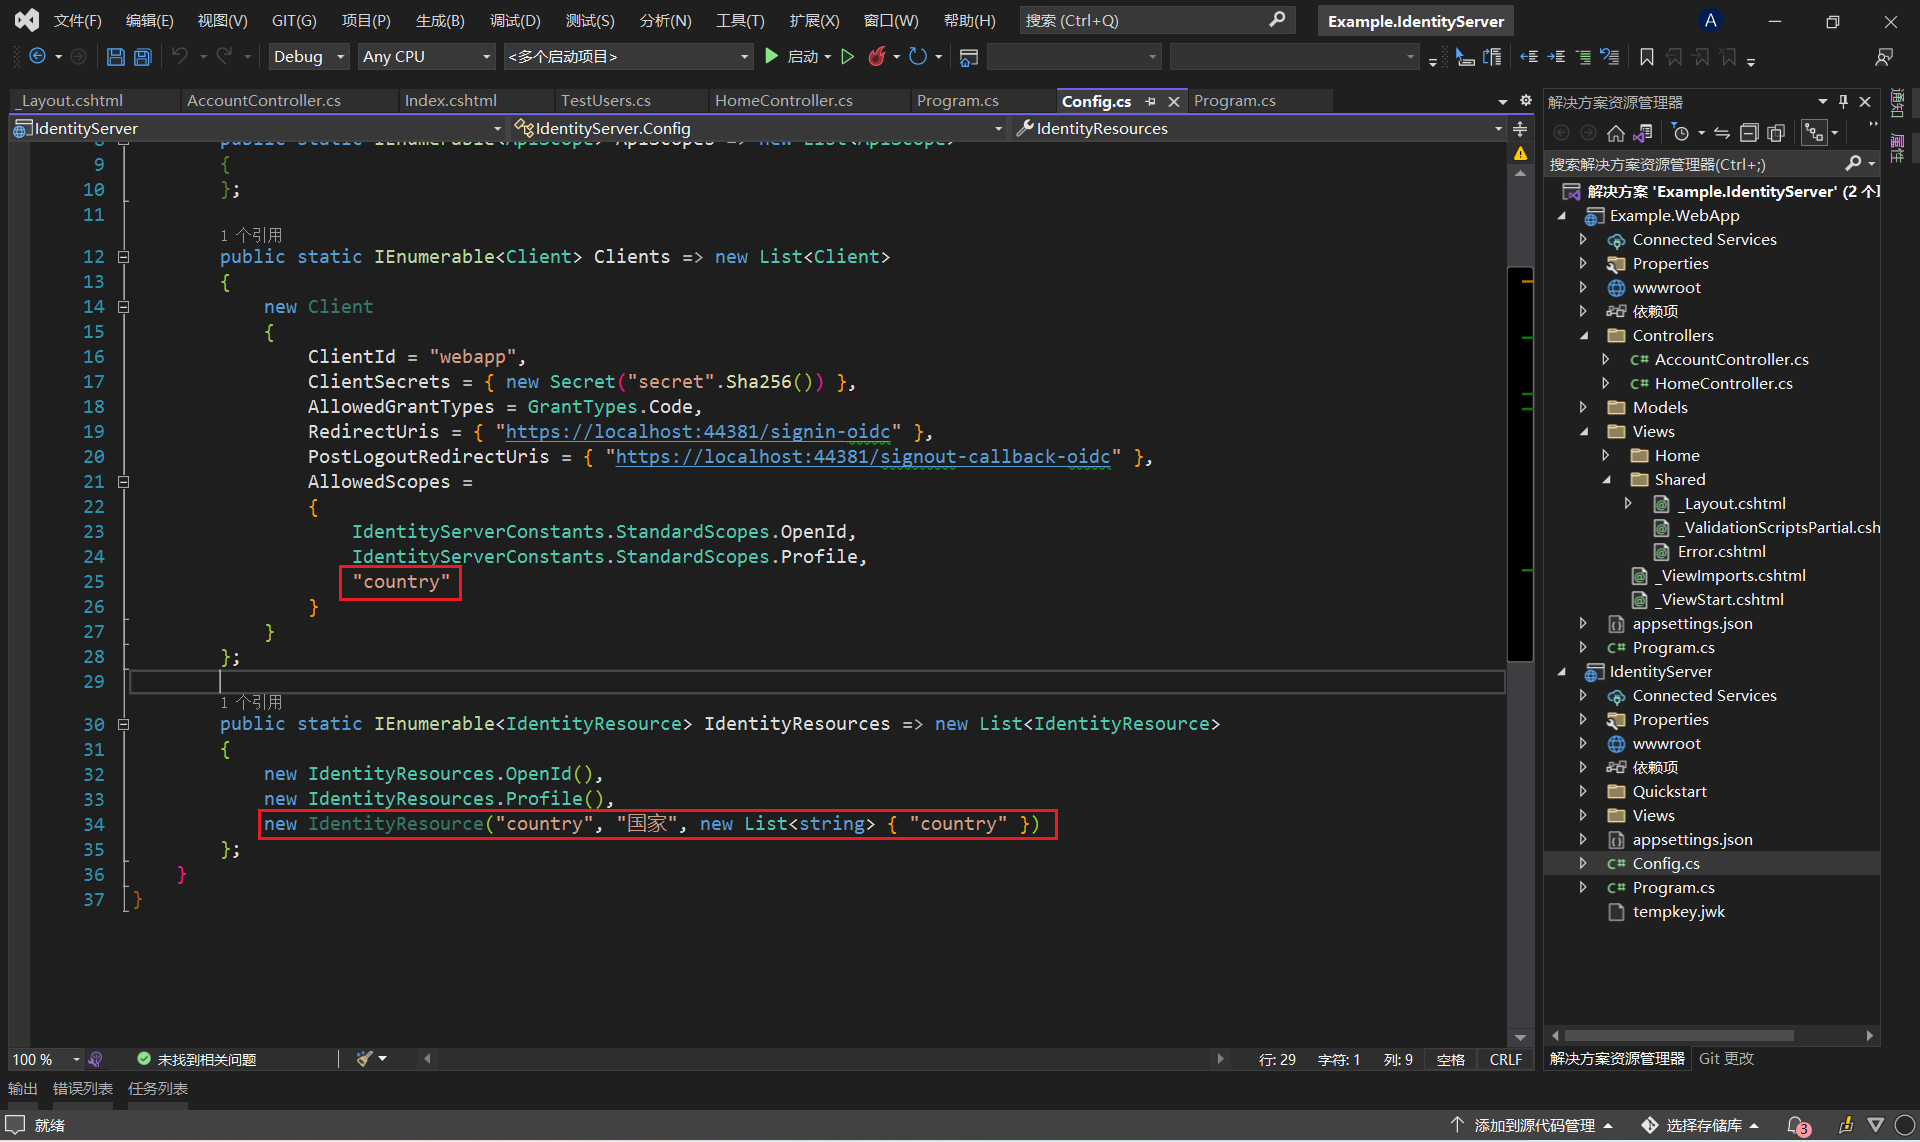
记得TestUsers里的bob用户要加上new Claim("country", "China"),另一个用户不用加,以便验证权限。
WebApp项目HomeController新增如下代码
[Authorize(Policy = "Area.China")]
public IActionResult Report()
{
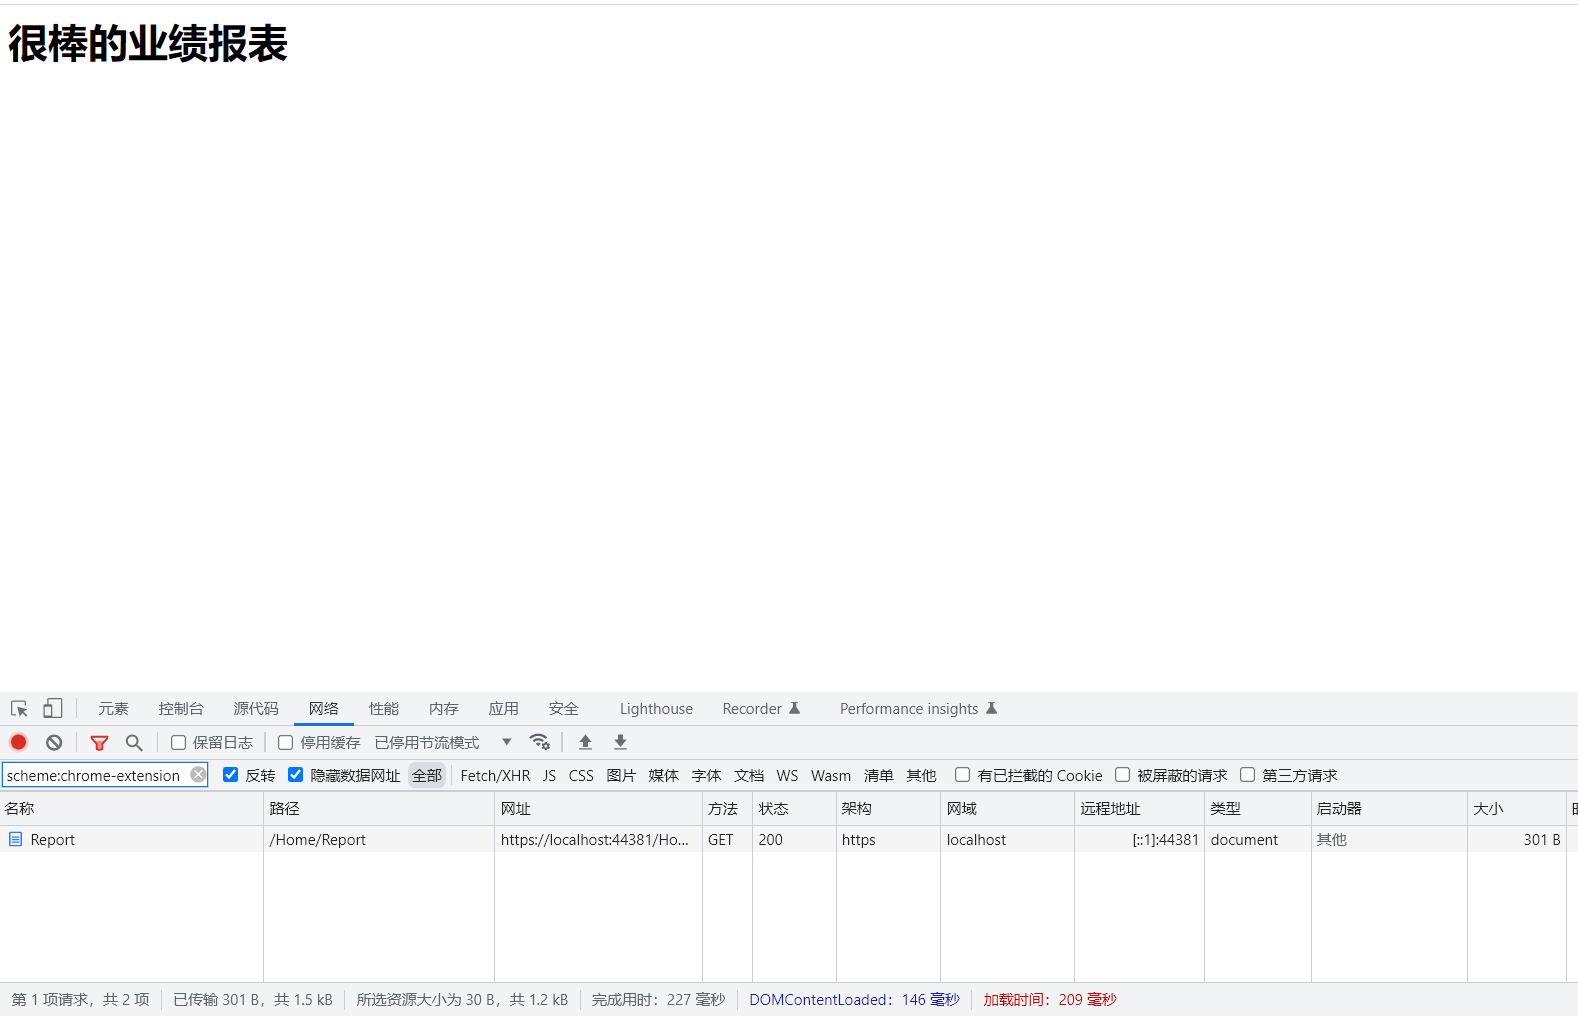
return Content("<h1>很棒的业绩报表</h1>", "text/html; charset=utf-8");
}
AccountController新增
public IActionResult AccessDenied(string returnUrl)
{
    return Content("<h1>您没有权限</h1>", "text/html; charset=utf-8");
}
现在我们测试一下授权策略是否生效,用bob用户登录后访问/Home/Report
用Alice用户登录访问/Home/Report

顺便说一下,如果要在页面使用类似[Authorize(Policy = "Area.China")]的方法判断权限需要用以下这种方式
var authorizationService = HttpContext.RequestServices.GetRequiredService<IAuthorizationService>();
var isPass = authorizationService.AuthorizeAsync(User, "Area.China").Result.Succeeded;
好了,功能已经实现,使用起来还是非常灵活,这里授权除了可以用Policy模式也可以用原生的Role模式,只需要把Role Claim映射一下就可以用User.IsInRole("Admin")这种自带方法判断是否有权限访问某个功能了。
实现Role模式鉴权核心代码
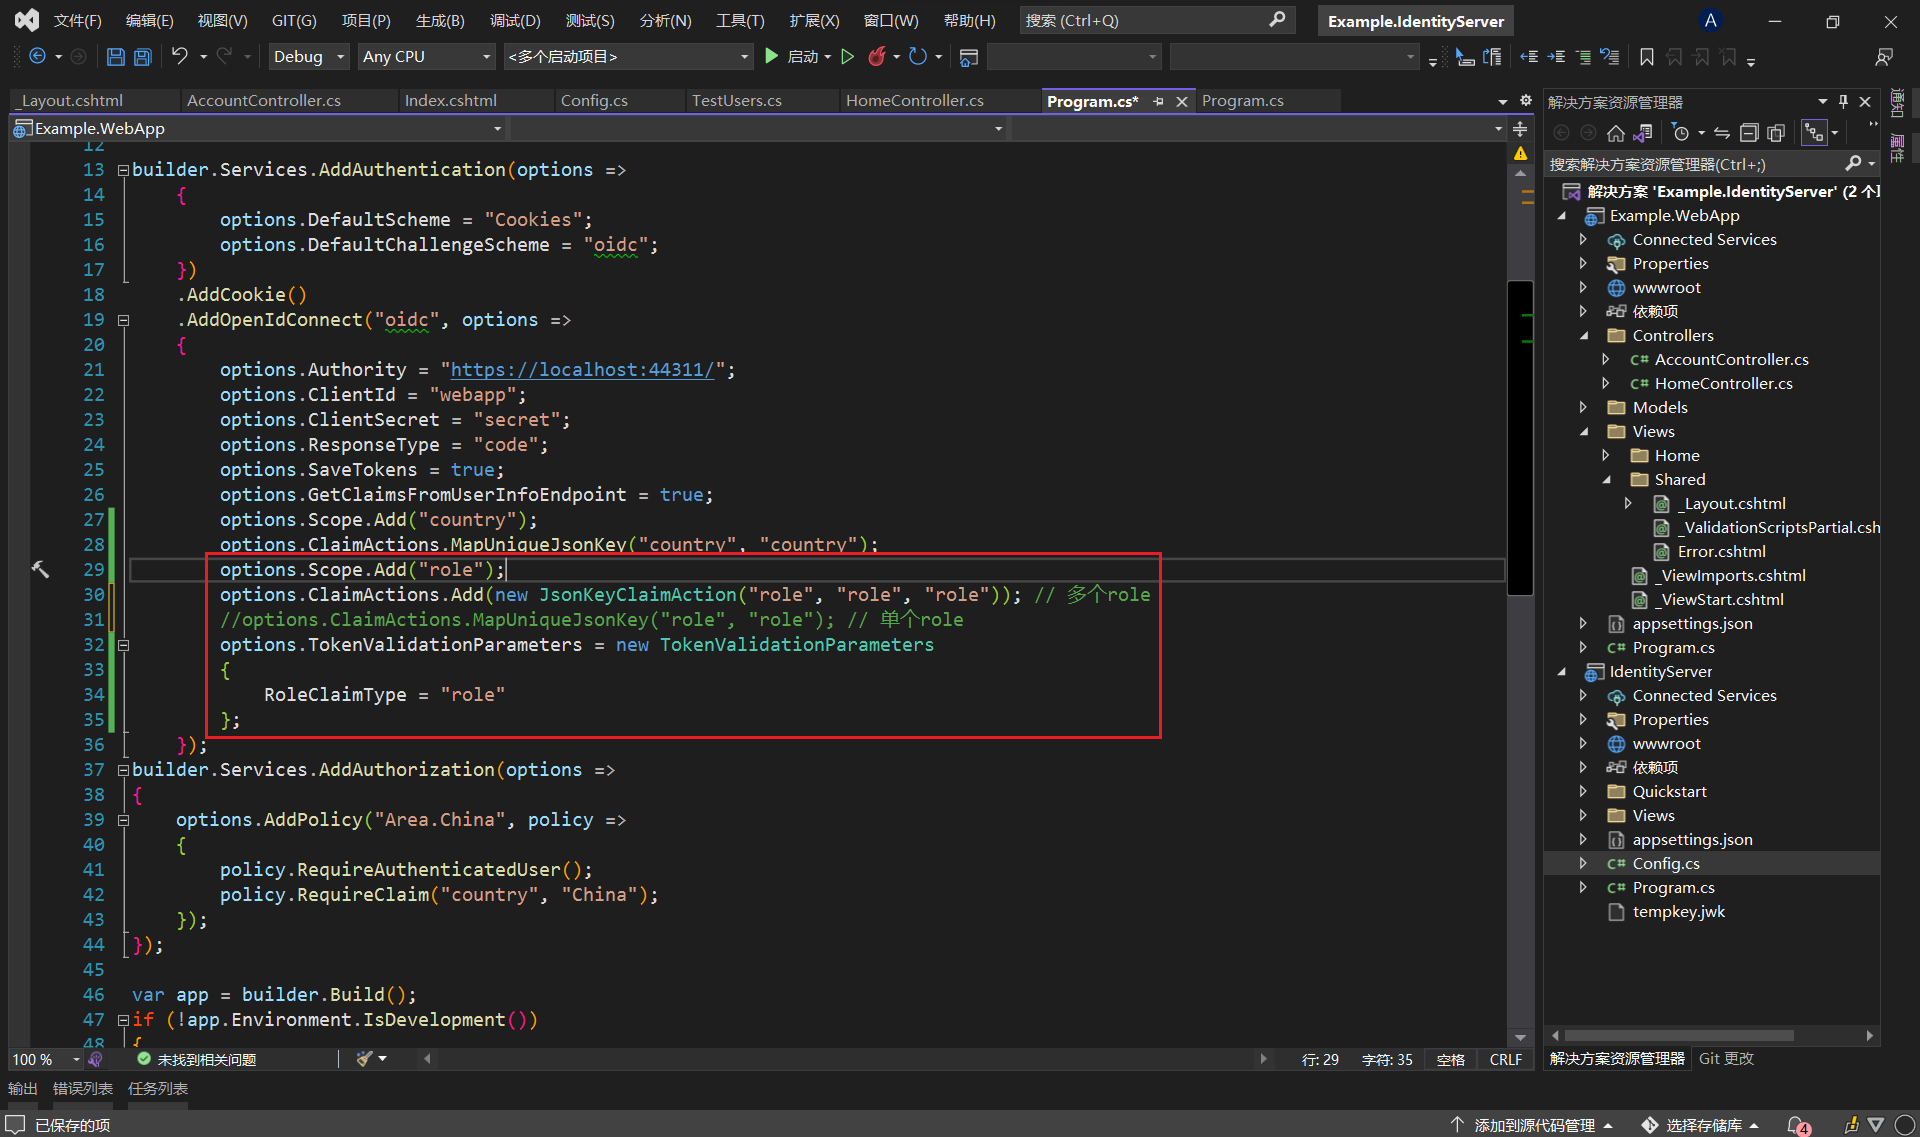
改造一下WebApp项目的Home/Index文件,加几行代码
@if (User.IsInRole("Visitor"))
{
<h1>你只是个访客</h1>
}
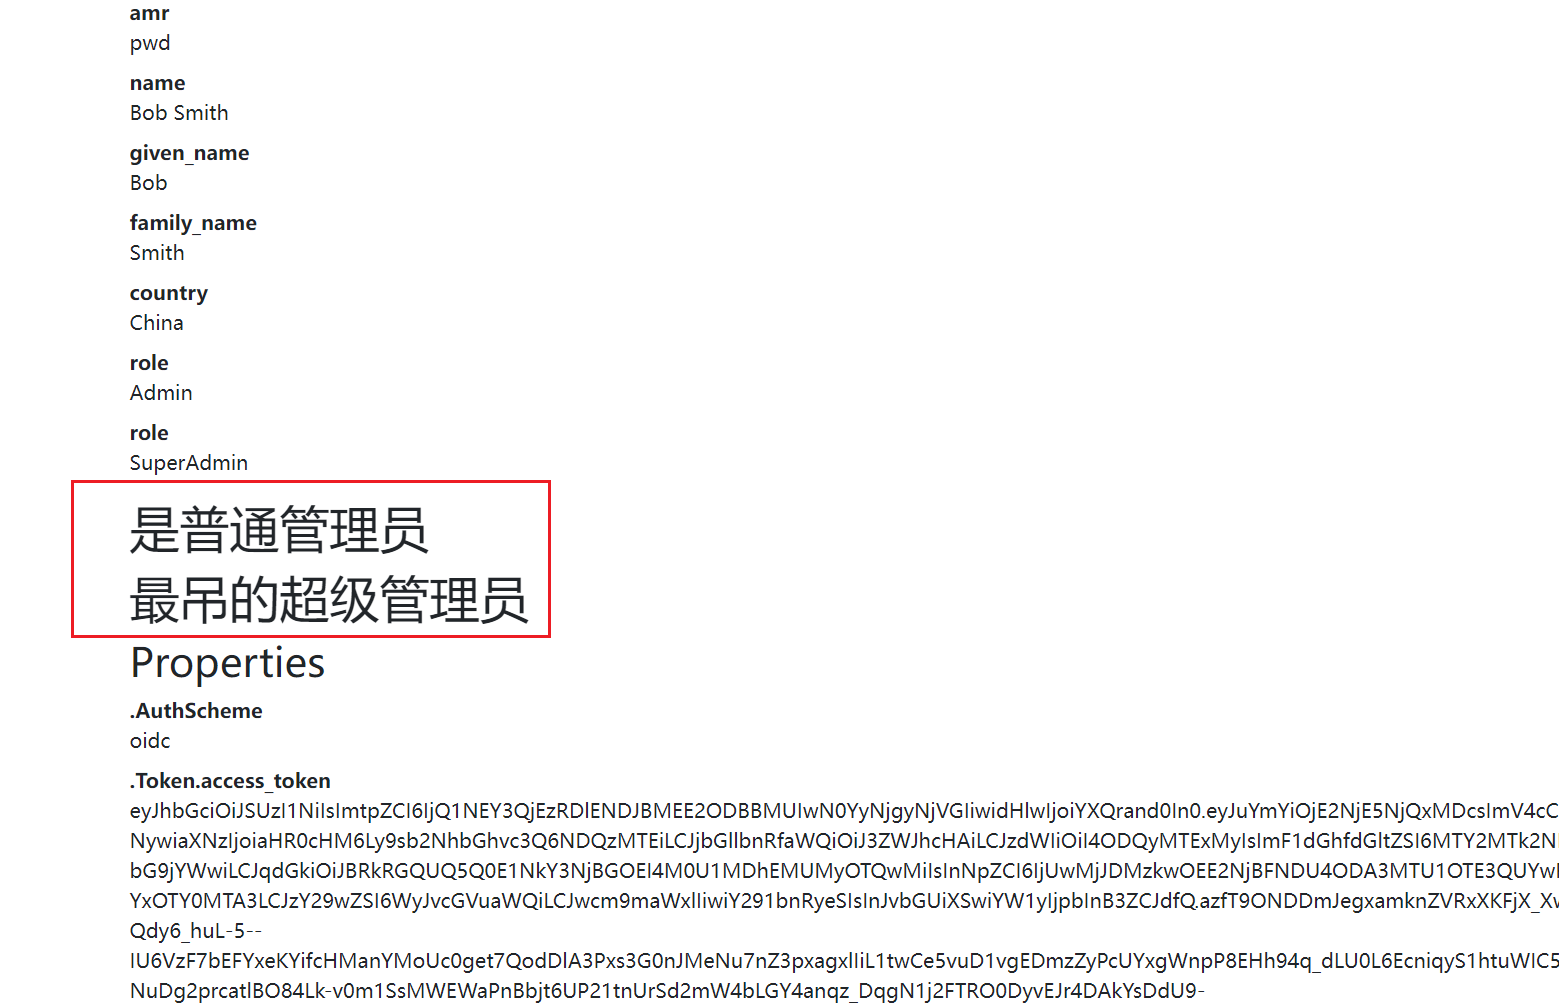
@if(User.IsInRole("Admin"))
{
<h1>是普通管理员</h1>
}
@if (User.IsInRole("SuperAdmin"))
{
<h1>最吊的超级管理员</h1>
}
最后给bob用户增加两个Role Claim:new Claim("role","Admin"),new Claim("role","SuperAdmin")。给Alice用户增加一个new Claim("role","Visitor"),在config里加上相应配置
public static IEnumerable<Client> Clients => new List<Client>
{
    new Client
    {
        ClientId = "webapp",
        ClientSecrets = { new Secret("secret".Sha256()) },
        AllowedGrantTypes = GrantTypes.Code,
        RedirectUris = { "https://localhost:44381/signin-oidc" },
        PostLogoutRedirectUris = { "https://localhost:44381/signout-callback-oidc" },
        //RequireConsent = true,
        AllowedScopes =
        {
            IdentityServerConstants.StandardScopes.OpenId,
            IdentityServerConstants.StandardScopes.Profile,
            "country",
            "role"
        }
    }
};

public static IEnumerable<IdentityResource> IdentityResources => new List<IdentityResource>
{
    new IdentityResources.OpenId(),
    new IdentityResources.Profile(),
    new IdentityResource("country", "国家", new List<string> { "country" }),
    new IdentityResource("role", "角色", new List<string> { "role" })
};
用bob登录 Home/Index显示如下:
用alice登录

展示完毕。
PS:刚开始添加多个角色的时候用原生的User.IsInRole方法返回的结果始终是false,当时想用自定义扩展方法解决这个问题,有点不甘心,后来花了一个多小时解决了使用User.IsInRole返回false的问题。