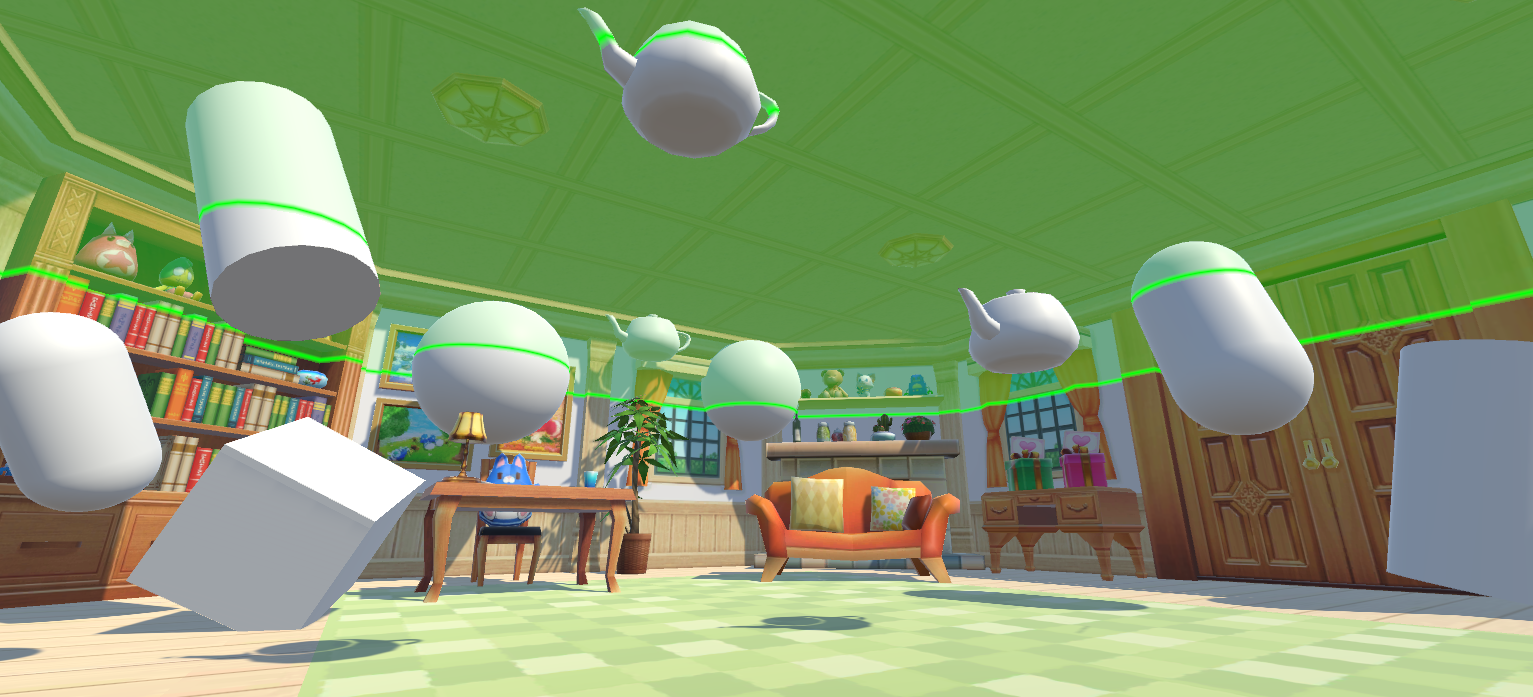
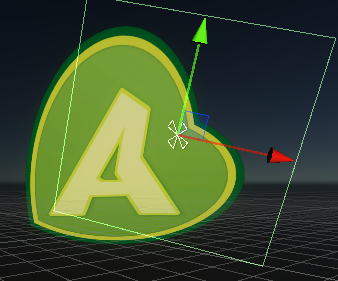
正常uGUI使用正交相机的话,旋转是没有透视效果的,但如果能实现较简单的透视,
对一些效果表现来说还是不错的;见下图(左为透视效果):

正常思路感觉各种麻烦。
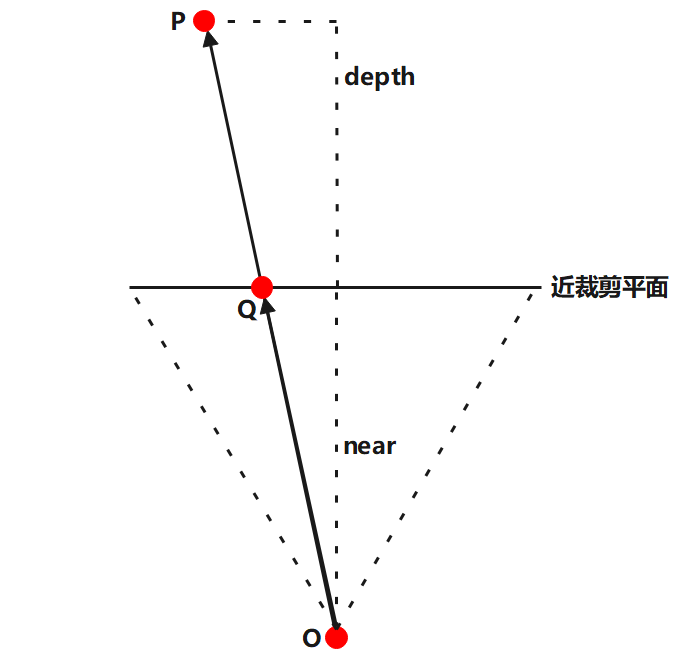
因为uGUI使用unity的x和y方向表示宽高,z方向自然就是纵深,我们可以直接拿z值作为系数进行缩放处理,
达到伪透视的效果(美中不足,细看会有弧度感)。
但是,直接对z轴进行缩放会出现扭曲问题:
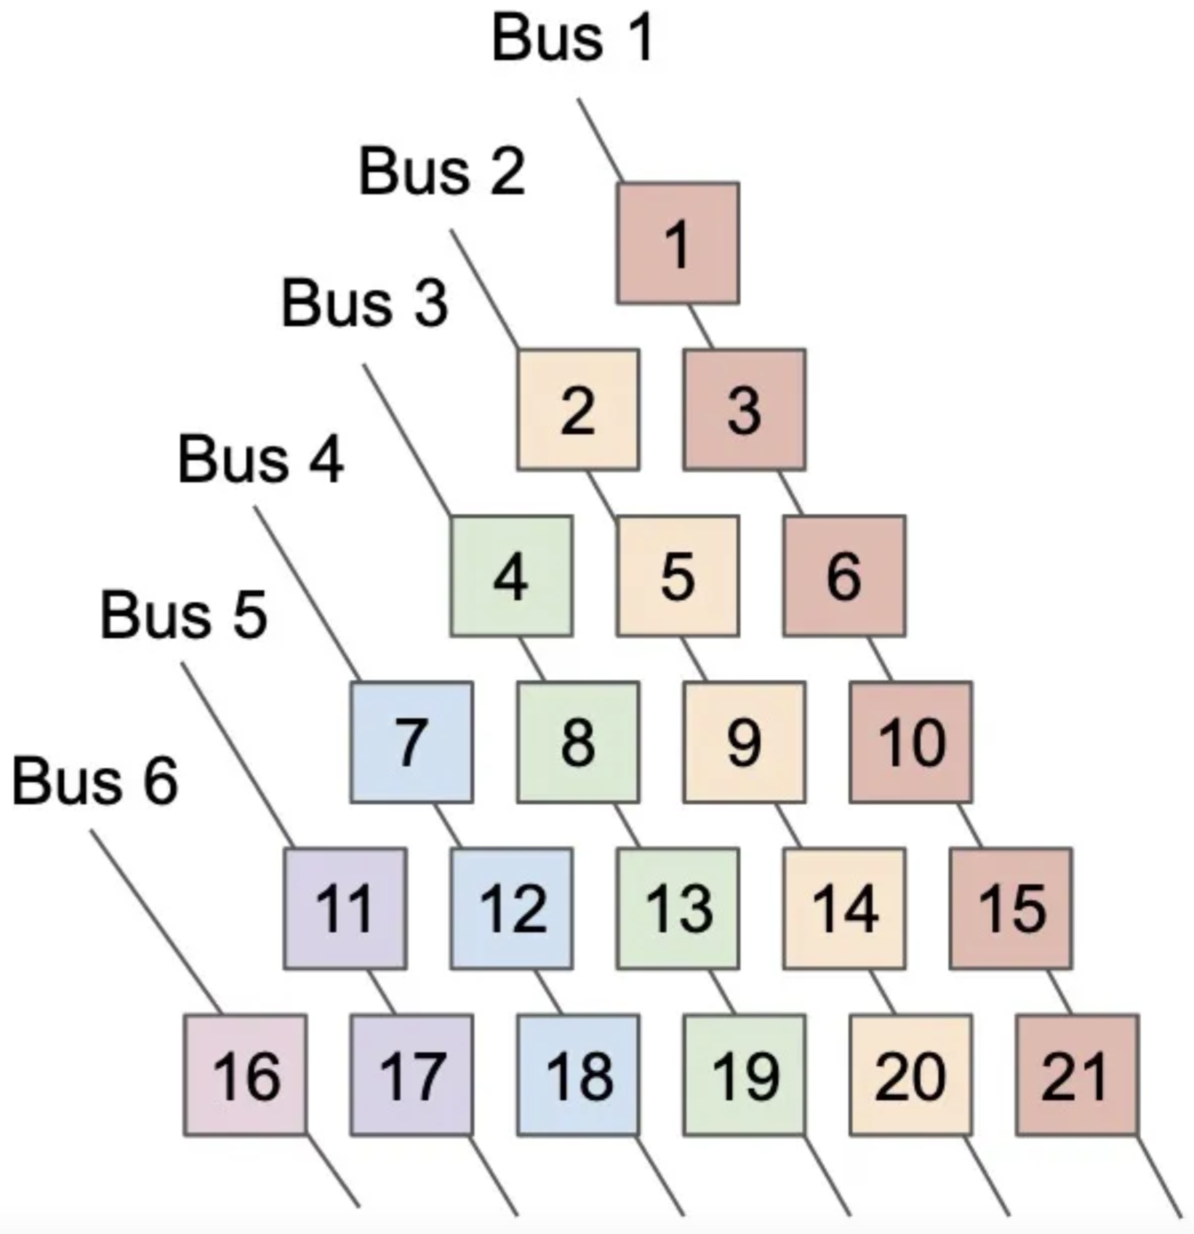
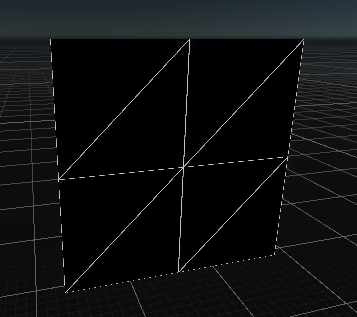
这种情况可以通过顶点细分来解决,一般细分一次即可。顶点越多,UV插值产生的扭曲影响就越小:
再扩展一下可支持Text组件:

最后上代码:
namespace Hont
{
    using System.Collections.Generic;
    using UnityEngine;
    using UnityEngine.UI;

    [ExecuteInEditMode]
    public class UiPerspectiveFx : BaseMeshEffect
    {
        [Header("Only Image")]
        public int subdivision = 2;//有的材质细分2次,有的需3-4次。
        public float perspectiveScale = 1.0f;
        public bool alwaysRefresh = true;


        private void Update()
        {
            if (alwaysRefresh)
                graphic.SetVerticesDirty();
        }

        private void CalcPerspectiveScale(ref Vector3 point)
        {
            Vector3 wPos = transform.localToWorldMatrix.MultiplyPoint(point);
            float fixValue = wPos.z * perspectiveScale;
            point *= 1f + fixValue;
        }

        public override void ModifyMesh(VertexHelper vh)
        {
            RectTransform rectTransform = transform as RectTransform;

            if (graphic is Image)
            {
                vh.Clear();

                Vector2 begin = -rectTransform.sizeDelta * 0.5f;
                Vector2 cell = rectTransform.sizeDelta / subdivision;
                float uvCell = 1f / subdivision;
                for (int x = 0; x < subdivision; x++)//TODO:可进一步做缓存优化
                {
                    for (int y = 0; y < subdivision; y++)
                    {
                        Vector3 p0 = new Vector3(begin.x + cell.x * x, begin.y + cell.y * y);
                        Vector3 p1 = new Vector3(begin.x + cell.x * x, begin.y + cell.y * (y + 1));
                        Vector3 p2 = new Vector3(begin.x + cell.x * (x + 1), begin.y + cell.y * (y + 1));
                        Vector3 p3 = new Vector3(begin.x + cell.x * (x + 1), begin.y + cell.y * y);

                        Vector3 uv0 = new Vector3(x * uvCell, y * uvCell);
                        Vector3 uv1 = new Vector3(x * uvCell, (y + 1) * uvCell);
                        Vector3 uv2 = new Vector3((x + 1) * uvCell, (y + 1) * uvCell);
                        Vector3 uv3 = new Vector3((x + 1) * uvCell, y * uvCell);

                        CalcPerspectiveScale(ref p0);
                        CalcPerspectiveScale(ref p1);
                        CalcPerspectiveScale(ref p2);
                        CalcPerspectiveScale(ref p3);

                        vh.AddUIVertexQuad(new UIVertex[]
                        {
                        new UIVertex(){position=p0, color=graphic.color, uv0=uv0},
                        new UIVertex(){position=p1, color=graphic.color, uv0=uv1},
                        new UIVertex(){position=p2, color=graphic.color, uv0=uv2},
                        new UIVertex(){position=p3, color=graphic.color, uv0=uv3}
                        });
                    }
                }
            }
            else if (graphic is Text)
            {
                for (int i = 0, iMax = vh.currentVertCount; i < iMax; i++)
                {
                    UIVertex vertex = default;
                    vh.PopulateUIVertex(ref vertex, i);
                    CalcPerspectiveScale(ref vertex.position);
                    vh.SetUIVertex(vertex, i);
                }
            }
        }
    }
}
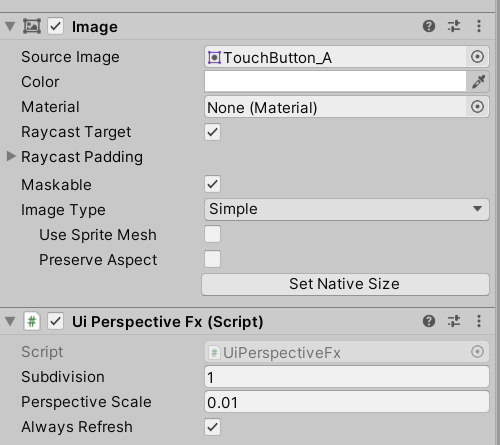
挂载到Image/Text组件下即可: