防火墙操作
-
开启防火墙
sudo systemctl start firewalld.service -
查看防火墙状态
sudo systemctl status firewalld.service -
关闭防火墙(临时)
sudo systemctl stop firewalld.service -
永久开启防火墙(打开自启动)
sudo systemctl enable firewalld.service -
永久关闭防火墙(关闭自启动)
sudo systemctl disable firewalld.service -
开放端口7474,并使配置生效
sudo firewall-cmd --zone=public --permanent --add-port=7474/tcp sudo firewall-cmd --reload -
列出所有端口
sudo firewall-cmd --list-ports
关于防火墙更详细的配置操作可见博客Centos7 防火墙配置详解(非常详细!)
换源
CentOS系统为主要使用yum源
(目前测试结果为中科大yum源速度最快,快于163yum源和阿里yum源)
-
首先备份原有的yum源文件
cd /etc/yum.repos.d/ sudo mv CentOS-Base.repo CentOS-Base.repo.bak -
在该目录新建CentOS-Base.repo文件,并将如下内容复制进去(CentOS 8等版本换中科大yum源见CentOS 源使用帮助)
# CentOS-Base.repo # # The mirror system uses the connecting IP address of the client and the # update status of each mirror to pick mirrors that are updated to and # geographically close to the client. You should use this for CentOS updates # unless you are manually picking other mirrors. # # If the mirrorlist= does not work for you, as a fall back you can try the # remarked out baseurl= line instead. # # [base] name=CentOS-$releasever - Base #mirrorlist=http://mirrorlist.centos.org/?release=$releasever&arch=$basearch&repo=os&infra=$infra baseurl=https://mirrors.ustc.edu.cn/centos/$releasever/os/$basearch/ gpgcheck=1 gpgkey=file:///etc/pki/rpm-gpg/RPM-GPG-KEY-CentOS-7 #released updates [updates] name=CentOS-$releasever - Updates #mirrorlist=http://mirrorlist.centos.org/?release=$releasever&arch=$basearch&repo=updates&infra=$infra baseurl=https://mirrors.ustc.edu.cn/centos/$releasever/updates/$basearch/ gpgcheck=1 gpgkey=file:///etc/pki/rpm-gpg/RPM-GPG-KEY-CentOS-7 #additional packages that may be useful [extras] name=CentOS-$releasever - Extras #mirrorlist=http://mirrorlist.centos.org/?release=$releasever&arch=$basearch&repo=extras&infra=$infra baseurl=https://mirrors.ustc.edu.cn/centos/$releasever/extras/$basearch/ gpgcheck=1 gpgkey=file:///etc/pki/rpm-gpg/RPM-GPG-KEY-CentOS-7 #additional packages that extend functionality of existing packages [centosplus] name=CentOS-$releasever - Plus #mirrorlist=http://mirrorlist.centos.org/?release=$releasever&arch=$basearch&repo=centosplus&infra=$infra baseurl=https://mirrors.ustc.edu.cn/centos/$releasever/centosplus/$basearch/ gpgcheck=1 enabled=0 gpgkey=file:///etc/pki/rpm-gpg/RPM-GPG-KEY-CentOS-7 -
清理旧yum源本地缓存
sudo yum clean all -
制作中科大yum源缓存
sudo yum makecache
配置多个版本的Java环境(使用alternatives管理)
-
新建文件夹/usr/java,并转到该目录下
sudo mkdir /usr/java cd /usr/java -
下载Java安装包,下载至/usr/java
网址:Oracle Java Downloads或者Azul Zulu OpenJDK Downloads例如下载两个版本jdk8(jdk-8u371-linux-x64.tar.gz)和jdk17(jdk-17_linux-x64_bin.tar.gz)
-
解压
sudo tar -zxvf jdk-8u371-linux-x64.tar.gz
sudo tar -zxvf jdk-17_linux-x64_bin.tar.gz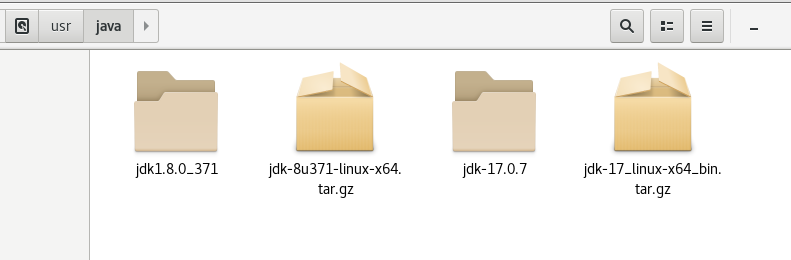
-
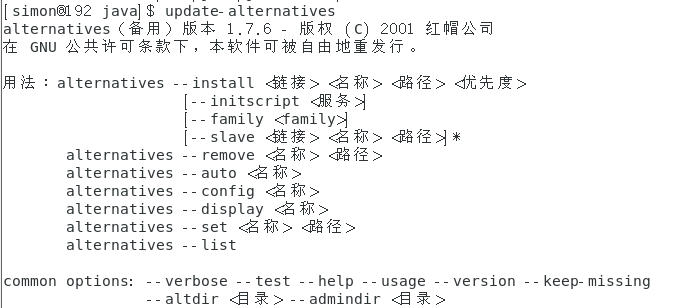
将JDK注册到alternatives中,命令:
# 创建JDK目录的软链接,并交由alternatives管理(命令最后一个数字为优先级,此处使用版本号作为优先级,因为java17更常用,所以优先级更高,设为默认) update-alternatives --install /usr/bin/java java /usr/java/jdk1.8.0_371/ 8 update-alternatives --install /usr/bin/java java /usr/java/jdk-17.0.7/ 17 -
如果原来alternatives中有系统自带的java版本,需要全部删除掉,否则后续路径可能出问题
删除方法例如:
update-alternatives --remove java /usr/lib/jvm/java-1.8.0-openjdk-1.8.0.372.b07-1.el7_9.x86_64/jre/bin/java -
查看jdk版本
java -version

-
切换jdk版本
sudo update-alternatives --config java
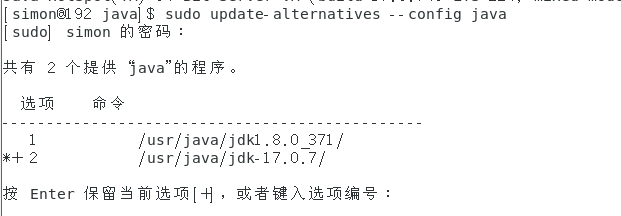
选择对应选项即可切换版本
(该部分思路来自于博客Linux(CentOS7)安装多版本 JDK 详细过程,我在自己的CentOS 7上实操之后,发现存在系统原有java版本与新加入的java版本路径不匹配问题,经过踩坑总结后得到如上过程,应该没有大问题了)


![(原创)[C#] MEF 主程序与插件加载不同版本的DLL](https://img2022.cnblogs.com/blog/1686429/202205/1686429-20220518114700898-521027074.jpg)