SpringMVC底层机制简单实现-02
4.任务3-从web.xml动态获取容器配置文件
4.1分析
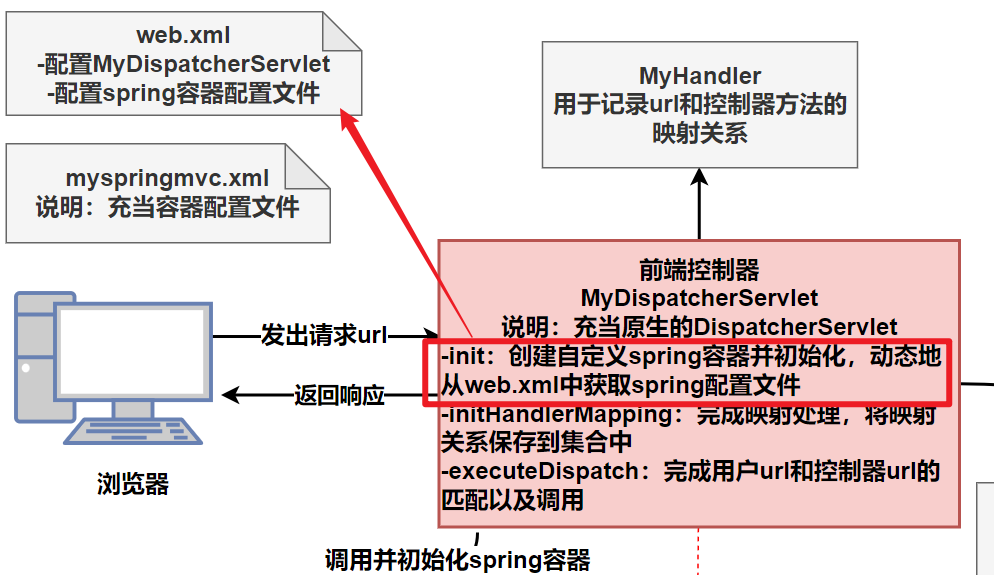
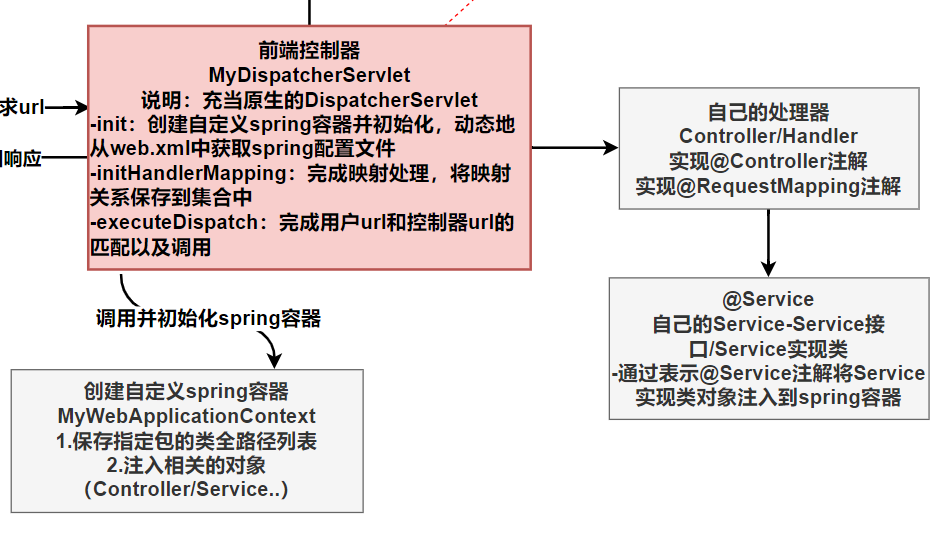
任务3:MyDispatcherServlet (自定义的前端分发器)在创建并初始化自定义的spring容器时,可以动态地从web.xml中获取到配置的容器文件。
我们之前实现的时候,是直接在 MyWebApplicationContext 中指定要读取的容器文件。
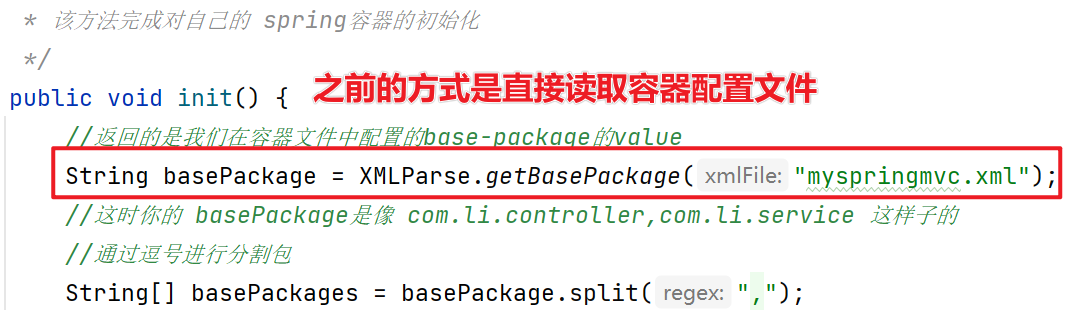
改进:在web.xml中通过init-param指定容器文件,然后通过读取web.xml获取即可。这样可以动态地读取容器文件,不需要改变源代码。
4.2代码实现
(1)修改 MyDispatcherServlet 的 init 方法。通过 ServletConfig 对象,获取 Servlet 的初始化参数 init-param,将该参数的值传入 spring 容器的初始化方法。
部分代码:
@Override
public void init(ServletConfig servletConfig) throws ServletException {
    /** web.xml文件,前端控制器的配置中:
     *  <init-param>
     *     <param-name>contextConfigLocation</param-name>
     *     <param-value>classpath:myspringmvc.xml</param-value>
     *  </init-param>
     */
    //configLocation ==> classpath:myspringmvc.xml
    String configLocation =
            servletConfig.getInitParameter("contextConfigLocation");
    //初始化ioc容器,传入指定的spring配置文件
    myWebApplicationContext = new MyWebApplicationContext(configLocation);
    myWebApplicationContext.init();
    //调用 initHandlerMapping(),完成url和控制器方法的映射
    initHandlerMapping();
    //测试输出 handlerList
    System.out.println("handlerList输出的结果=" + handlerList);
}
(2)修改 MyApplicationContext 自定义spring 容器,额外提供一个带参构造器,用于获取传入的 容器配置文件名,然后传给 MyApplicationContext 的 init() 方法去初始化。
部分代码:
//无参构造器
public MyWebApplicationContext() {
}

//表示spring容器配置文件名
private String configLocation;

//带参构造器
public MyWebApplicationContext(String configLocation) {
    this.configLocation = configLocation;
}

/**
 * 该方法完成对自己的 spring容器的初始化
 */
public void init() {
    //configLocation的值是 classpath:myspringmvc.xml
    // 按冒号分割,取索引为 1的子串:myspringmvc.xml
    String basePackage =
            XMLParse.getBasePackage(configLocation.split(":")[1]);
    String[] basePackages = basePackage.split(",");
    if (basePackages.length > 0) {
        //遍历这些包
        for (String pack : basePackages) {
            scanPackage(pack);
        }
    }
    System.out.println("扫描后的路径classFullPathList=" + classFullPathList);
    //将扫描到的类反射到ioc容器
    executeInstance();
    System.out.println("扫描后的ioc容器=" + ioc);
}

//scanPackage方法,略..该方法完成对包的扫描

//executeInstance方法,略..该方法将扫描到的类,在满足条件的情况下进行反射,并放入到ioc容器中
5.任务4-完成自定义@Service注解功能
5.1分析
目标:给某个类加上@Service注解,可以将对象注入到spring容器中,并且可以
(1)通过该类的类名,实现的多个接口名,在容器获取到该 Service Bean
(2)或者通过指定的 value 在容器中获取该 Service Bean
5.2代码实现
(1)自定义Service注解
package com.li.myspringmvc.annotation;

import java.lang.annotation.*;

/**
 * @author 李
 * @version 1.0
 * @Service 注解用于标识一个Service对象,并注入到spring容器中
 */
@Target(ElementType.TYPE)
@Retention(RetentionPolicy.RUNTIME)
@Documented
public @interface Service {
    String value() default "";
}
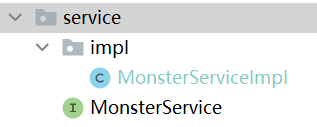
(2)创建Service和ServiceImpl,用于测试
Monster.java
package com.li.entity;

/**
 * @author 李
 * @version 1.0
 * 一个Javabean
 */
public class Monster {
    private Integer id;
    private String name;
    private String skill;
    private Integer age;

    public Monster(Integer id, String name, String skill, Integer age) {
        this.id = id;
        this.name = name;
        this.skill = skill;
        this.age = age;
    }

    public Integer getId() {
        return id;
    }

    public void setId(Integer id) {
        this.id = id;
    }

    public String getName() {
        return name;
    }

    public void setName(String name) {
        this.name = name;
    }

    public String getSkill() {
        return skill;
    }

    public void setSkill(String skill) {
        this.skill = skill;
    }

    public Integer getAge() {
        return age;
    }

    public void setAge(Integer age) {
        this.age = age;
    }

    @Override
    public String toString() {
        return "Monster{" +
                "id=" + id +
                ", name='" + name + '\'' +
                ", skill='" + skill + '\'' +
                ", age=" + age +
                '}';
    }
}
MonsterService:
package com.li.service;

import com.li.entity.Monster;

import java.util.List;

/**
 * @author 李
 * @version 1.0
 */
public interface MonsterService {
    //增加方法,返回Monster列表
    public List<Monster> listMonster();
}
MonsterServiceImpl:
package com.li.service.impl;

import com.li.entity.Monster;
import com.li.myspringmvc.annotation.Service;
import com.li.service.MonsterService;

import java.util.ArrayList;
import java.util.List;

/**
 * @author 李
 * @version 1.0
 * MonsterServiceImpl 作为一个Service对象注入容器
 */
@Service
public class MonsterServiceImpl implements MonsterService {

    @Override
    public List<Monster> listMonster() {
        //这里模拟到 DB获取数据
        List<Monster> monsters = new ArrayList<>();
        monsters.add(new Monster(100, "牛魔王", "芭蕉扇", 400));
        monsters.add(new Monster(200, "猫妖", "撕咬", 800));
        return monsters;
    }
}
(3)修改 MyWebApplicationContext 的 executeInstance 方法:
注意,这里通过类名和接口名获取到的 Bean 都是同一个
/**
 * 该方法将扫描到的类,在满足条件的情况下进行反射,并放入到ioc容器中
 */
public void executeInstance() {
    //是否扫描到了类
    if (classFullPathList.size() == 0) {//没有扫描到类
        return;
    }
    //遍历 classFullPathList,进行反射
    try {
        for (String classFullPath : classFullPathList) {
            Class<?> clazz = Class.forName(classFullPath);
            //判断是否要进行反射(即是否添加了注解)
            if (clazz.isAnnotationPresent(Controller.class)) {
                Object instance = clazz.newInstance();
                //获取该对象的id,默认情况下为类名(首字母小写)
                String beanName = clazz.getSimpleName().substring(0, 1).toLowerCase()
                        + clazz.getSimpleName().substring(1);
                String value = clazz.getAnnotation(Controller.class).value();
                if (!"".equals(value)) {//如果注解的value指定了id
                    beanName = value;
                }
                ioc.put(beanName, instance);
            }//如果有其他注解,可以进行扩展
            else if (clazz.isAnnotationPresent(Service.class)) {//判断是否添加@Service注解
                //获取 @Service注解的value值作为 beanName
                String beanName = clazz.getAnnotation(Service.class).value();
                //如果没有指定value
                if ("".equals(beanName)) {
                    //可以通过接口名/列名(首字母小写)作为id注入ioc容器
                    //1.通过反射,得到所有接口的名称
                    Class<?>[] interfaces = clazz.getInterfaces();
                    Object instance = clazz.newInstance();
                    //2.遍历接口,然后通过多个接口名来分别作为这个实例的id
                    for (Class<?> anInterface : interfaces) {
                        //接口名(首字母小写)
                        String beanName2 = anInterface.getSimpleName().substring(0, 1).toLowerCase()
                                + anInterface.getSimpleName().substring(1);
                        //ioc容器中多个key(接口名)匹配同一个Instance实例
                        ioc.put(beanName2, instance);
                    }
                    //3.同时通过类名(首字母小写)来作为这个实例的id
                    String beanName3 = clazz.getSimpleName().substring(0, 1).toLowerCase()
                            + clazz.getSimpleName().substring(1);
                    ioc.put(beanName3, instance);
                } else {
                    //如果指定了 beanName
                    ioc.put(beanName, clazz.newInstance());
                }
            }
        }
    } catch (Exception e) {
        e.printStackTrace();
    }

}
(4)启动tomcat,部分输出如下,ioc容器初始化时成功将Service Bean对象注入,并且可以通过类名和类实现的接口名来获取这个 Bean 对象。
流程:tomcat启动--加载了MyDispatcherServlet--通过该Servlet的init()生命周期方法初始化自定义的 spring 容器,同时调用自定义 spring 容器的 init 方法去扫描包,然后将扫描到的类初始化放入容器
扫描后的ioc容器={monsterService=com.li.service.impl.MonsterServiceImpl@6f3a4b3d, monsterServiceImpl=com.li.service.impl.MonsterServiceImpl@6f3a4b3d, orderController=com.li.controller.OrderController@5c3b452c, monsterController=com.li.controller.MonsterController@7a813e9a}
6.任务5-@AutoWired-容器对象的自动装配
完成Spring容器中对象的注入/自动装配。
6.1分析
目标:通过接口类型来获取ioc容器里已经注入的某个bean对象,将这个对象的引用赋给被 @AutoWired 修饰的属性对象,即完成对象属性的装配。
6.2代码实现
(1)自定义@AutoWired 注解
package com.li.myspringmvc.annotation;

import java.lang.annotation.*;

/**
 * @author 李
 * @version 1.0
 * AutoWired 注解完成对象属性的装配
 */
@Target(ElementType.FIELD)
@Retention(RetentionPolicy.RUNTIME)
@Documented
public @interface AutoWired {
    String value() default "";
}
(2)在自定义容器 MyWebApplicationContext 类中增加 executeAutoWired() 方法完成属性的自动装配,在初始化方法 init() 中调用该方法。
部分代码:
/**
 * executeAutoWired 方法完成属性的自动装配
 */
public void executeAutoWired() {
    //判断ioc有没有要装配的对象
    if (ioc.isEmpty()) {
        return;
    }
    //遍历ioc所有的 bean对象,然后判断每个bean的属性字段是否需要装配
    for (Map.Entry<String, Object> entry : ioc.entrySet()) {
        //一个entry对象一对 k-v
        // <String,Object>,String为 beanId,Object为 bean对象
        //String key = entry.getKey();
        Object bean = entry.getValue();
        //得到当前bean的所有字段/属性
        Field[] declaredFields = bean.getClass().getDeclaredFields();
        //遍历判断字段是否要装配
        for (Field declaredField : declaredFields) {
            if (declaredField.isAnnotationPresent(AutoWired.class)) {
                //得到当前字段的 @AutoWired注解的 value值
                String beanName = declaredField.getAnnotation(AutoWired.class).value();
                if ("".equals(beanName)) {//如果没有设置value,按照默认规则
                    //即按照字段类型的名称(首字母小写)作为 beanName来装配
                    //得到字段的类型
                    Class<?> type = declaredField.getType();
                    //获取要匹配的名称(首字母小写)
                    beanName = type.getSimpleName().substring(0, 1).toLowerCase()
                            + type.getSimpleName().substring(1);
                }
                //如果设置了value,直接按照 beanName类进行装配
                //ioc中没有找到对应名称的 bean
                if (null == ioc.get(beanName)) {
                    throw new RuntimeException("ioc中不存在字段" + beanName + "要装配的对象!");
                }
                //ioc中找到了对应名称的 bean
                //防止属性为private,使用暴破
                declaredField.setAccessible(true);
                try {
                    //装配属性
                    //第一个参数为当前字段所在类的 bean,第二个参数为当前的字段要关联的 bean
                    declaredField.set(bean, ioc.get(beanName));
                } catch (Exception e) {
                    e.printStackTrace();
                }
            }
        }
    }
}

/**
 * 该方法完成对自己的 spring容器的初始化
 */
public void init() {
    //...
    //...略
    //将扫描到的类反射到ioc容器
    executeInstance();
    System.out.println("扫描后的ioc容器=" + ioc);
    //完成注入bean对象的属性装配
    executeAutoWired();
    System.out.println("装配后ioc容器=" + ioc);
}
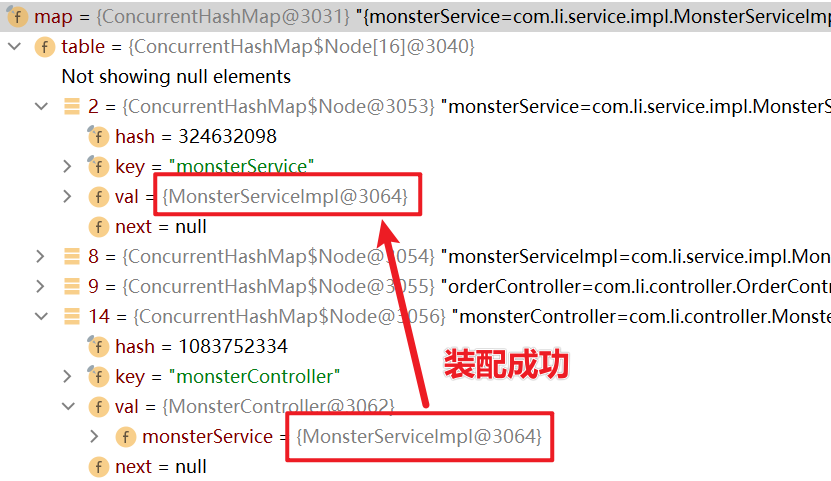
(3)在MonsterController中添加属性,并进行自动装配。
部分代码:
package com.li.controller;

//import ...

/**
 * @author 李
 * @version 1.0
 * 用于测试的Controller
 */
@Controller
public class MonsterController {
    //属性
    @AutoWired
    private MonsterService monsterService;
}
(4)debug结果如下,测试成功。
(5)为了测试通过浏览器是否能访问到自动装配的属性的方法,编写一个 listMonster() 方法
因为还没实现视图和视图解析,这里使用 response.getWriter().printWriter() 的方式给浏览器返回信息。
package com.li.controller;
import com.li.entity.Monster;
import com.li.myspringmvc.annotation.AutoWired;
import com.li.myspringmvc.annotation.Controller;
import com.li.myspringmvc.annotation.RequestMapping;
import com.li.service.MonsterService;
import javax.servlet.http.HttpServletRequest;
import javax.servlet.http.HttpServletResponse;
import java.io.IOException;
import java.io.PrintWriter;
import java.util.List;
/**
* @author 李
* @version 1.0
* 用于测试的 Controller
*/
@Controller
public class MonsterController {
//属性
@AutoWired
private MonsterService monsterService;
//编写方法,可以列出妖怪列表
//springmvc支持原生的servlet api,为了看到底层机制,这里直接放入两个参数
@RequestMapping(value = "/monster/list")
public void listMonster(HttpServletRequest request, HttpServletResponse response) {
//设置编码
response.setContentType("text/html;charset=utf-8");
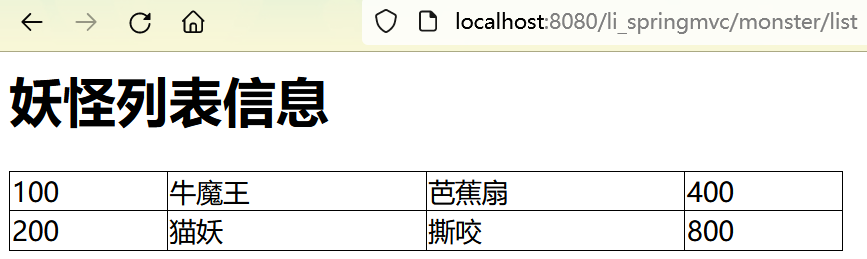
StringBuilder content = new StringBuilder("<h1>妖怪列表信息</h1>");
content.append("<table border='1px' width='500px'> style='border-collapse:collapse'");
//调用 monsterService的方法
List<Monster> monsters = monsterService.listMonster();
for (Monster monster : monsters) {
content.append("<tr>" +
"<td>" + monster.getId() + "</td>" +
"<td>" + monster.getName() + "</td>" +
"<td>" + monster.getSkill() + "</td>" +
"<td>" + monster.getAge() + "</td></tr>");
}
content.append("</table>");
//获取writer,返回提示信息
try {
PrintWriter printWriter = response.getWriter();
printWriter.print(content.toString());
} catch (IOException e) {
e.printStackTrace();
}
}
}
(6)启动 tomcat,浏览器访问方法,显示如下,测试成功。