vue脚手架
1 vue脚手架的概念
Vue脚手架(Vue Scaffolding)是Vue.js**官方提供的一个工具,专门用于快速搭建单页面应用(SPA)的项目结构。它通过命令行界面(CLI)提供了一套标准化的开发流程,包括项目初始化、自动化构建、本地开发服务器、组件和插件支持等功能,帮助开发者更加专注于业务逻辑的实现,提高开发效率。12
Vue脚手架是一个集成了项目初始化、自动化构建、本地开发服务器、组件和插件支持等功能的工具,旨在帮助开发者快速搭建Vue.js项目,提高开发效率
2 vue脚手架的创建
2.1 vue脚手架的安装
-g 表示的全局安装
npm install -g @vue/cli
2.2 创建Vue脚手架工程
想把项目创建在哪里,就在哪里执行以下的命令
vue create xxx项目名

出现以下界面说明构建成功

进入项目执行命令运行程序
cd myvue
npm run serve
启动成功后出现

访问本地的http://localhost:8080/

关闭服务用Ctrl+C
2.3 Vue脚手架的文件结构说明

3 修改默认配置
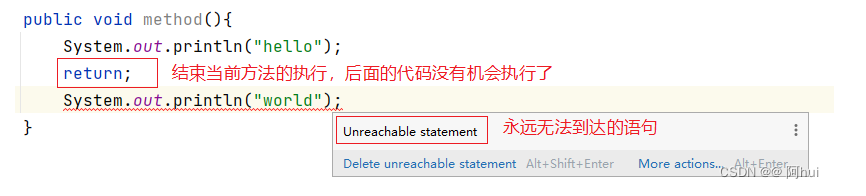
在main.js中定义一个方法 info() 此方法没有调用 服务器启动报错
这样不方便开发

配置vue.config.js
添加:
lintOnSave:false


4 标签的 ref属性
4.1 ref介绍
可以通过ref获取Dom元素
js中是通过document.getElementById("id")获取Dom元素
在vue中可以使用ref来替换上面js获取Dom元素
应用在html标签上获取的是Dmo元素,应用在组件标签上的是组件实例对象(vc)
使用方法:
<h1 ref="xxx"></h1>或<组件 ref="xxx"></组件>
获取 :this.$refs.xxx
4.1示范
编写一个Person.vue组件,
<template>
    <div class="person">
        <h1>姓名:{{name}}</h1>
        <h1>年龄:{{age}}</h1>
    </div>
</template>
<script>
export default {
    name:"Person",
    data(){
        return{
            name:"gqk",
            age:18
        }
    }
}
</script>
<style>
    .person{
        background-color: pink;
    }
</style>
在App.vue中引入
<template>
  <div id="app">
    <h1 ref="title">{{msg}}</h1>
    <button ref="btn" @click="showDom">点击输出Dom元素</button>
    <Person ref="person"></Person>
  </div>
</template>

<script>
import Person from './components/Person.vue' //导入Person.vue
export default {
  name: 'App',
  components: {
   Person
  },
  data(){
    return{
      msg:"欢迎来到java05班学习",
    }
  },
  methods:{
    showDom(){//通过ref获取dom元素或组件对象
      console.log(this.$refs.title)
      console.log(this.$refs.btn)
      console.log(this.$refs.person)
    }
  }
}
</script>

<style>
#app {
  font-family: Avenir, Helvetica, Arial, sans-serif;
  -webkit-font-smoothing: antialiased;
  -moz-osx-font-smoothing: grayscale;
  text-align: center;
  color: #2c3e50;
  margin-top: 60px;
}
</style>
点击按钮观察控制台

5 props配置
让组件接收外部传递过来的数据,从而达到组件复用的目的
Person.vue
<template>
    <div class="person">
        <h1>{{msg}}</h1>
        <h2>姓名:{{name}}</h2>
        <h2>性别:{{sex}}</h2>
        <h2>年龄:{{age+1}}</h2>
    </div>
</template>
<script>
export default {
    name:"Person",
    data(){
        return{
           msg:"个人简介"
        }
    },
    props:['name','sex','age']

}
</script>
<style>
    .person{
        background-color: pink;
    }
</style>
App.vue
<template>
  <div id="app">
    <h1 ref="title">{{msg}}</h1>
    <button ref="btn" @click="showDom">点击输出Dom元素</button>
    <Person ref="person" name="gqk" sex="男" :age="18"></Person>
  </div>
</template>

<script>
import Person from './components/Person.vue'
export default {
  name: 'App',
  components: {
   Person
  },
  data(){
    return{
      msg:"欢迎来到java05班学习",
    }
  },
  methods:{
    showDom(){
      console.log(this.$refs.title)
      console.log(this.$refs.btn)
      console.log(this.$refs.person)
    }
  }
}
</script>

<style>
#app {
  font-family: Avenir, Helvetica, Arial, sans-serif;
  -webkit-font-smoothing: antialiased;
  -moz-osx-font-smoothing: grayscale;
  text-align: center;
  color: #2c3e50;
  margin-top: 60px;
}
</style>

除了以上配置还可以配置参数的类型,默认值
   props:{
        name:{
            type:String,
            require:true,
            default:"老王"
        },
        age:String,
        sex:"男"

    }
6 mixin混入
6.1 局部混入
示范:
Person.vue中有一个方法
methods:{
    showInfo(){
        alert(this.name)
    }
}
<template>
    <div class="person">
        <h1>{{msg}}</h1>
        <h2 @click="showInfo">姓名:{{name}}</h2>
        <h2>性别:{{sex}}</h2>
        <h2>年龄:{{age+1}}</h2>
    </div>
</template>
<script>
export default {
    name:"Person",
    data(){
        return{
           msg:"个人简介"
        }
    },
    props:{
        name:{
            type:String,
            require:true,
            default:"老王"
        },
        age:String,
        sex:"男"

    },
    methods:{
        showInfo(){
            alert(this.name)
        }
    }
}
</script>
<style>
    .person{
        background-color: pink;
    }
</style>
Student.vue中也有一个
methods:{
    showInfo(){
        alert(this.name)
    }
}
<template>
    <div class="stu">
        <h2 @click="showInfo">学生姓名:{{name}}</h2>
        <h2>学生简介:{{info}}</h2>
    </div>
</template>
<script>
export default {
    name:"Stu",
    data(){
        return{
            name:"姜萌",
            info:"java05班学生"
        }
    },
    methods:{
        showInfo(){
            alert(this.name)
        }
    }
}
</script>
<style>

    .stu{
        background-color: green;
    }

</style>
当组件中有相同方法的时候可以对其进行抽取出来(一个公共的js代码)重复使用
在根目录下创建一个mixin.js
export const hunhe={
    methods:{
        showInfo(){
            alert(this.name)
        }
    }
}
在模块中使用(Student.vue)
<template>
    <div class="stu">
        <h2 @click="showInfo">学生姓名:{{name}}</h2>
        <h2>学生简介:{{info}}</h2>
    </div>
</template>
<script>
import { hunhe } from '@/mixin';
export default {
    name:"Stu",
    data(){
        return{
            name:"姜萌",
            info:"java05班学生"
        }
    },
    mixins:[hunhe]

}
</script>
<style>

    .stu{
        background-color: green;
    }

</style>
6.2 全局混入
导入一次可在所有组件中使用混入文件。
在main.js中添加全局混入
import Vue from 'vue'
import App from './App.vue'
import { hunhe } from './mixin'
Vue.config.productionTip = false
Vue.mixin(hunhe)
new Vue({
  render: h => h(App),
}).$mount('#app')
7 插件
功能:用于增强Vue
本质:包含install方法的一个对象,install的第一个参数就是Vue,第二个以后的参数是插件使用者传递的数据。
定义插件
	对象.install=function(Vue,options){

		//1.添加全局过滤器
		Vue.filter(...)

		//2.添加全局指令
		Vue.directive(...)

		//3.配置全局混入
		Vue.minxin(...)

		//4.添加实例方法
		Vue.prototype.xxx=function(){
		  .....
		}
		Vue.prototype.xxx=(...)=>{
		 ......
		}

    }
创建一个plugins.js文件
export default{
    install(Vue,x,y,z){
        console.info("x: "+x)
        console.info("y: "+y)
        console.info("z: "+z)
        //全局过滤器
        Vue.filter('mySlice',function(value){
            console.log(x+y+z)
            return value.slice(0,4)
        })
        //全局混入
        Vue.mixin({
            data(){
                return{
                    x:100,
                    y:100
                }
            }
        })
        //给Vue原型上添加方法
        Vue.prototype.hello=()=>{
            alert("Hello Vue");
        }

    }
}
在main.js中使用插件
import plugins from './plugins'
//使用插件
Vue.use(plugins,1,2,3)
在vue中可以调用方法
<template>
    <div class="stu">
        <h2 >学生姓名:{{name}}{{x}}{{y}}</h2>
        <h2>学生简介:{{info|mySlice}}</h2>
        <h2 @click="hello">学生说</h2>
    </div>
</template>
<script>
export default {
    name:"Stu",
    data(){
        return{
            name:"姜萌",
            info:"java05班学生"
        }
    },
}
</script>
8 反向代理
在解决ajax跨域问题时,后端人员经常会配置CORS解决跨域,但是作为前端,我们也可以通过自己的反向代理的方式解决跨域,这样就不用麻烦后端开发人员。
先启动后端服务器:

启动成功后:

编写axios 前提下载安装axios(npm i axios)
<template>
    <div>
        <button @click="getStuList">查询全部学生</button>
    </div>
</template>
<script>
import axios from 'axios'
export default {
    name:"Stu",
    methods:{
        getStuList(){//发送ajax请求
            axios.get("http://localhost:5000/students").then(
                response=>{
                    console.log("请求成功...",response.data);
                },
                error=>{
                    console.log("请求失败...",error.message)
                }
            )
        }
    }
}
</script>
<style>

</style>
直接请求报错(跨域问题)

会发现,产生了跨域问题,接下来我们用以下两种方式解决跨域
8.1 方式一
如果你的前端应用和后端 API 服务器没有运行在同一个主机上,你需要在开发环境下将 API 请求代理到 API 服务器。这个问题可以通过 vue.config.js 中的 devServer.proxy 选项来配置。
devServer.proxy 可以是一个指向开发环境 API 服务器的字符串:
module.exports = {
  devServer: {
    proxy: 'http://localhost:5000'
  }
}
将原请求路径更改为以下
   getStuList(){//发送ajax请求
            axios.get("http://localhost:8080/students").then(
                response=>{
                    console.log("请求成功...",response.data);
                },
                error=>{
                    console.log("请求失败...",error.message)
                }
            )
        }

8.2 方式二
如果你想要更多的代理控制行为,也可以使用一个 path: options 成对的对象
配置vue.config.js
const { defineConfig } = require('@vue/cli-service')
module.exports = defineConfig({
  transpileDependencies: true,
  lintOnSave:false,
  // devServer:{
  //   proxy:"http://localhost:5000"
  // }
  devServer: {
    proxy: {
      '/stu': {
        target: 'http://localhost:5000',
        ws: true,
        changeOrigin: true,
        pathRewrite:{"^/stu":""}
      },
      '/car': {
        target: 'http://localhost:5001',
        changeOrigin: true,
        pathRewrite:{"^/car":""}
      }
    }
  }
})
发送axios
<template>
    <div>
        <button @click="getStuList">查询全部学生</button>
        <button @click="getCarList">查询汽车信息</button>
    </div>

</template>
<script>
import axios from 'axios'
export default {
    name:"Stu",
    methods:{
        getStuList(){//发送ajax请求
            axios.get("http://localhost:8080/stu/students").then(
                response=>{
                    console.log("请求成功...",response.data);
                },
                error=>{
                    console.log("请求失败...",error.message)
                }
            )
        },
        getCarList(){//发送ajax请求
            axios.get("http://localhost:8080/car/cars").then(
                response=>{
                    console.log("请求成功...",response.data);
                },
                error=>{
                    console.log("请求失败...",error.message)
                }
            )
        },
    }
}
</script>
<style>

</style>

9 路由
9.1 路由简介
服务端路由指的是服务器根据用户访问的 URL 路径返回不同的响应结果。当我们在一个传统的服务端渲染的 web 应用中点击一个链接时,浏览器会从服务端获得全新的 HTML,然后重新加载整个页面。
然而,在单页面应用中,客户端的 JavaScript 可以拦截页面的跳转请求,动态获取新的数据,然后在无需重新加载的情况下更新当前页面。这样通常可以带来更顺滑的用户体验,尤其是在更偏向“应用”的场景下,因为这类场景下用户通常会在很长的一段时间中做出多次交互。
9.1 路由的简单使用
安装vue-router
注意,在2022年2月7日以后,vue-router的默认版本为4版本,并且:Vue-router3才能再Vue2中使用
npm i vue-router@3
使用vue-router
创建一个叫router的文件夹,并创建index.js,我们创建并暴露一个路由器VueRouter
import VueRouter from 'vue-router'
export default new VueRouter({
    routes:[
    ]
})
main.js中引入VueRouter并use,然后配置router
import Vue from 'vue'
import App from './App.vue'
import VueRouter from 'vue-router'
import router from './router/index'
Vue.config.productionTip = false

Vue.use(VueRouter)
new Vue({
  render: h => h(App),
  router:router
}).$mount('#app')
src下创建views
准备两个组件:Stu.vue|Class.vue
<template>
    <div>
        <h2>我是Stu内容</h2>
    </div>
</template>
<script>
export default {
    name:"Stu",
}
</script>
<style>

</style>
<template>
    <div>
        <h2>我是Class内容</h2>
    </div>
</template>
<script>
export default {
    name:"Class"
}
</script>
<style>

</style>
路由器中配置路由数组routes 它里面包含很多路由。
import VueRouter from 'vue-router'
import Stu from '../views/Stu'
import Class from '../views/Class'
export default new VueRouter({
    routes:[
        {
            path:"/stu",
            component:Stu
        },{
            path:"/class",
            component:Class
        }
    ]
})
App.vue使用路由
<template>
  <div id="app">
    <img alt="Vue logo" src="./assets/logo.png">
    <div>
        <!-- 指定组件存放的位置 -->
      <router-view></router-view>
    </div>
    <router-link class="test" active-class="active" to="/stu">学生管理</router-link>
    <router-link class="test" active-class="active" to="/class">班级管理</router-link>
  </div>
</template>
<script>
export default {
  name: 'App',
  components: {

  }
}
</script>

<style>
#app {
  font-family: Avenir, Helvetica, Arial, sans-serif;
  -webkit-font-smoothing: antialiased;
  -moz-osx-font-smoothing: grayscale;
  text-align: center;
  color: #2c3e50;
  margin-top: 60px;
}
.test{
  background-color: skyblue;
  height: 100px;
  width: 150px;
  display: inline-block;
  margin-left: 20px;
  line-height: 100px;
  text-decoration: none;
}
.active{
  background-color: red;
}
</style>
点击学生管理,显示我是Stu内容,点击班级管理显示我是Class内容(局部刷新的)


![[数据结构] 栈 (C语言)](https://img2023.cnblogs.com/blog/3039354/202301/3039354-20230119211454737-2099370575.jpg)